Create Multiple Records in Salesforce
Introduction
In this tutorial, we will learn how to create a form that creates multiple Salesforce records from a table entry field. Each row in the table will be used to create a separate Salesforce record.
Our form will:
- Create a new Salesforce contact.
- Use a table entry field called Tasks to collect multiple tasks.
- Create one Salesforce task for each row in the Tasks table.
- Associate each task with the contact created by the first workflow action.
Create a new form
On your Formcrafts dashboard ↗ click on Add Form → Start from scratch. Enter a Form name and hit enter. This will create a new form.
You can also create a new form by clicking on Add Form → Use a Template and selecting a template. This would allow you to skip this step.
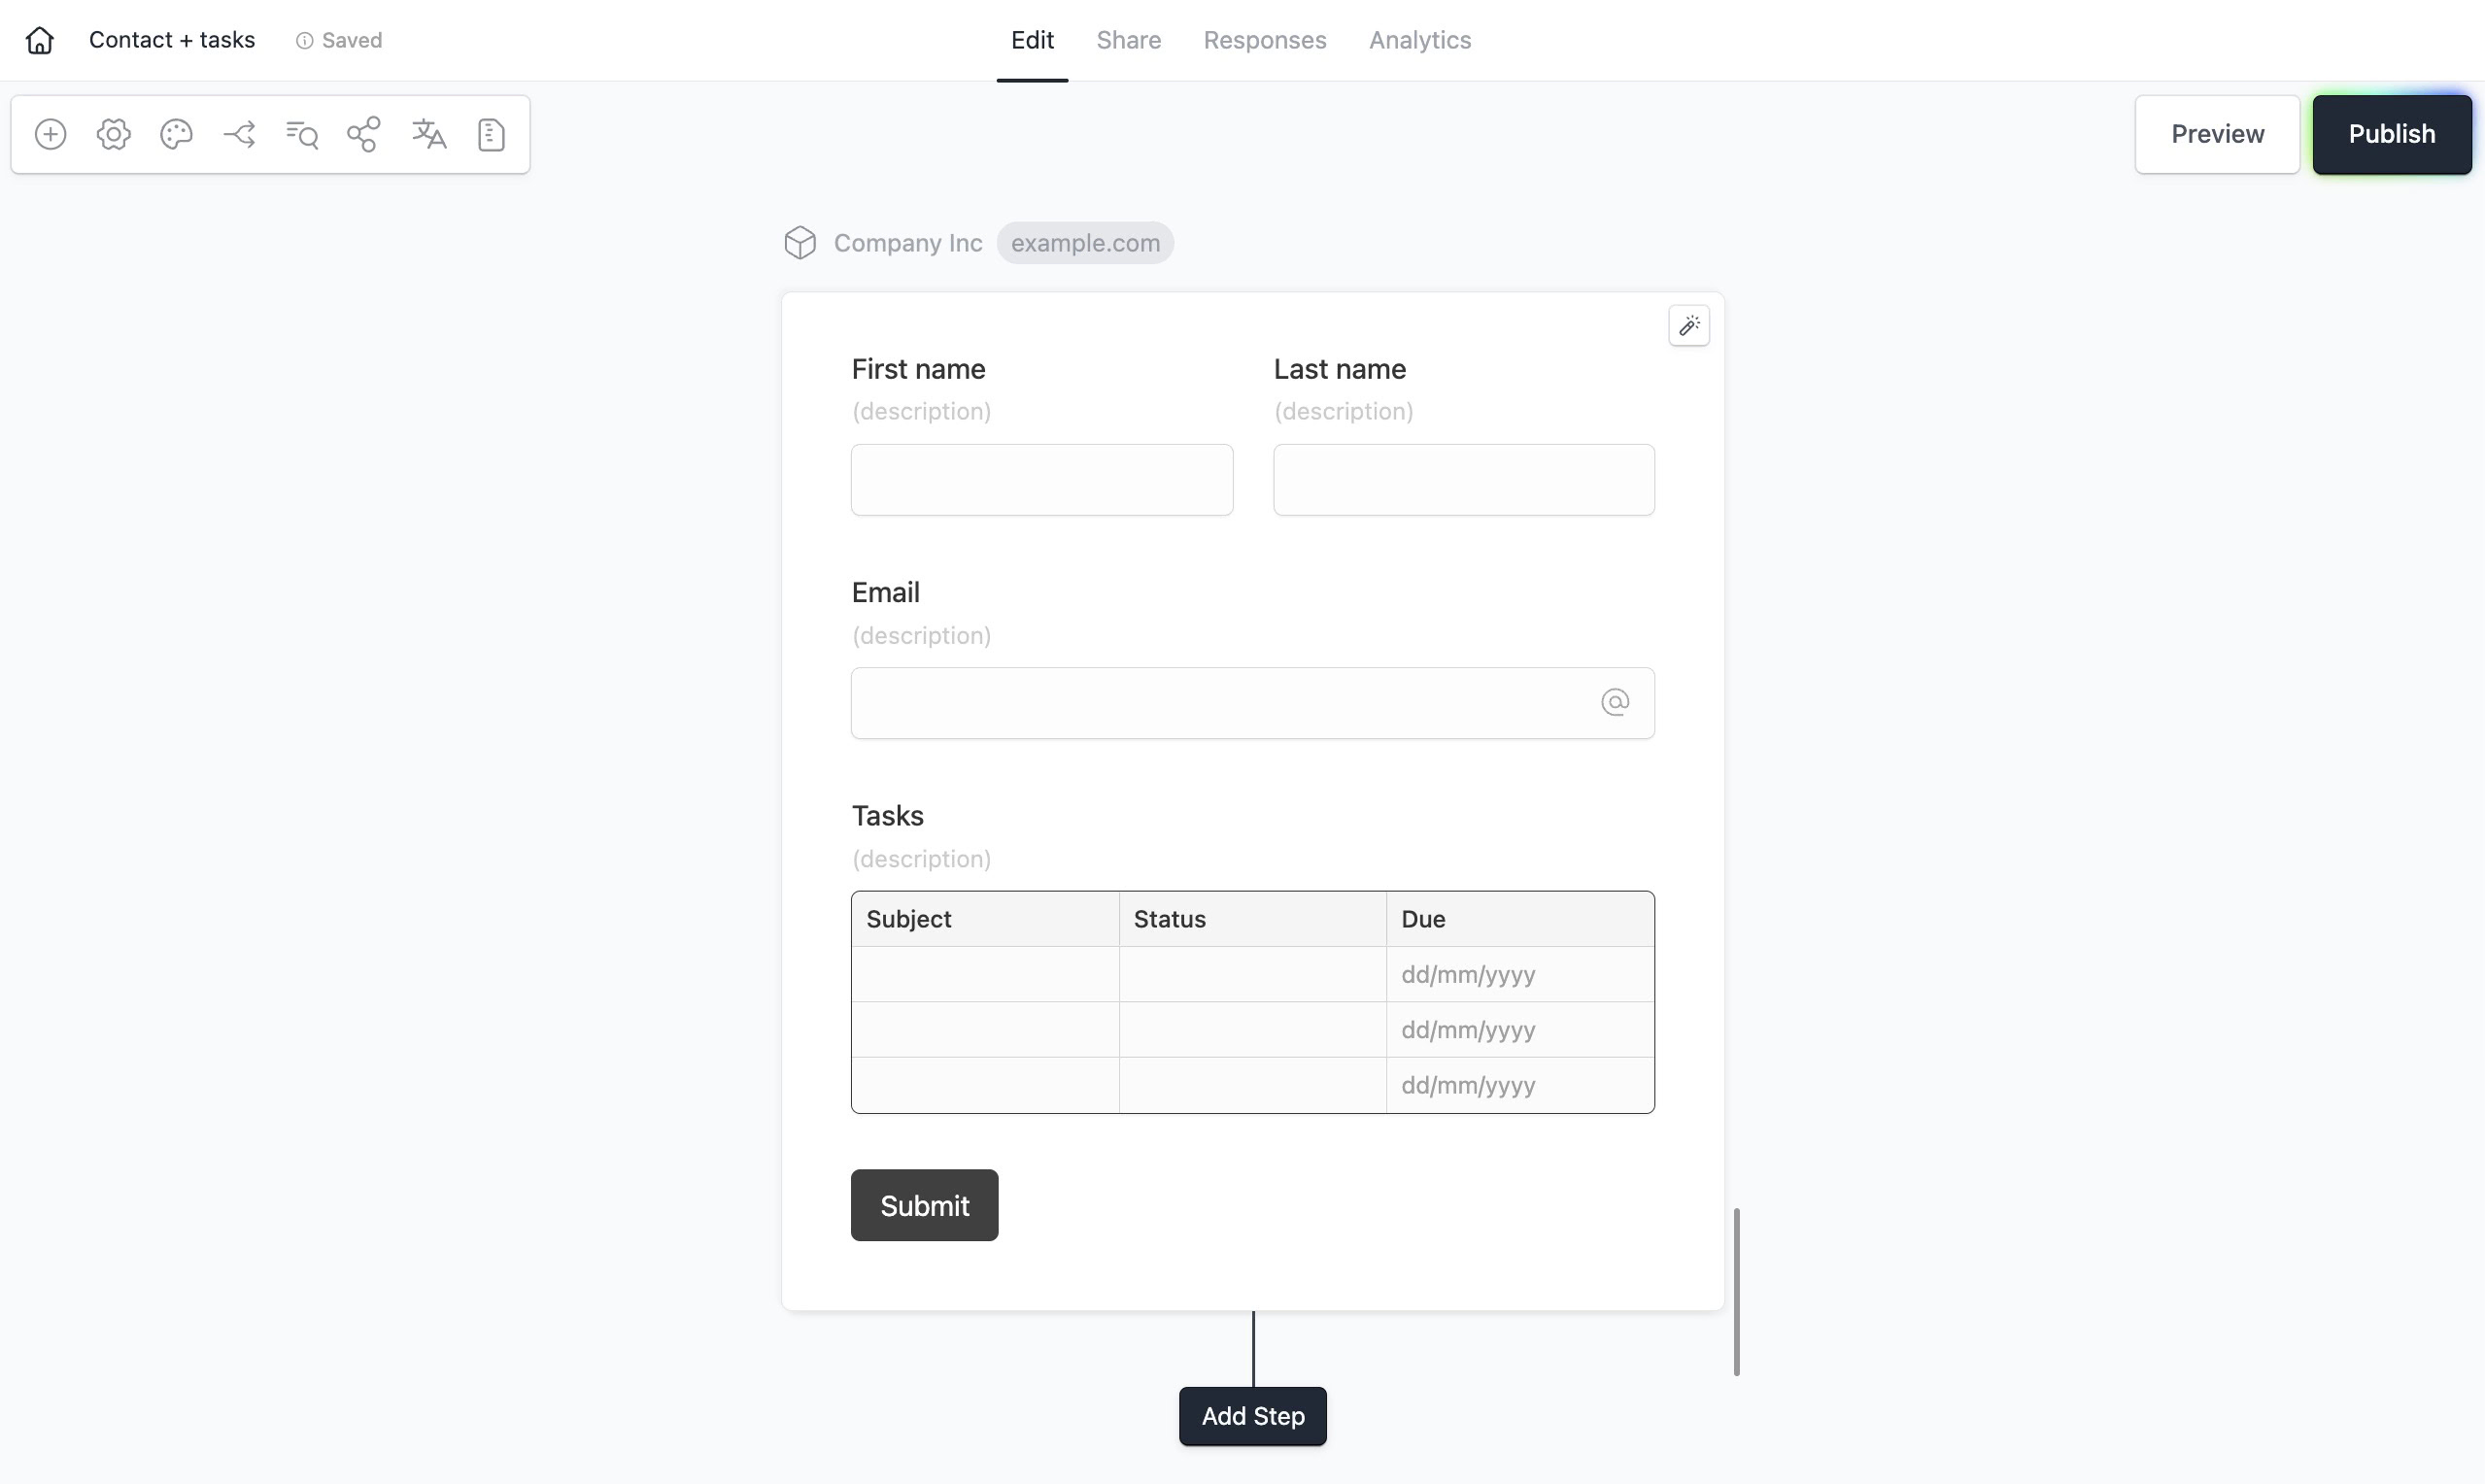
Now add these fields to your form using the Add field button on the top-left corner of the form editor:
- First name (One line text)
- Last name (One line text)
- Email (Email)
Next add a table entry field called Tasks.
Add these columns to the Tasks table:
- Subject (Input)
- Status (Dropdown)
- Due (Date)
Autofill task statuses
The Status column should use the same values that Salesforce accepts for tasks.
Edit the Status column in the Tasks table, and use Options → Autofill → Status to populate the dropdown options from the Status picklist.
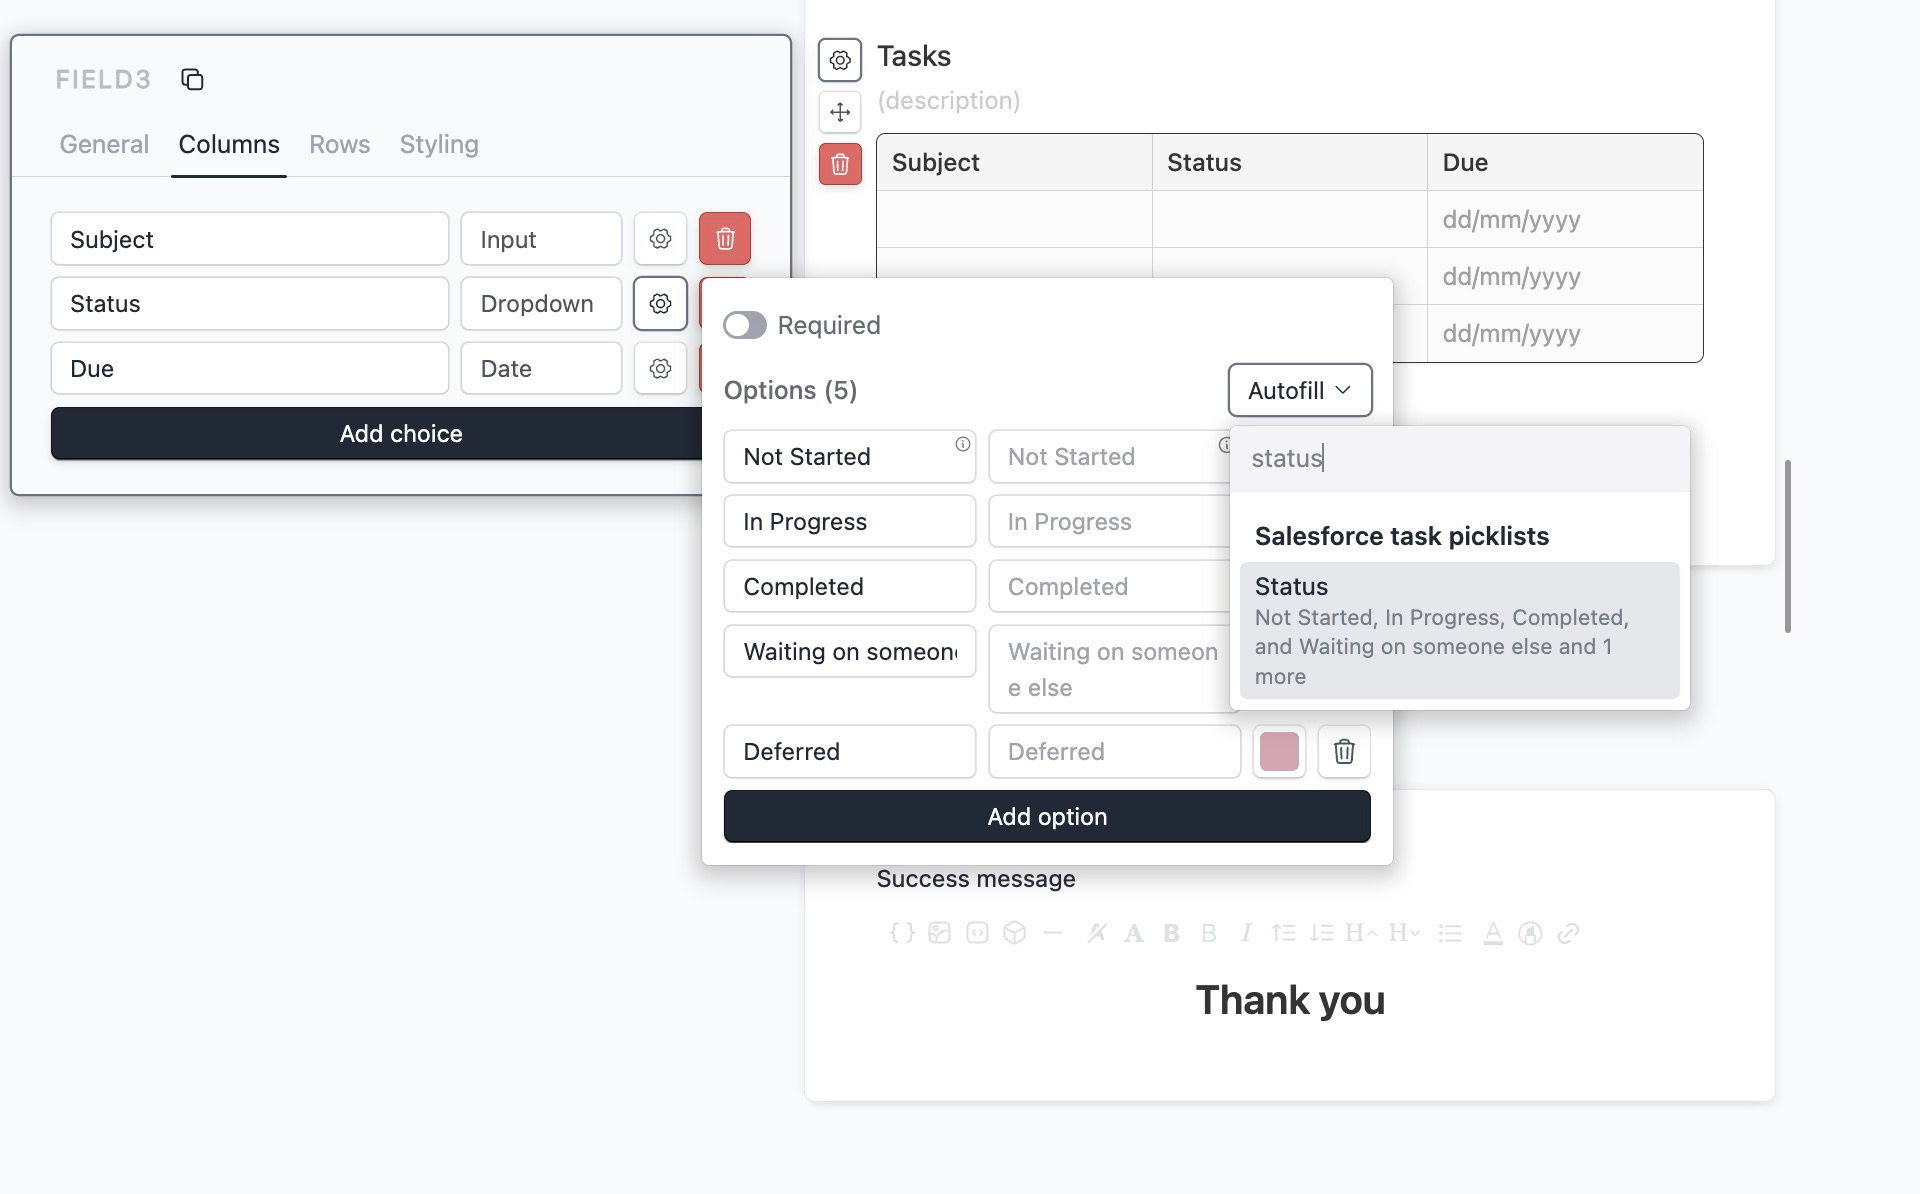
Autofill copies the current Salesforce options into the dropdown. If the task status options change later in Salesforce, you should update the column options in Formcrafts as well.
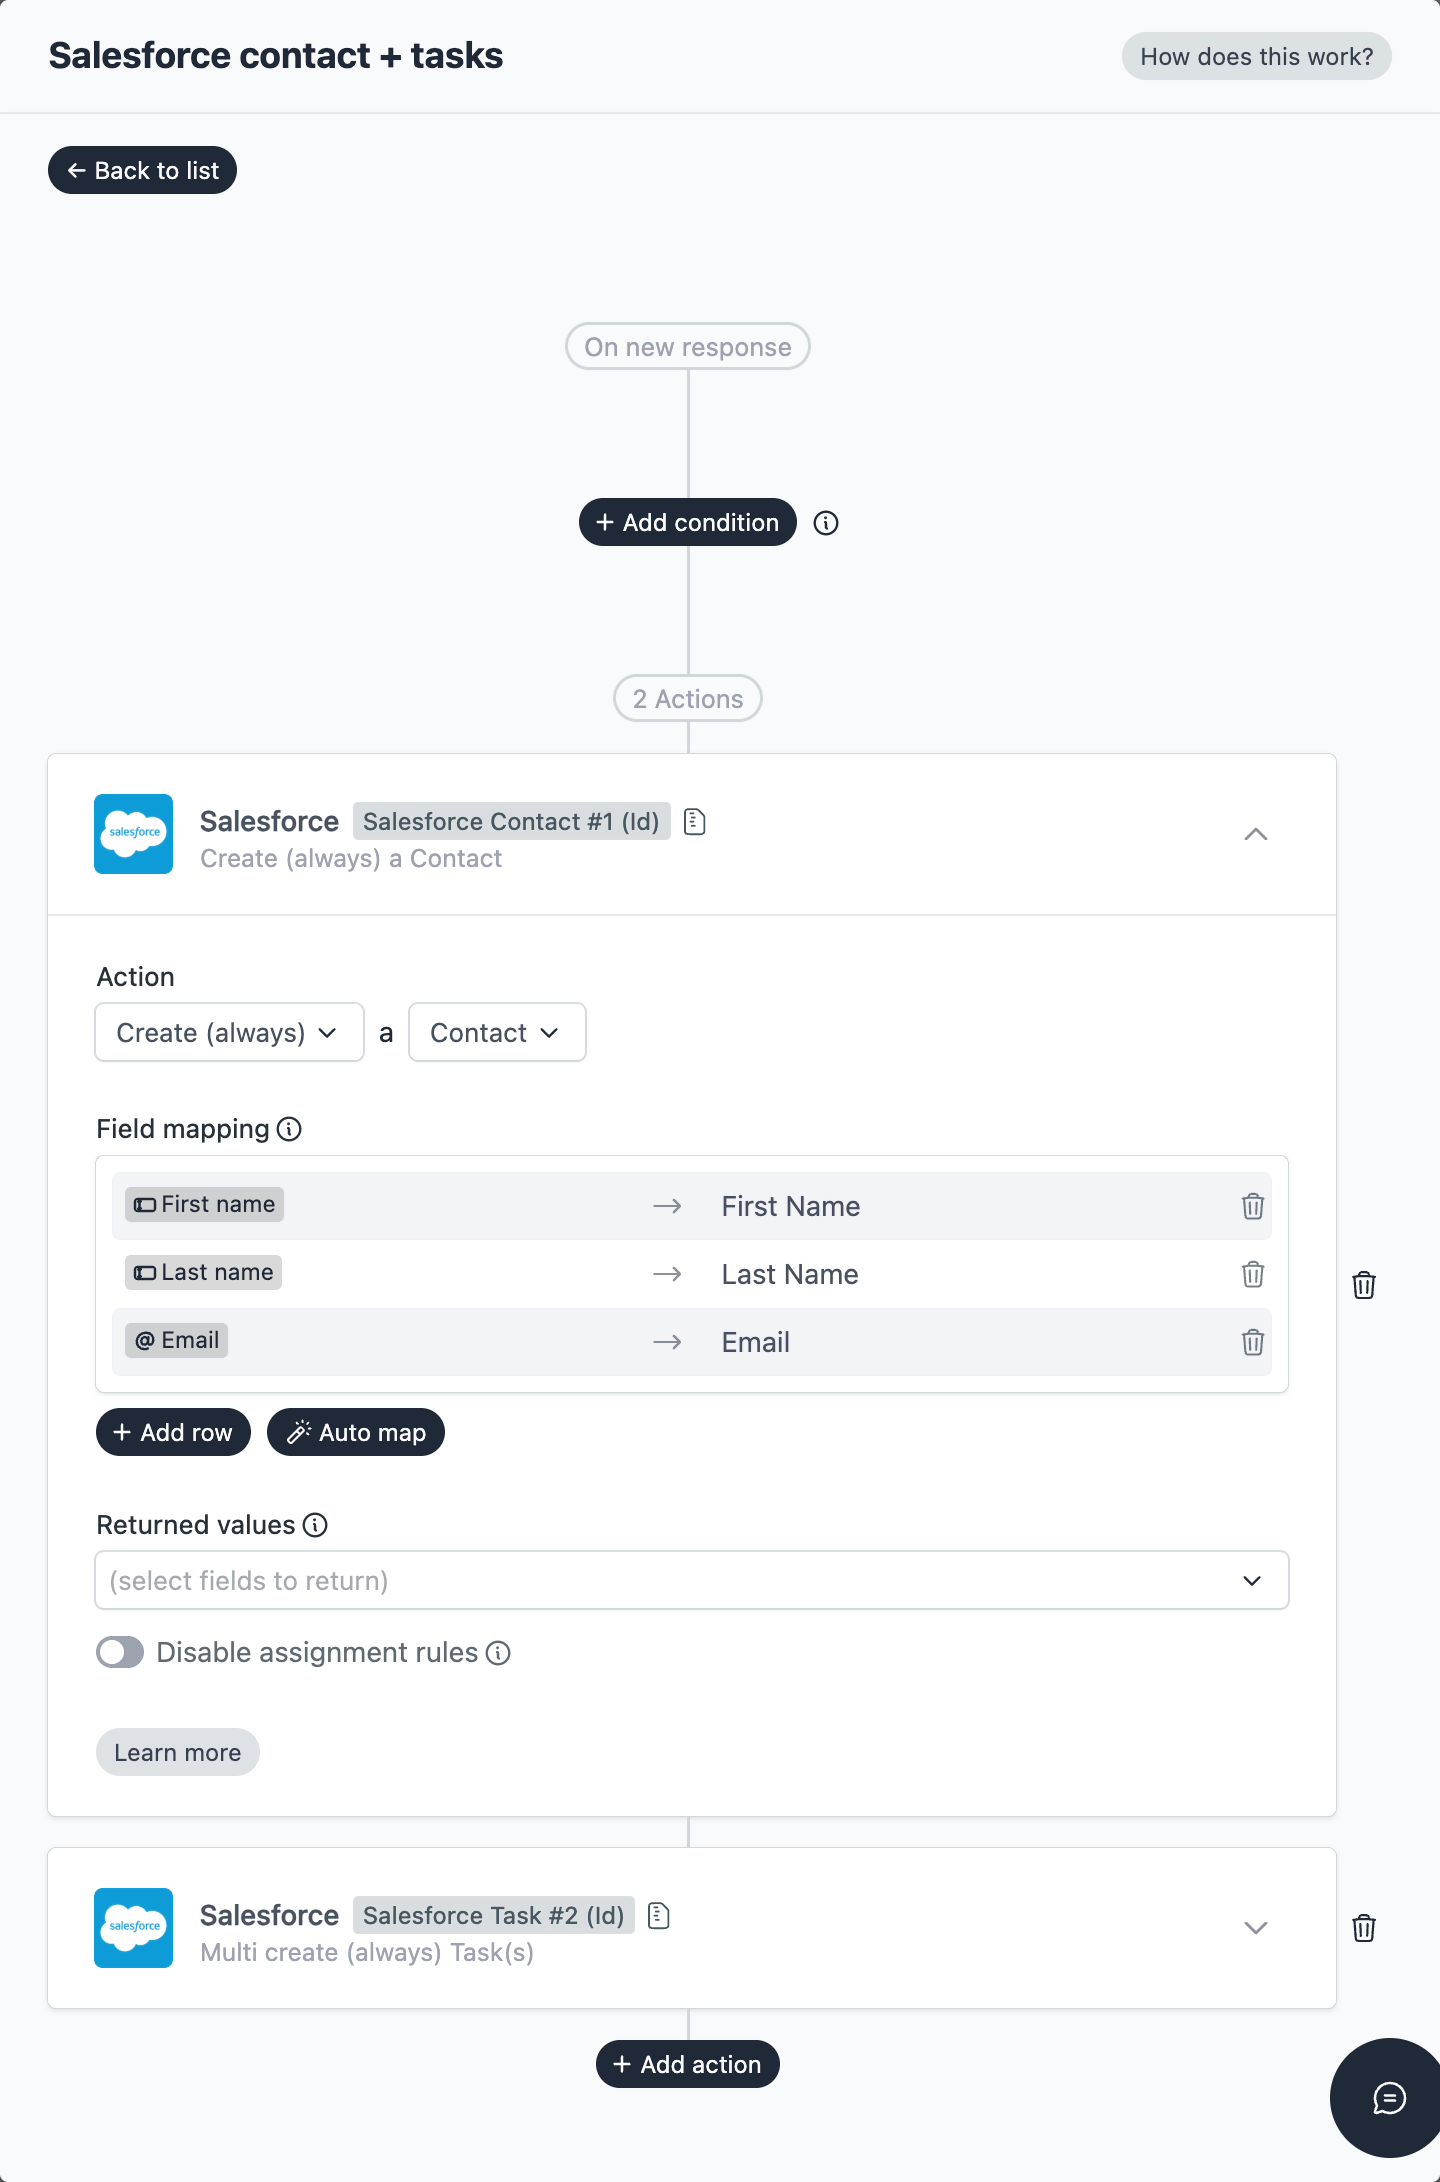
Create a workflow
Click on the Workflows button on the top-left corner of the form editor, and then click on the Add workflow button.
Now edit the new workflow, and click on Add action. Under (select action) find Salesforce, and click on Connect to Salesforce.

This will open a popup window where you can connect to your Salesforce organization.
Configure the contact action
Our first action should be Create a Contact.
Use the Field mapping section to map the regular form fields to Salesforce contact fields:
- Map First name to First Name.
- Map Last name to Last Name.
- Map Email to Email.
The created contact will be available to later workflow actions. We will use this value in the next action to associate the tasks with the new contact.
Configure the tasks action
In the same workflow, click on Add action again and select Salesforce.
Select Multi create (always) as the Salesforce action, and select Task as the Salesforce object.
Use the Table field setting to select the Tasks table from your form. Each non-empty row from this table will be used to create a separate Salesforce task.
Use the Field mapping section to map the table columns to Salesforce task fields:
- Map Subject to Subject.
- Map Status to Status.
- Map Due to Activity Date.
To associate each task with the contact created by the first action, map Salesforce Contact #1 to the Salesforce field Name ID.
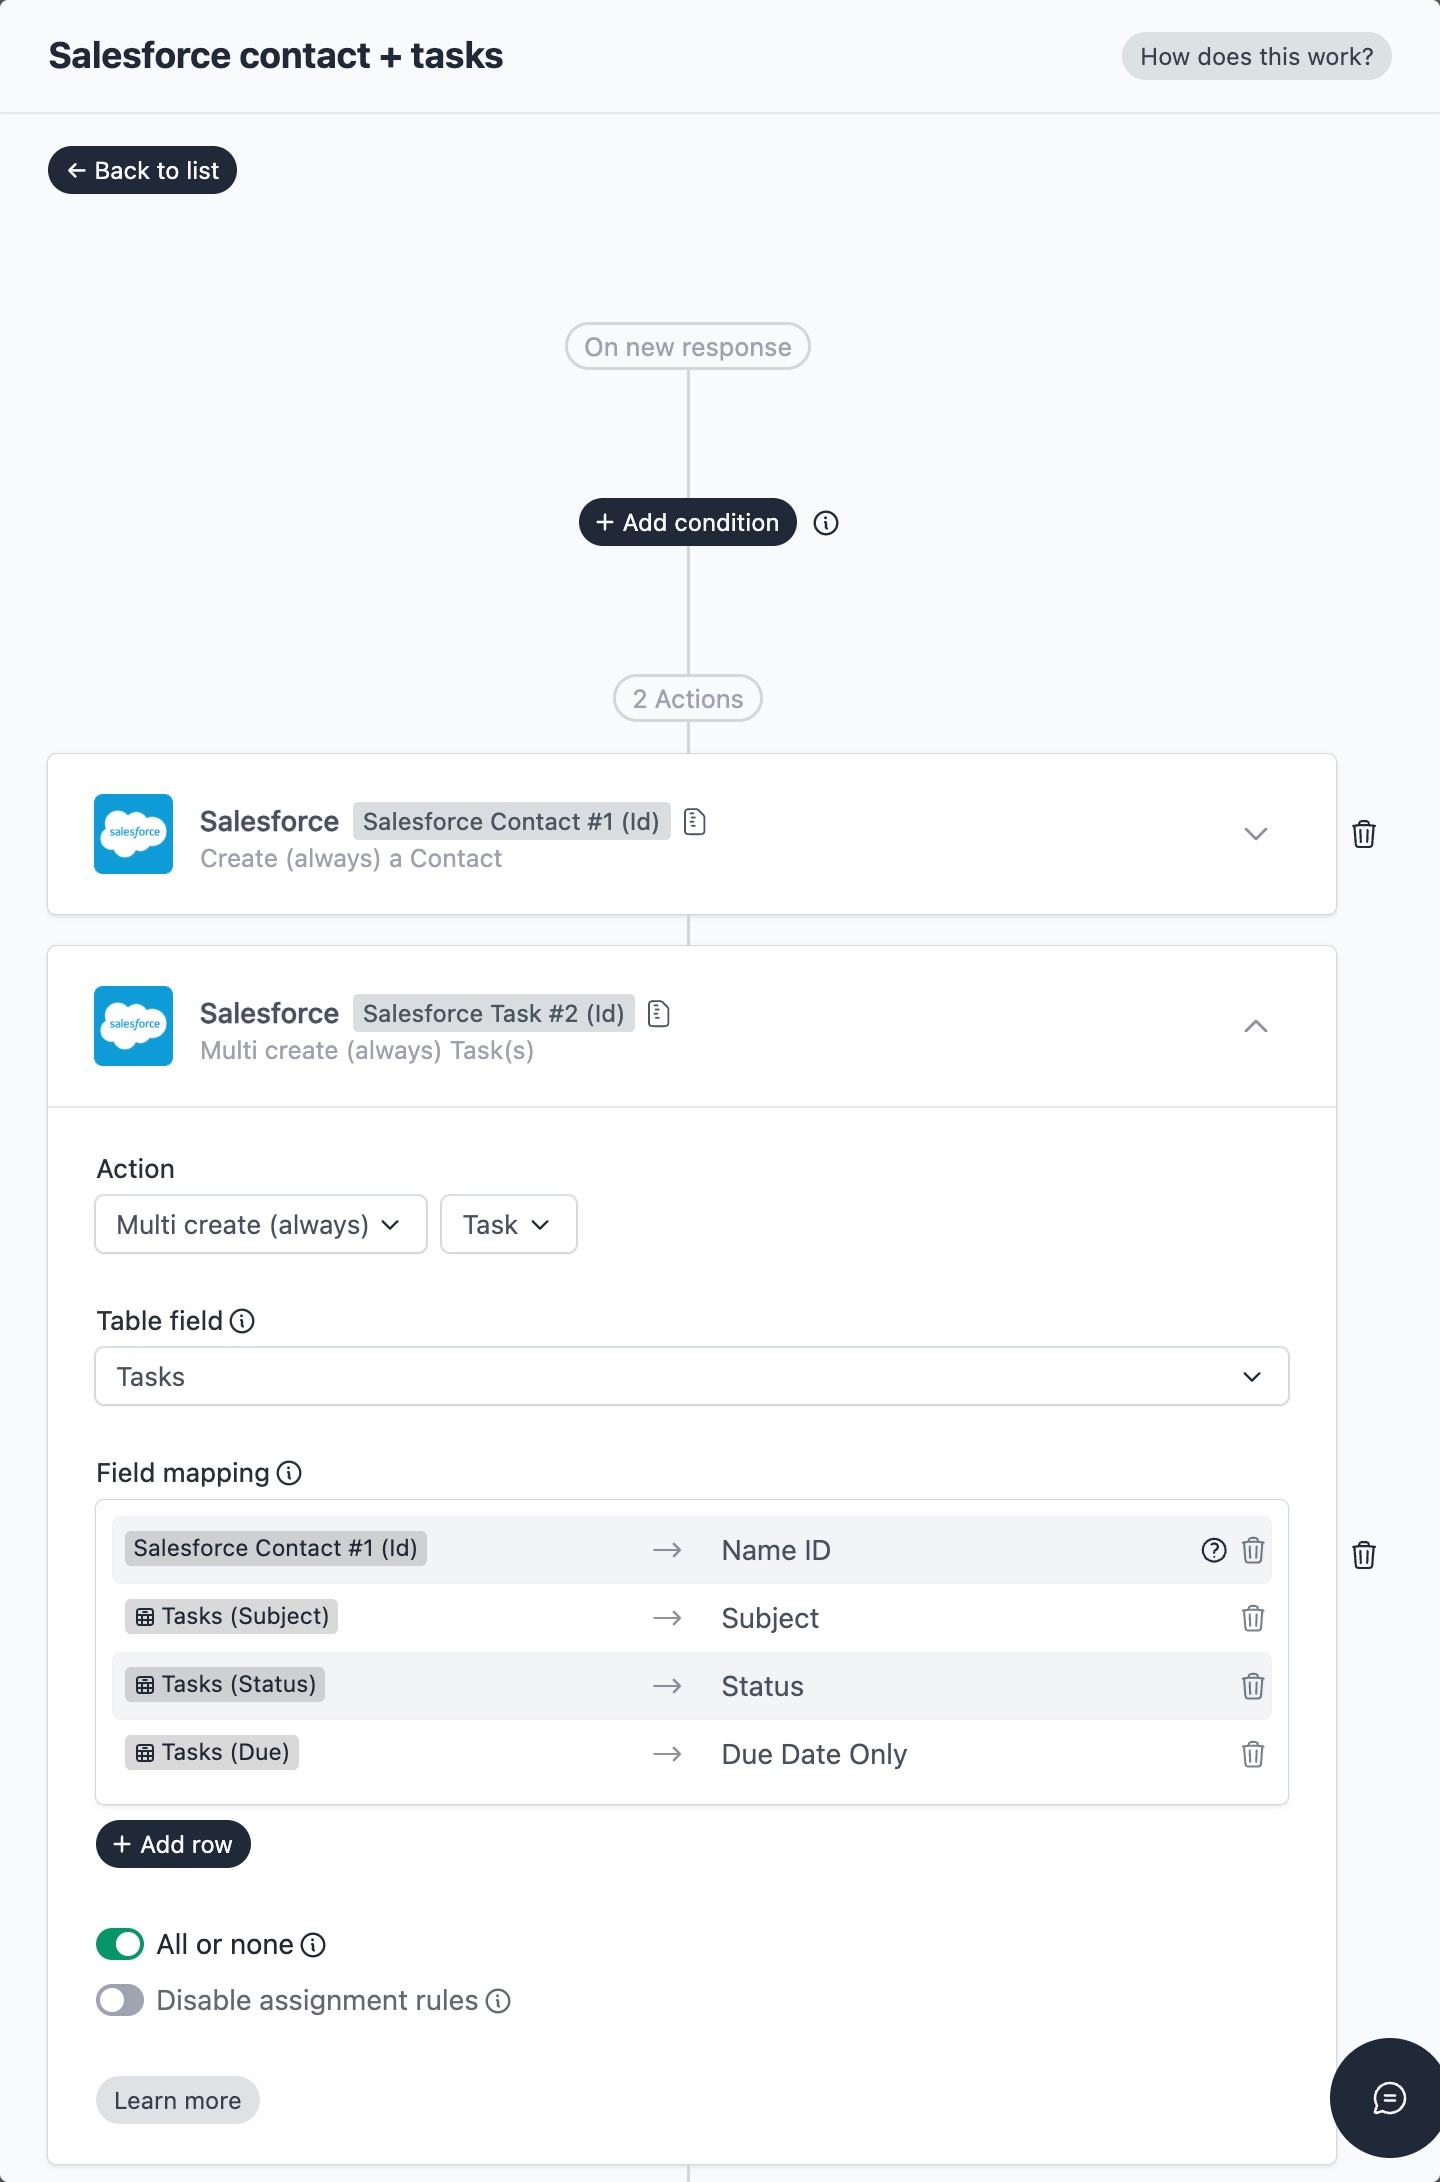
Each row in the Tasks table can use different values for Subject, Status, and Due. Values mapped from regular form fields or previous workflow actions will be reused for every task record.
Optional settings
All or none
Enable All or none if the entire batch should be rolled back when any record fails.
When this setting is off, Salesforce can create the valid records and return errors for the rows that failed. When this setting is on, Salesforce creates either all records or none of them.
Disable assignment rules
Enable Disable assignment rules if you do not want Salesforce assignment rules to run for the created records.
Save and test
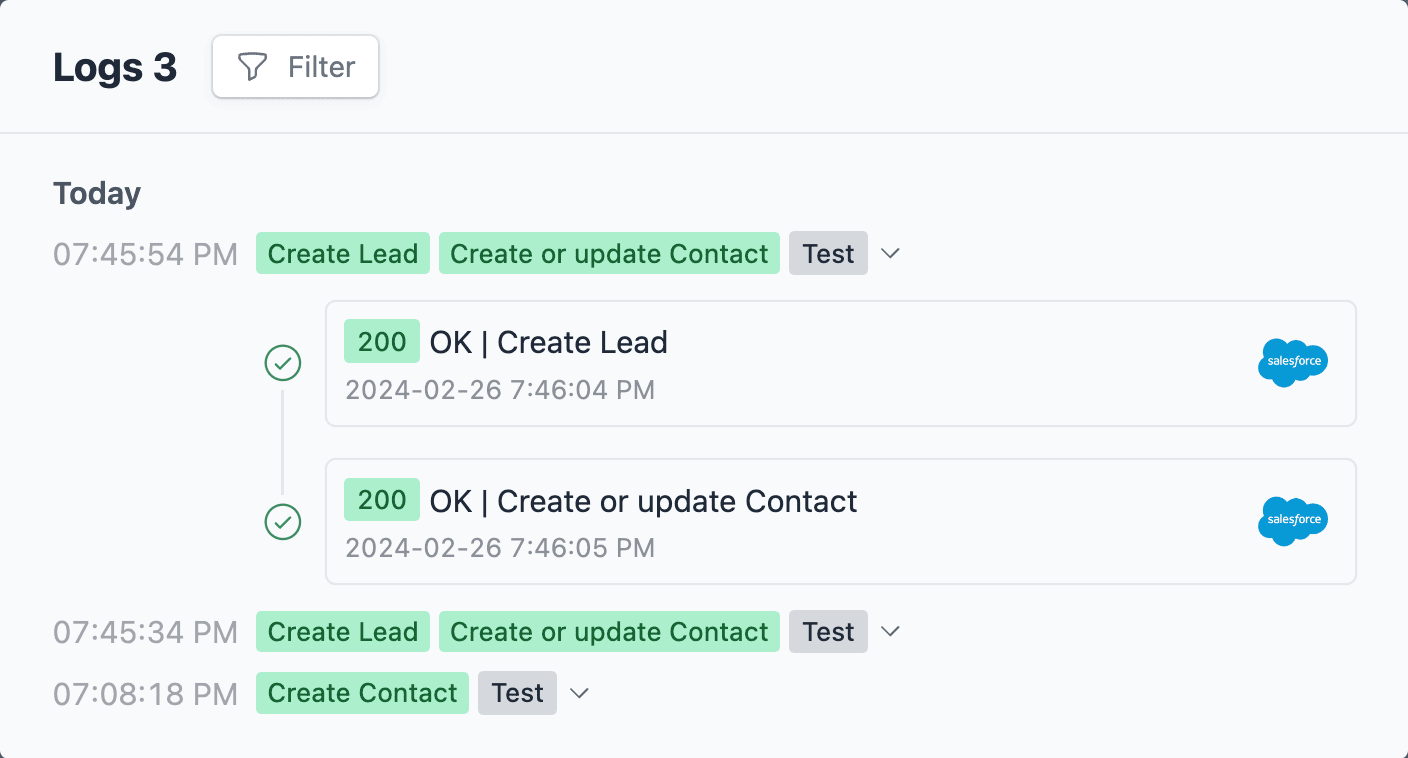
Save and test
Click on the Preview button on the top-right corner of the form editor, and submit the form to test the workflow.
Formcrafts keeps a record of all successful and failed workflows which you can view using the Logs button on the top-left corner of the form editor.
Learn more about Workflow logs.
Submit the form with multiple rows in the table entry field. Then open the workflow logs to confirm how many records were created and whether any rows failed.
Notes
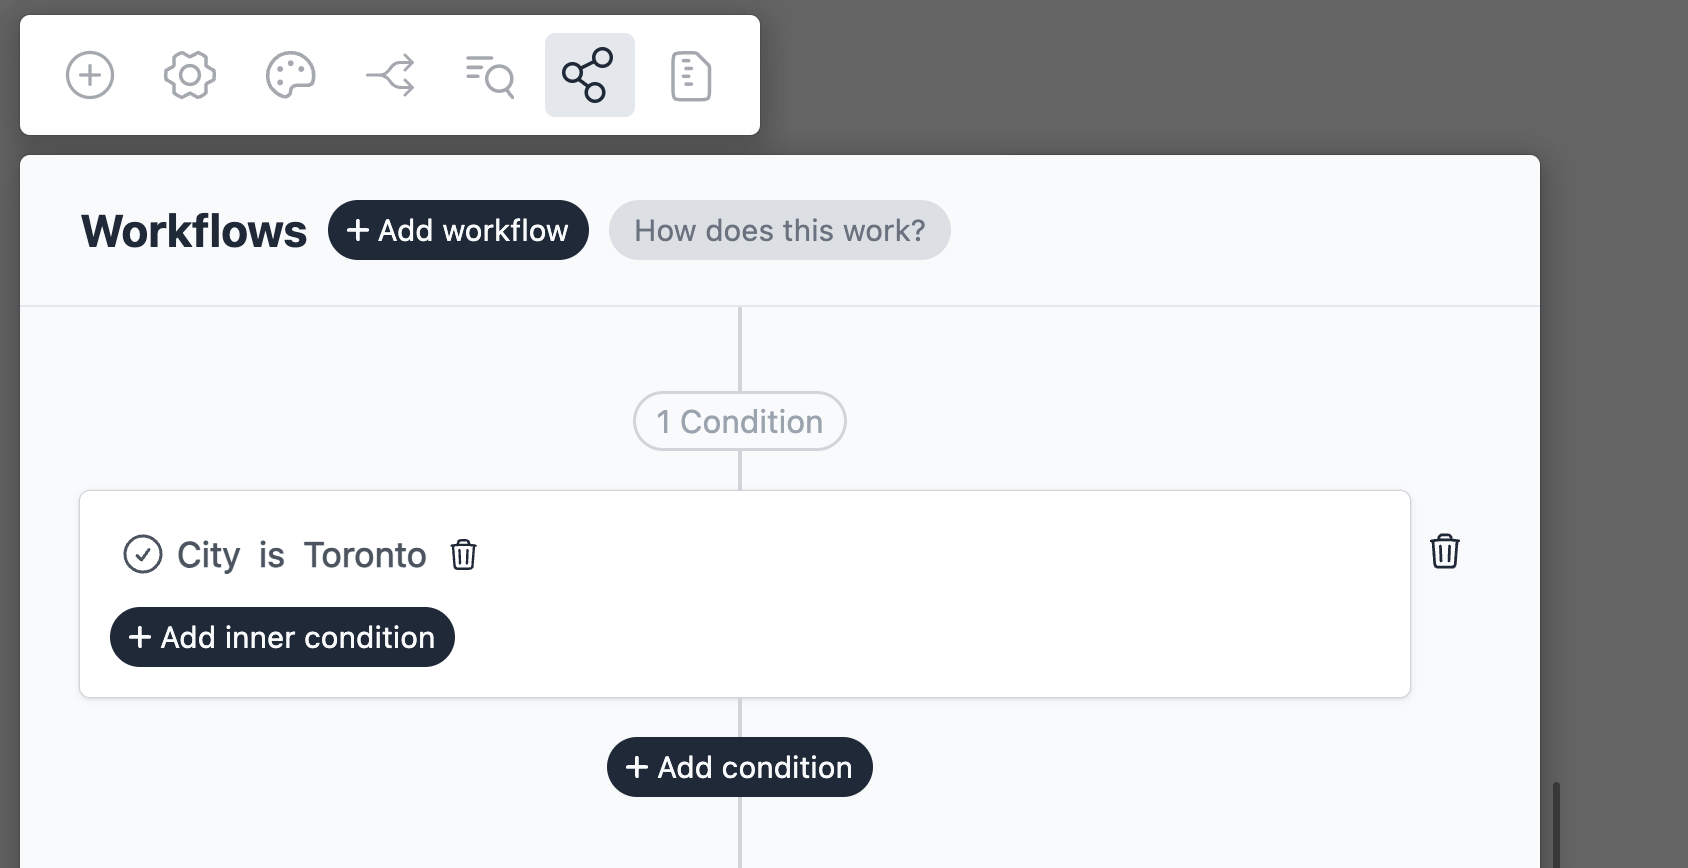
Conditional workflows
By default the Salesforce action(s) is triggered on each form submit. We can add conditions to our workflow to trigger the action(s) only when certain conditions are met. Edit your workflow and click on Add condition. Here you can add conditions, or even create condition groups.
Empty table rows are ignored. If the selected table entry field has no rows to process, the Salesforce action is skipped.
For single-record workflows, see create a record in Salesforce. For workflows that first find another Salesforce record, see work with related records in Salesforce.