Record responses in Google Sheets
Introduction
This workflow will show you how to turn new form responses into new rows in a Google Sheets spreadsheet, in real-time.
Create a new form
On your Formcrafts dashboard ↗ click on Add Form → Start from scratch. Enter a Form name and hit enter. This will create a new form.
You can also create a new form by clicking on Add Form → Use a Template and selecting a template. This would allow you to skip this step. We have a large collection of customer support form templates ↗ that you can use.
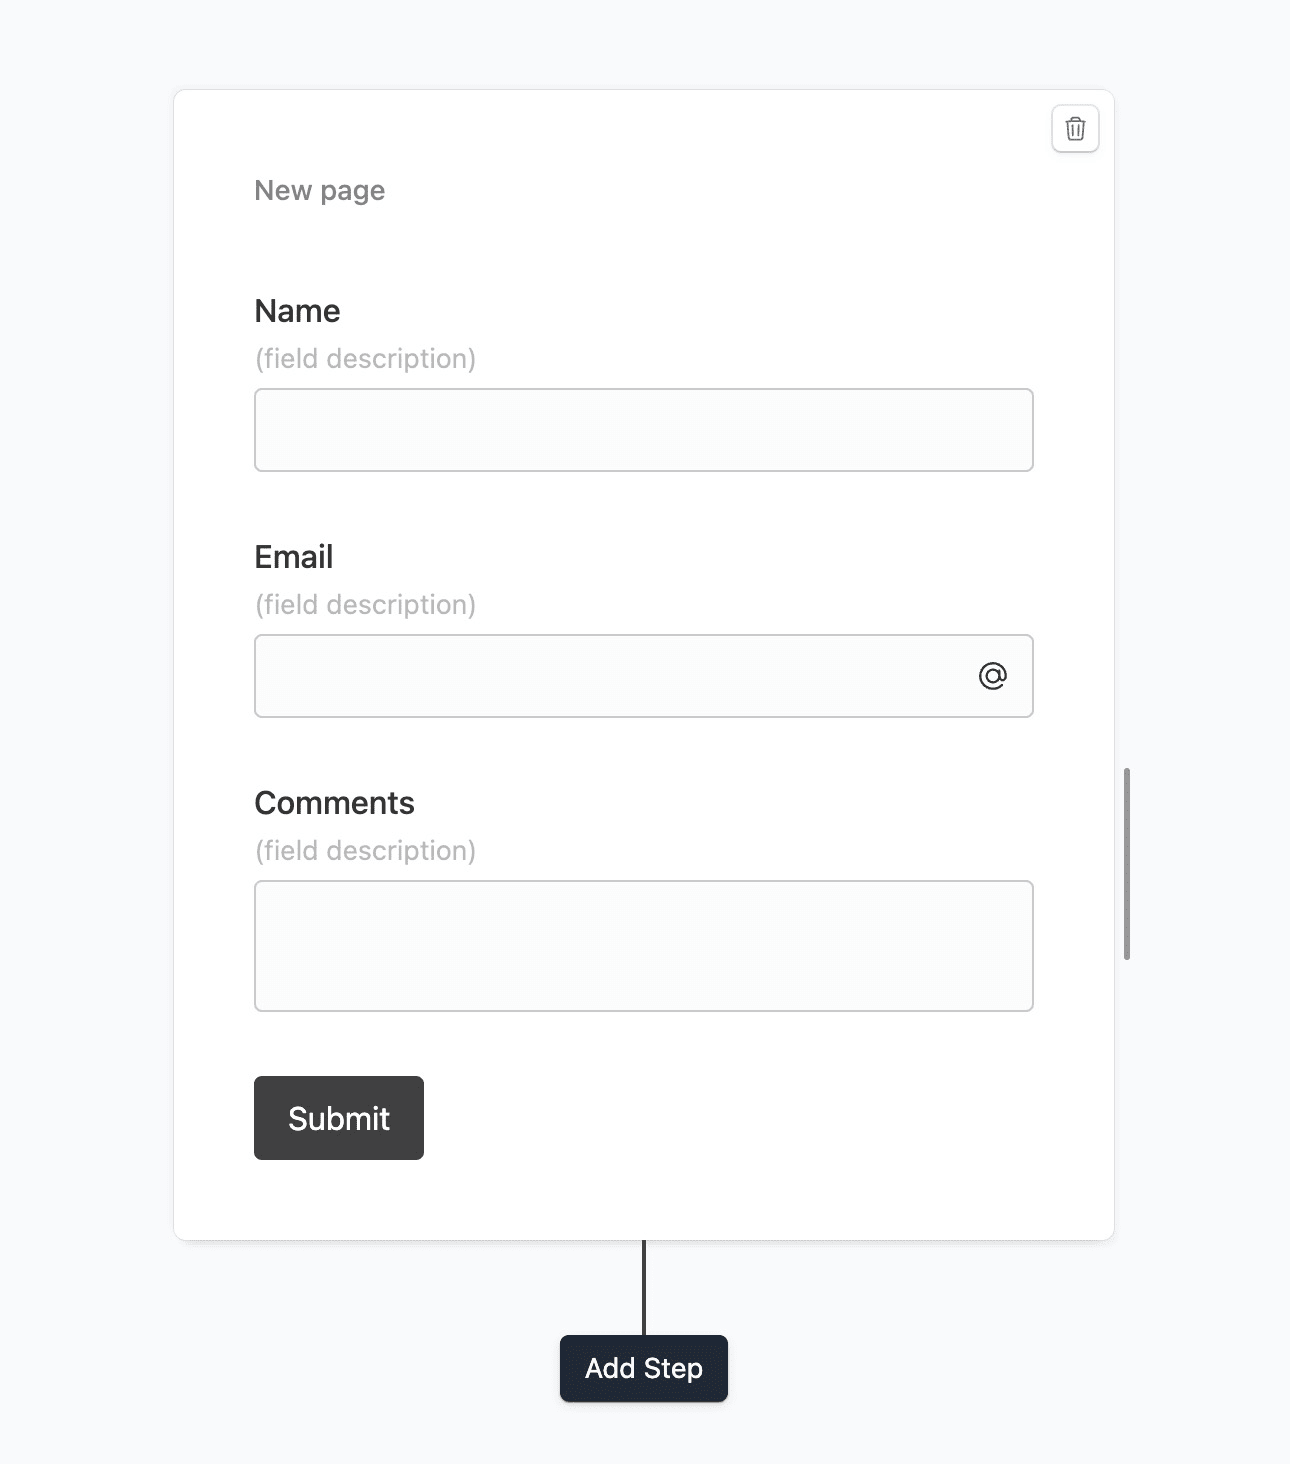
Now add some basic fields to your form using the Add field button on the top-left corner of the form editor:
- Name (One line input)
- Email (Email)
- Comments (Comment)

Create a workflow
Click on the Workflows button on the top-left corner of the form editor, and then click on the Add workflow button.
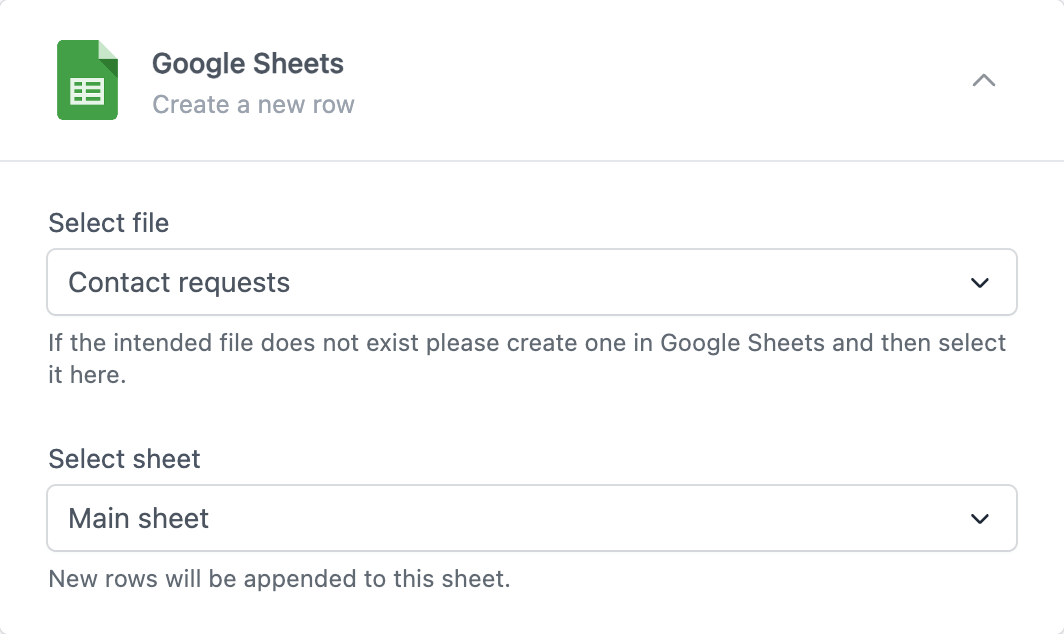
Now edit the new workflow, and click on Add action. Under (select action) find Google Sheets, and click on Connect to Google Sheets, and proceed as directed.

Configure the action
Now that you have connected your Google Sheets account, you can configure the action. You have to select the file and sheet where you want to record the responses. This sheet must be blank.

Save and test
Click on the Preview button on the top-right corner of the form editor, and submit the form to test the workflow.
Formcrafts keeps a record of all successful and failed workflows which you can view using the Logs button on the top-left corner of the form editor.
Learn more about Workflow logs.

Notes:
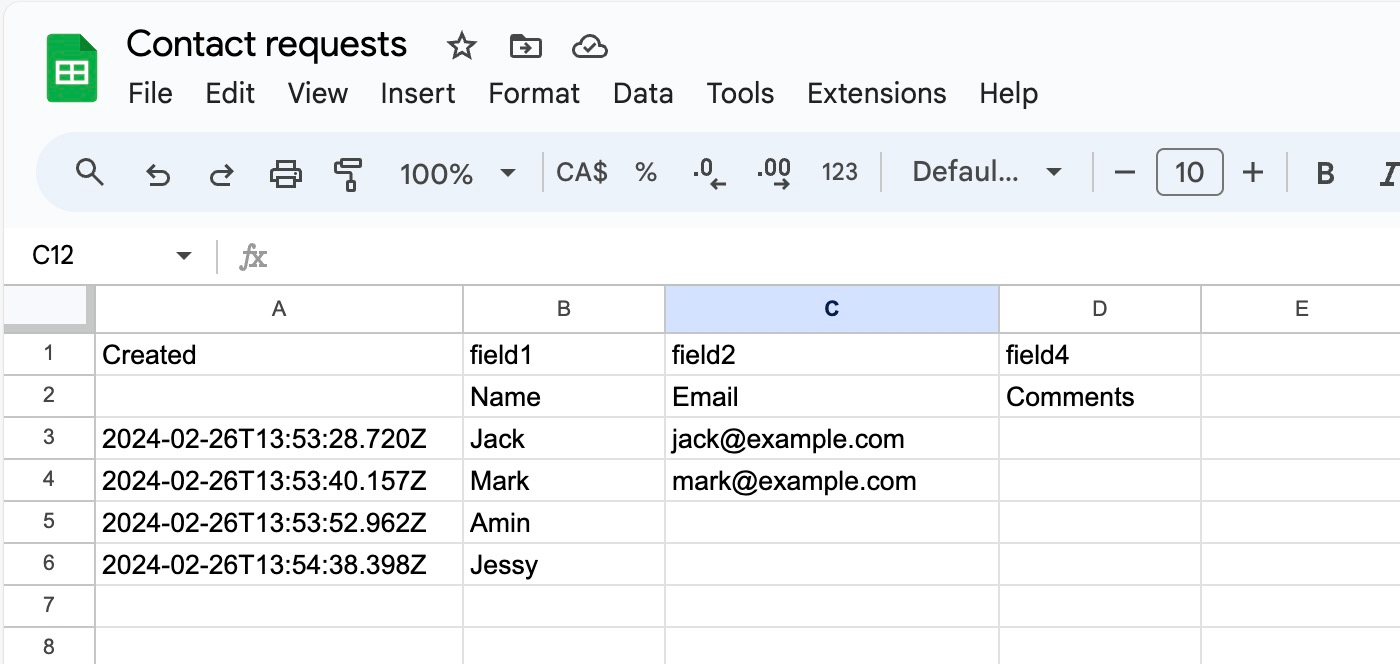
- We do not recommend modifying this sheet manually, as it may break the workflow. You can view and copy the data to another sheet if you need to.
- The first row of the sheet will contain the field IDs, and the second row will contain the field labels.
- The first column of the sheet contains the timestamp of the response.
