Accept payments
Introduction
Formcrafts allows you to add a Stripe field to your form which can be used to accept payments. You can use it to create order forms, subscription forms, donation forms, and more.
Some notes:
- The field can only accept cards. It does not support other payment methods like PayPal.
- Formcrafts creates the customer and handles the initial payment. All subsequent actions are handled via Stripe's dashboard.
- Formcrafts does not collect or store any credit card information. It is all handled by Stripe, even though the card field appears on the form.
Features of the Stripe field:
- Support for test / live mode.
- Support for coupons.
- Mark transactions as 'authorized' or 'captured'.
- Support for all currencies.
- Calculate order total based on form inputs (using math calculations).
- Support for Tax IDs (in subscription forms).
- Create customers (with support for customer info and metadata).
- Support for transaction info and metadata.
Create a order form
In this section we will create a simple order that collects the customer name, email, and allows them to select a product.
Create a form
On your Formcrafts dashboard ↗ click on Add Form → Start from scratch. Enter a Form name and hit enter. This will create a new form.
You can also create a new form by clicking on Add Form → Use a Template and selecting a template. This would allow you to skip this step. We have a large collection of order and subscription form templates ↗ that you can use.
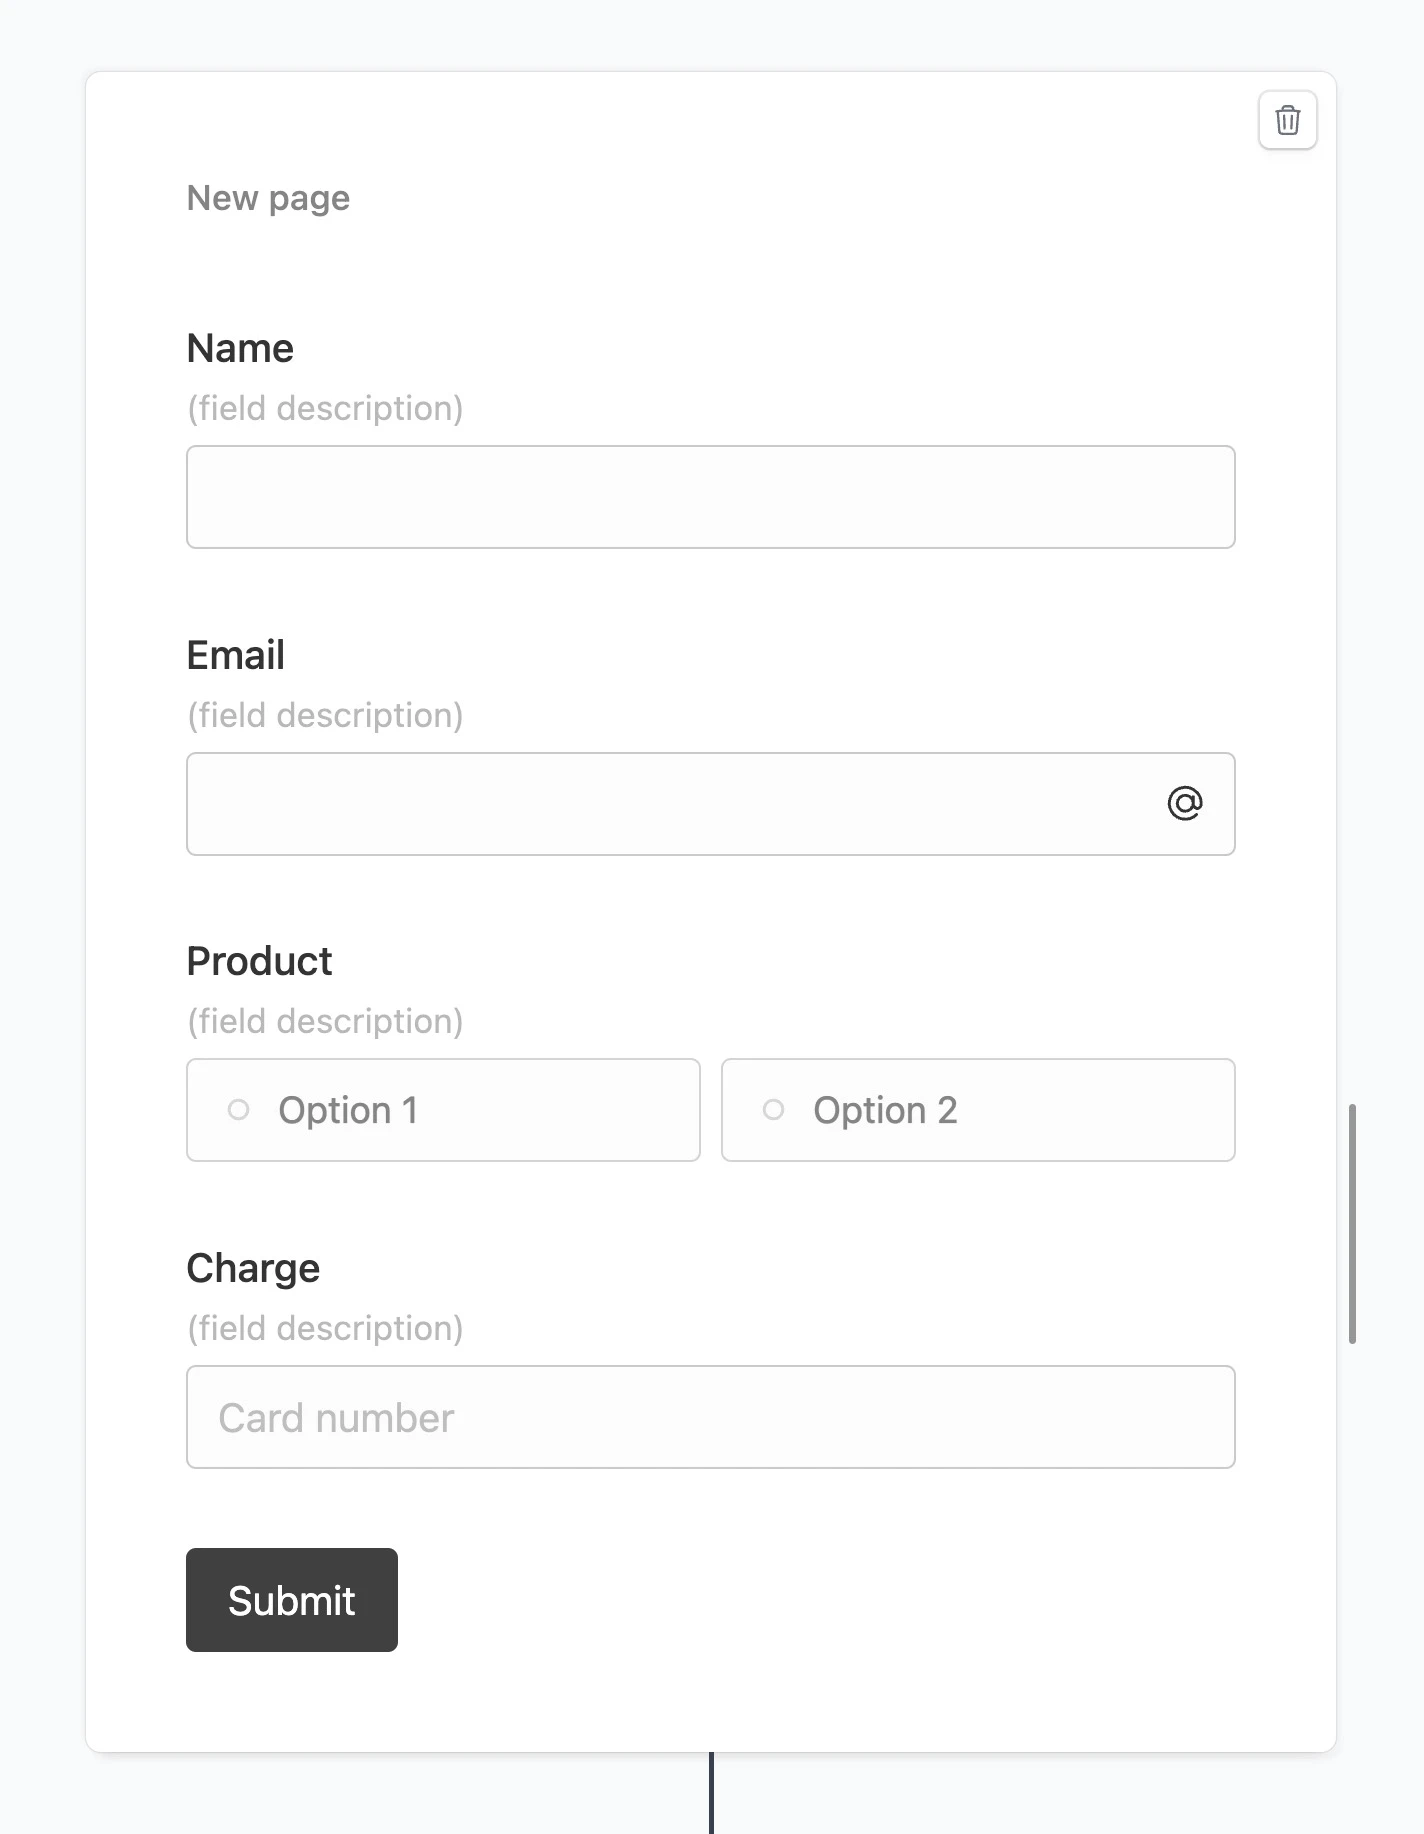
Now add some basic fields to your form using the Add field button on the top-left corner of the form editor:
- Name (One line text)
- Email (Email)
- Product (Multiple choice)
- Charge (Stripe)
Now edit the Product field and set the options as follows:
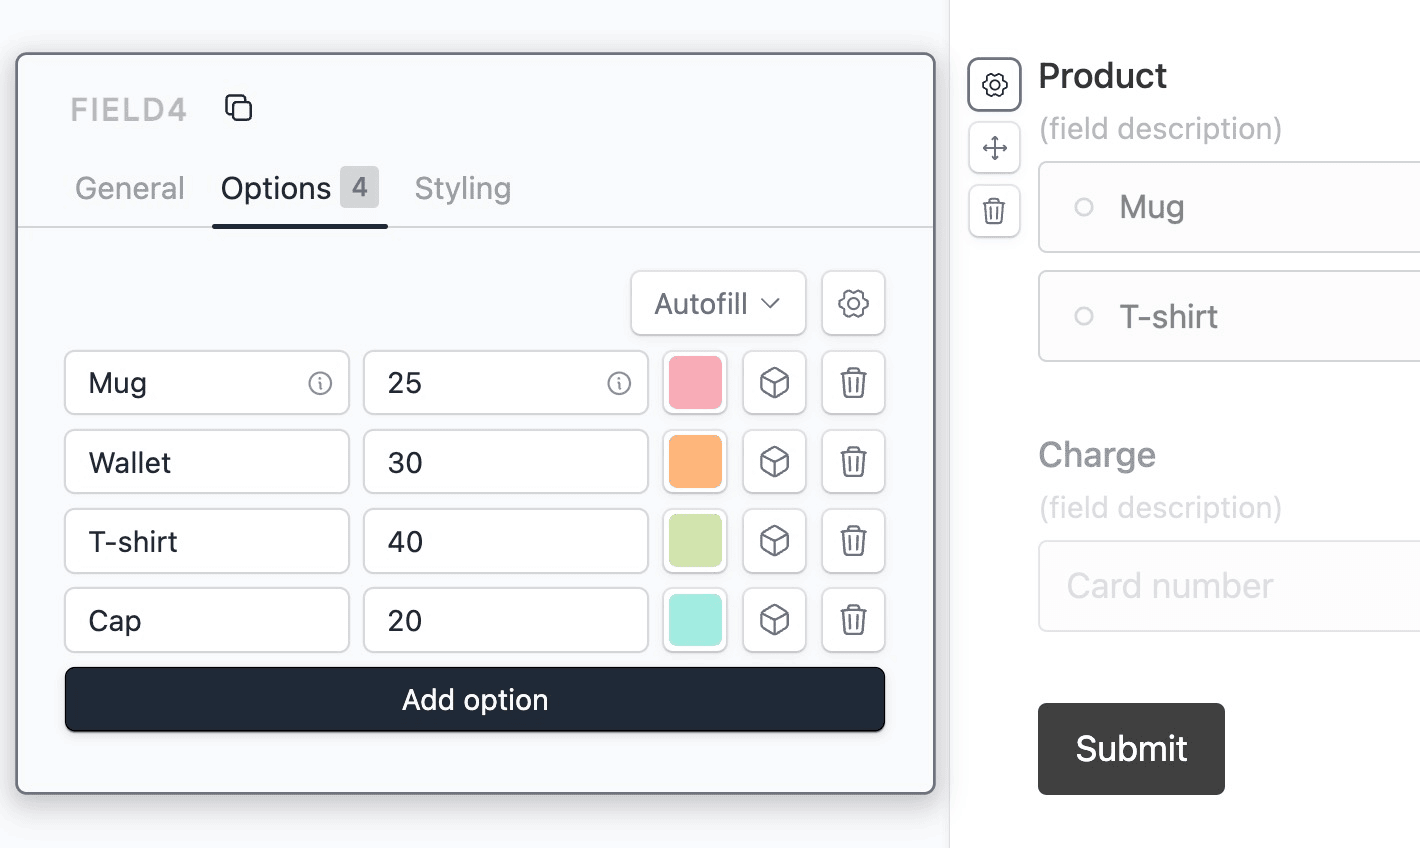
The left-hand column denotes the user-facing text, and the right-hand column denotes the value (i.e. price) that will be sent to Stripe.
Note the field ID of this field on the top-left corner of the field settings dialog. You will need it later.
Set up the Stripe field
Edit the Charge field and click on Connect to Stripe. This will open a dialog where you can connect your Stripe account to Formcrafts.
Under Charge calculation type in the field ID of the Product field, in curly braces:
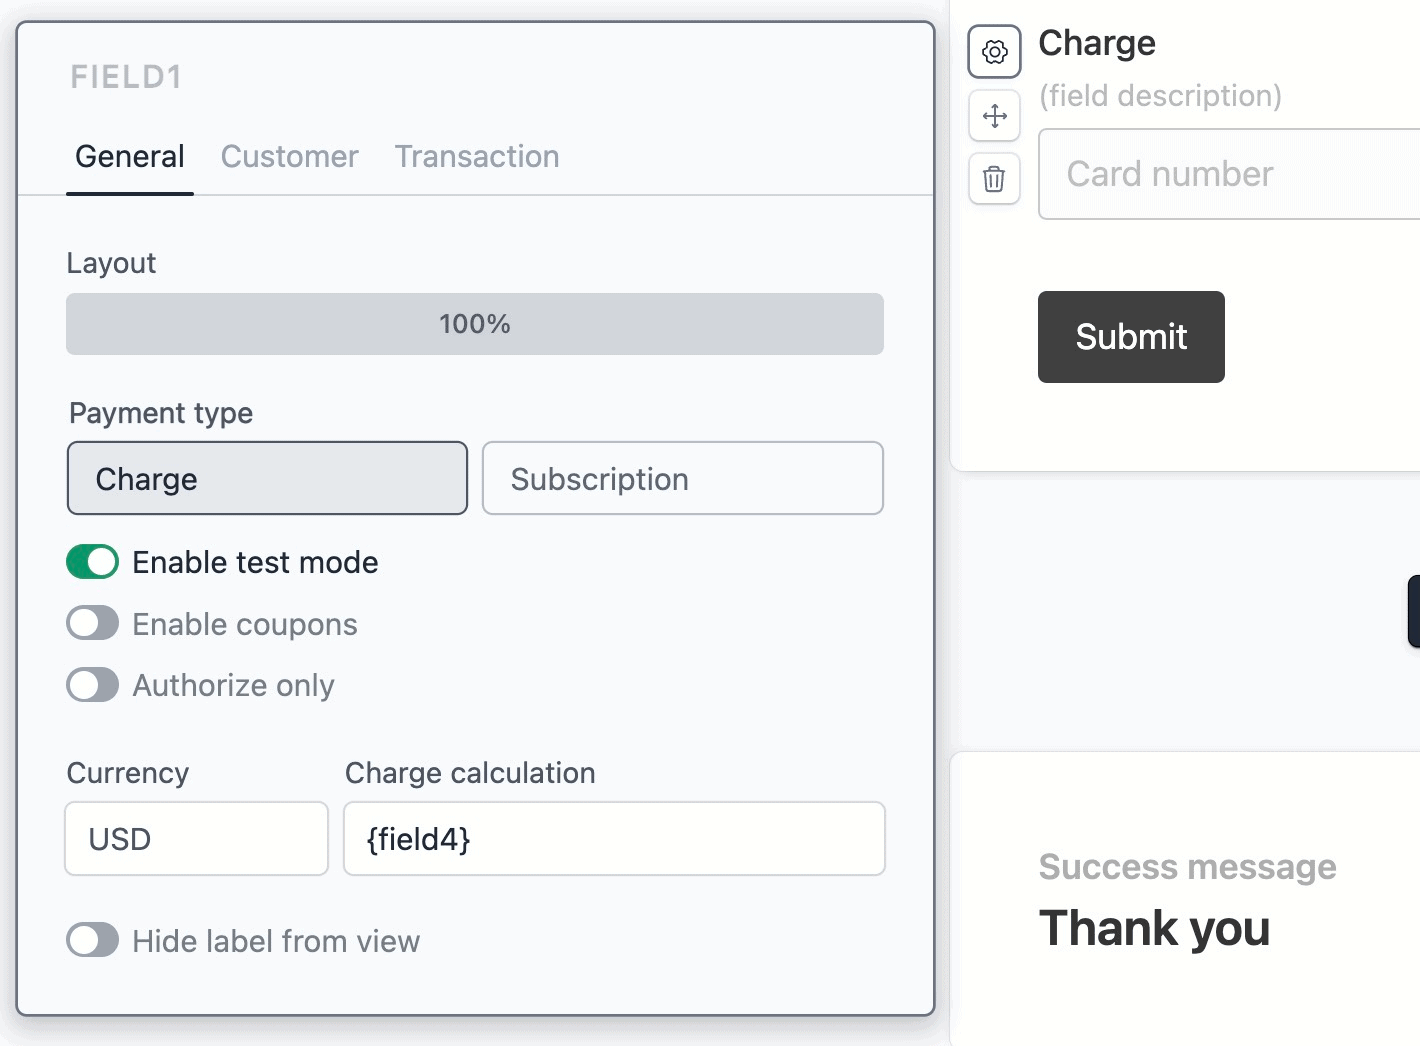
This tells the Stripe field to calculate the charge based on the value of the Product field. Note that you can use complex math calculations here, referencing multiple fields. Learn more about math calculations.
We want to create a customer in stripe. Click on the Customer tab and create the following field mappings:
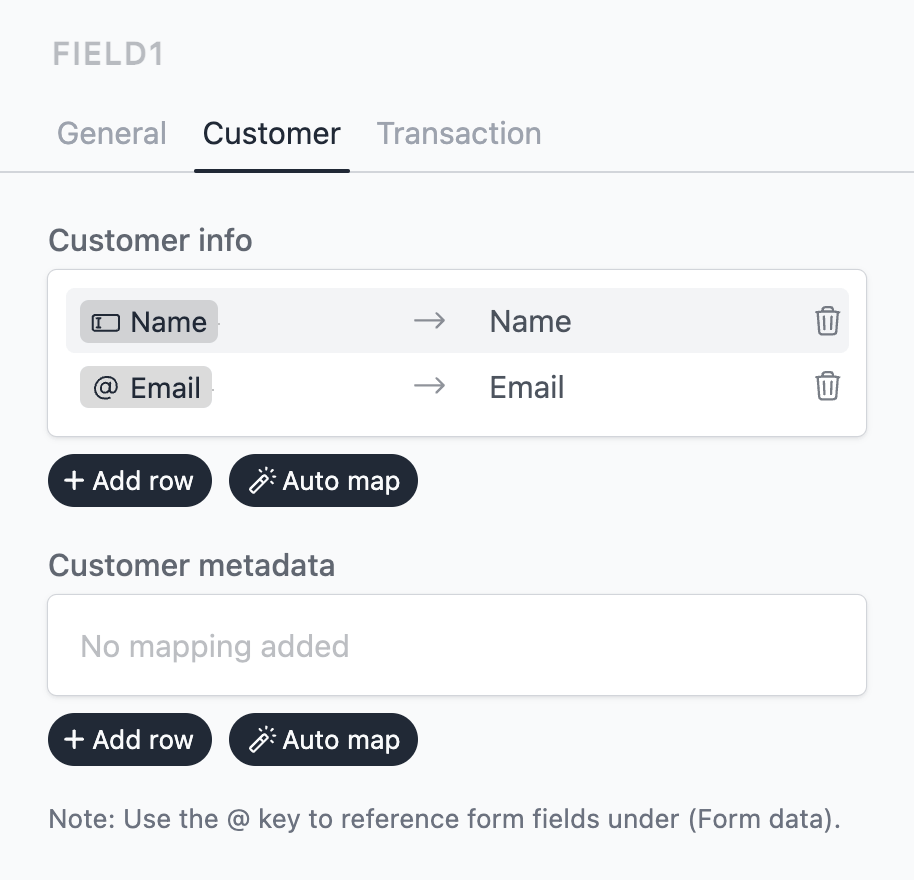
This will create a customer in Stripe with the name and email taken from the form.
We can also associate form values to the transaction. Click on the Transaction tab and create the following field mappings:
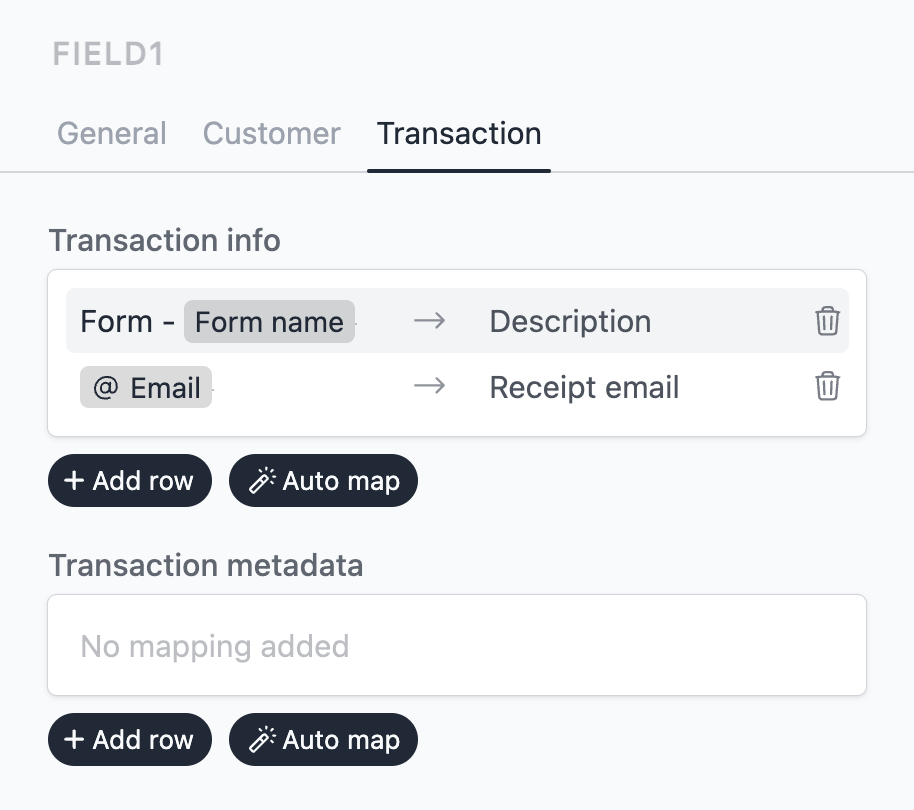
We have mapped a combination of plain text and a reference (Form - @Form name) to the Description. This will allow us to see the form name in the description of the transaction in Stripe.
We have mapped the Email field to Receipt email. This will allow Stripe to send a receipt to the customer.
Save and test
Click on the Preview button on the top-right corner of the form editor, and submit the form to test the payment flow.
If you have enabled test mode in the Stripe field, you can test the payment using Stripe test cards ↗
Create a subscription form
In this section we will create a subscription form which asks for a customer’s name, email, and allows them to select a plan.
Create a form
On your Formcrafts dashboard ↗ click on Add Form → Start from scratch. Enter a Form name and hit enter. This will create a new form.
You can also create a new form by clicking on Add Form → Use a Template and selecting a template. This would allow you to skip this step. We have a large collection of order and subscription form templates ↗ that you can use.
Now add some basic fields to your form using the Add field button on the top-left corner of the form editor:
- Name (One line text)
- Email (Email)
- Product (Multiple choice)
- Charge (Stripe)

We need to add the subscription plans to the Product field. Edit the field and click on the Options tab. The label of the option is the user-facing text, and the value should be the plan ID in Stripe.
Formcrafts can automatically fetch the subscription plans from your Stripe account. Click on Autofill → Stripe plans.
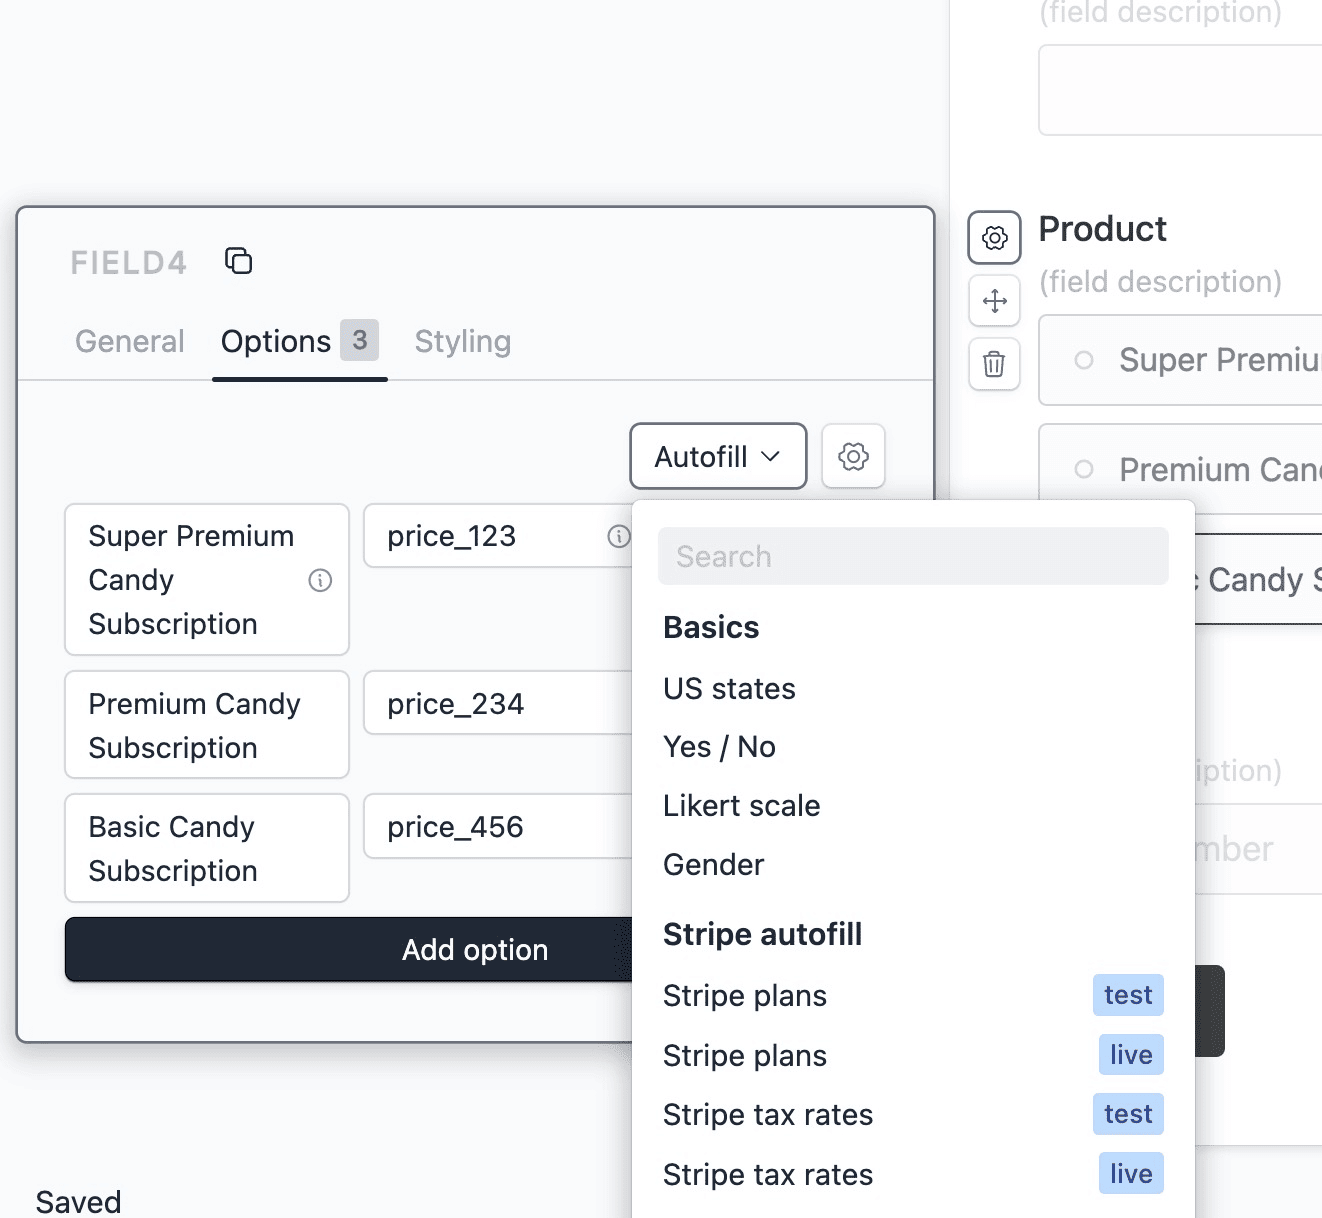
Note the field ID of this field on the top-left corner of the field dialog. You will need it later.
Set up the Stripe field
Edit the Charge field and click on Connect to Stripe. This will open a dialog where you can connect your Stripe account to Formcrafts.
Set Payment type to Subscription. Under Subscription plan(s) type in the field ID of the Product field, in curly braces:
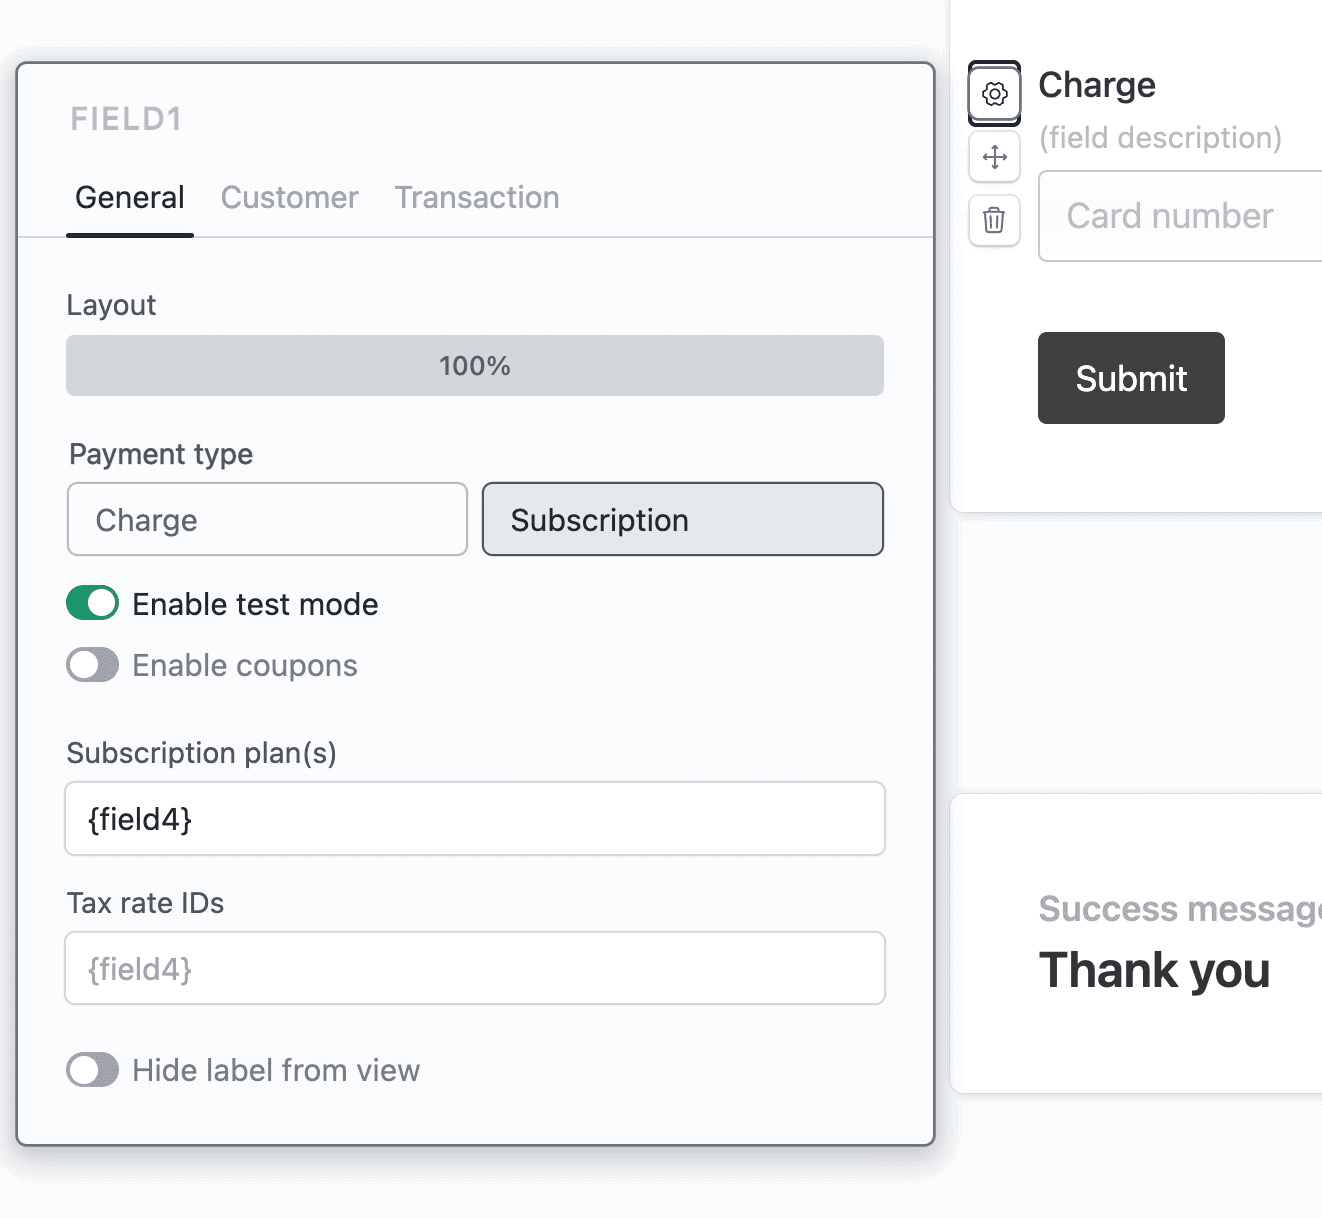
This tells the Stripe field to use the value of the Product field as the subscription plan.
We want to create a customer in stripe. Click on the Customer tab and create the following field mappings:

This will create a customer in Stripe with the name and email taken from the form.
Save and test
Click on the Preview button on the top-right corner of the form editor, and submit the form to test the payment flow.
If you have enabled test mode in the Stripe field, you can test the payment using Stripe test cards ↗
Notes
Coupons
Both charge and subscription methods support coupon codes. Edit the Stripe field and check Enable coupons. This will allow customers to enter a coupon code.
Coupon codes need to be created in the Stripe dashboard.
Authorize only
When Payment type is charge you can choose to enable Authorize only. This will create a pending transaction in Stripe. You can later capture the payment from the Stripe dashboard.
Multiple plans
Above, we created a product field with subscription plans. You could edit the Product field to allow multiple selections. This would allow customers to select multiple plans.
Tax IDs
The subscription payment type supports Tax ID(s). You can map a field to the Tax rate IDs column in the Stripe field. The tax rate IDs could come from a multiple choice field, a hidden field, or set manually.
Conditional payments
You can use conditional logic to show the Stripe field only when certain conditions are met, making payment conditional. Learn more about using conditional logic.
