Create a Zendesk Ticket Form
Introduction
Zendesk workflow allows you to turn new form responses into Zendesk tickets. This allows you to replace your default Zendesk ticket forms with Formcrafts’ forms which are much more powerful and customizable.
Let us learn how to create a simple support ticket form and turn new responses into tickets in Zendesk.
Create a new form
On your Formcrafts dashboard ↗ click on Add Form → Start from scratch. Enter a Form name and hit enter. This will create a new form.
You can also create a new form by clicking on Add Form → Use a Template and selecting a template. This would allow you to skip this step. We have a large collection of customer support form templates ↗ that you can use.
Now add some basic fields to your form using the Add field button on the top-left corner of the form editor:
- Name (One line input)
- Email (Email)
- Request (Multiple choice)
- Priority (Multiple choice)
- Comments (Comment)
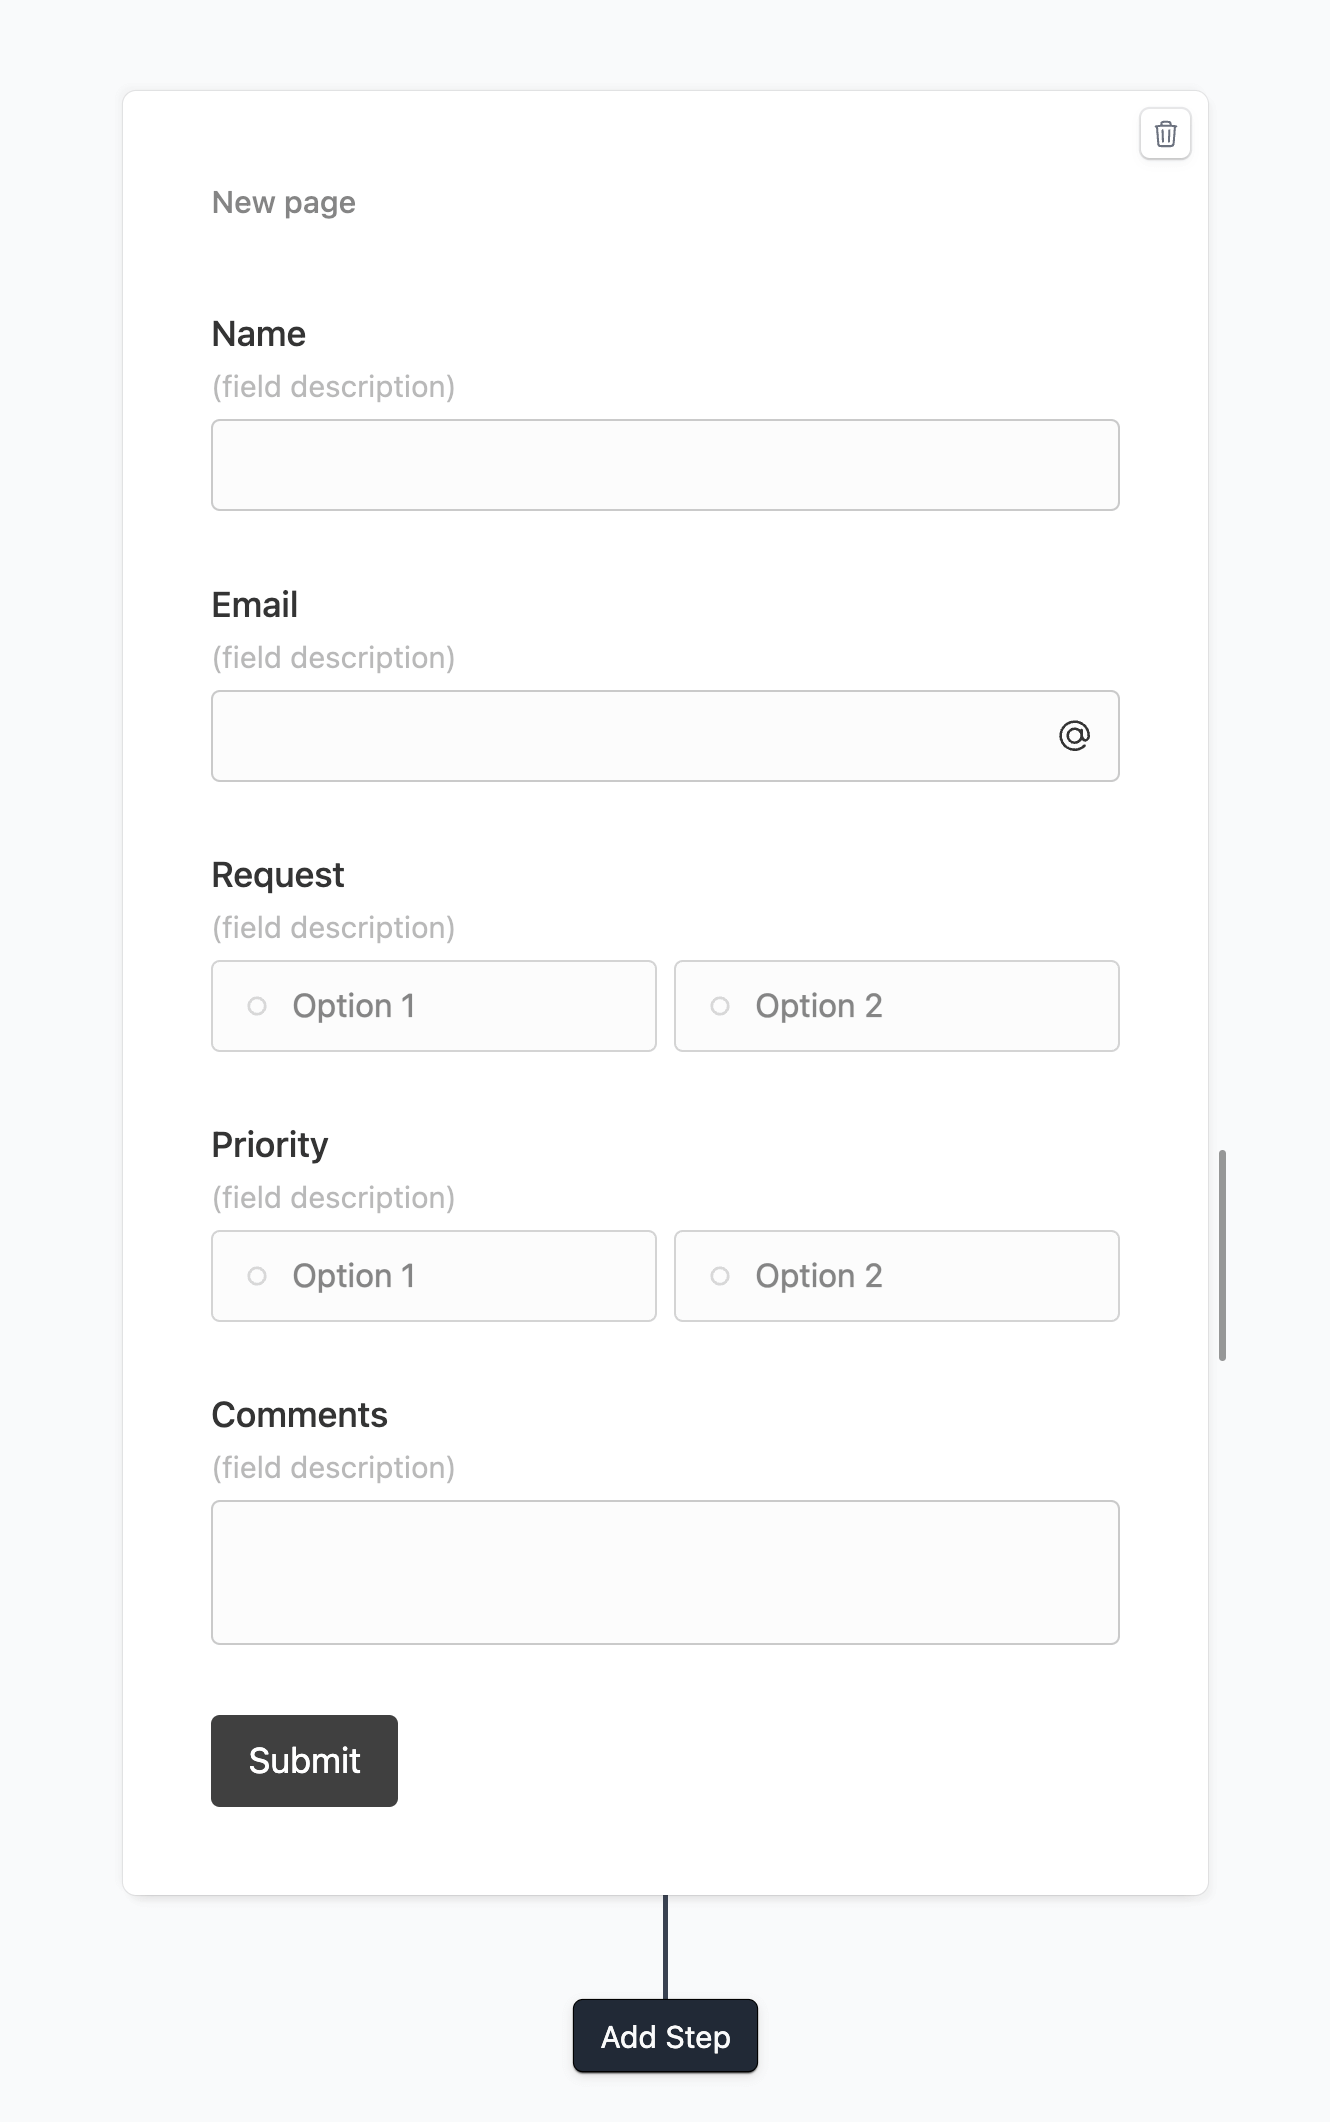
Edit the Request field and add appropriate options like Technical, Billing, and Other.
Connect to Zendesk
Click on the Workflows button on the top-left corner of the form editor, and then click on the Add workflow button.
Now edit the new workflow, and click on Add action. Under (select action) find Zendesk, and click on Connect to Zendesk.

At this stage you will be asked to connect your Zendesk account. Proceed as directed.
Autofill field options
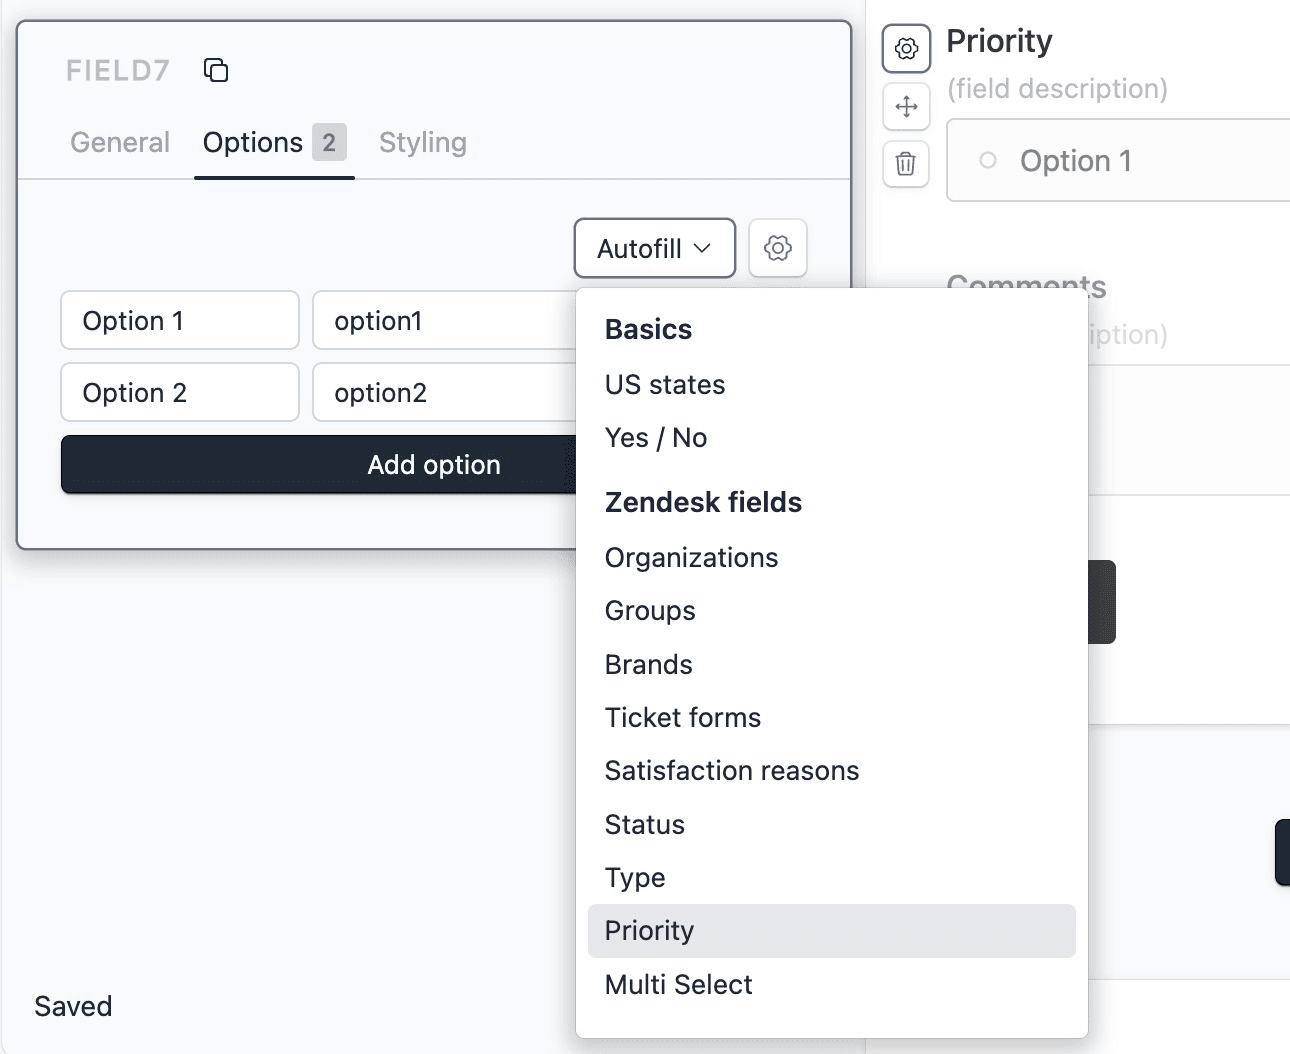
Note that we created a Priority field before. We need to add options for this field. This field will be mapped directly to the Priority field in Zendesk, so the option values in Formcrafts need to match the values in Zendesk.
Formcrafts can pull the options from Zendesk. Edit this field, and go to Options → Autofill and look for Priority under Zendesk fields.
Configure the action
In the workflow, set the action to Create a Request.
For end-user support forms we recommend using the request object (which effectively creates a ticket). For internal forms, you can use the ticket object. The ticket object offers more fields, like private comments, brand id, etc ... You can also chain workflow actions: create a request, and then update the same with ticket-only fields.
Back in the workflow, we have to use the Field mapping section to map our form fields to their respective fields in Zendesk.
Under (Form data) you can use plain text or reference fields using the @ key. We will create the following field mappings:
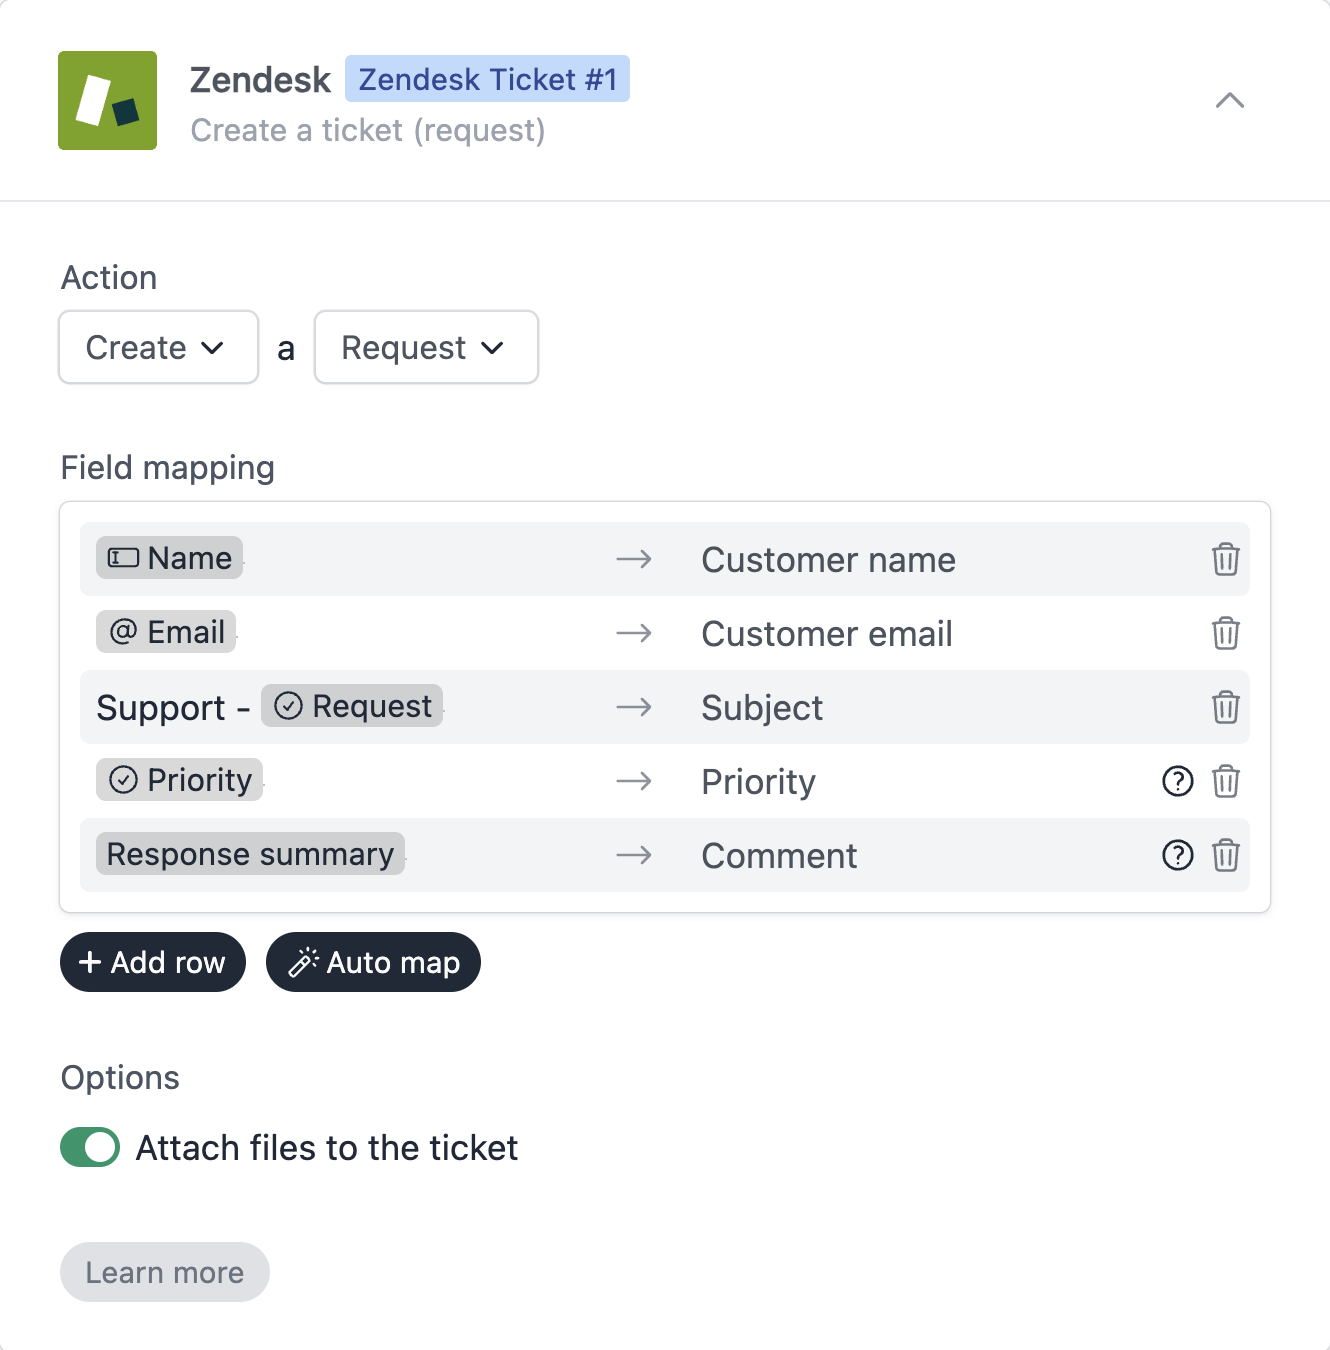
We have mapped the form field Name to Customer name.
We have mapped the form field Email to Customer email.
We have mapped a combination of plain text and a field reference (Support - @Request) to Subject. If the form response has a request of “Technical” then the subject will be “Support - Technical”.
We have mapped the form field Priority to Priority.
We have mapped the special reference Response Summary to Comment. This will include a summary of the form response in the ticket comment.
Save and test
Click on the Preview button on the top-right corner of the form editor, and submit the form to test the workflow.
Formcrafts keeps a record of all successful and failed workflows which you can view using the Logs button on the top-left corner of the form editor.
Learn more about Workflow logs.
Notes
Adding other ticket properties
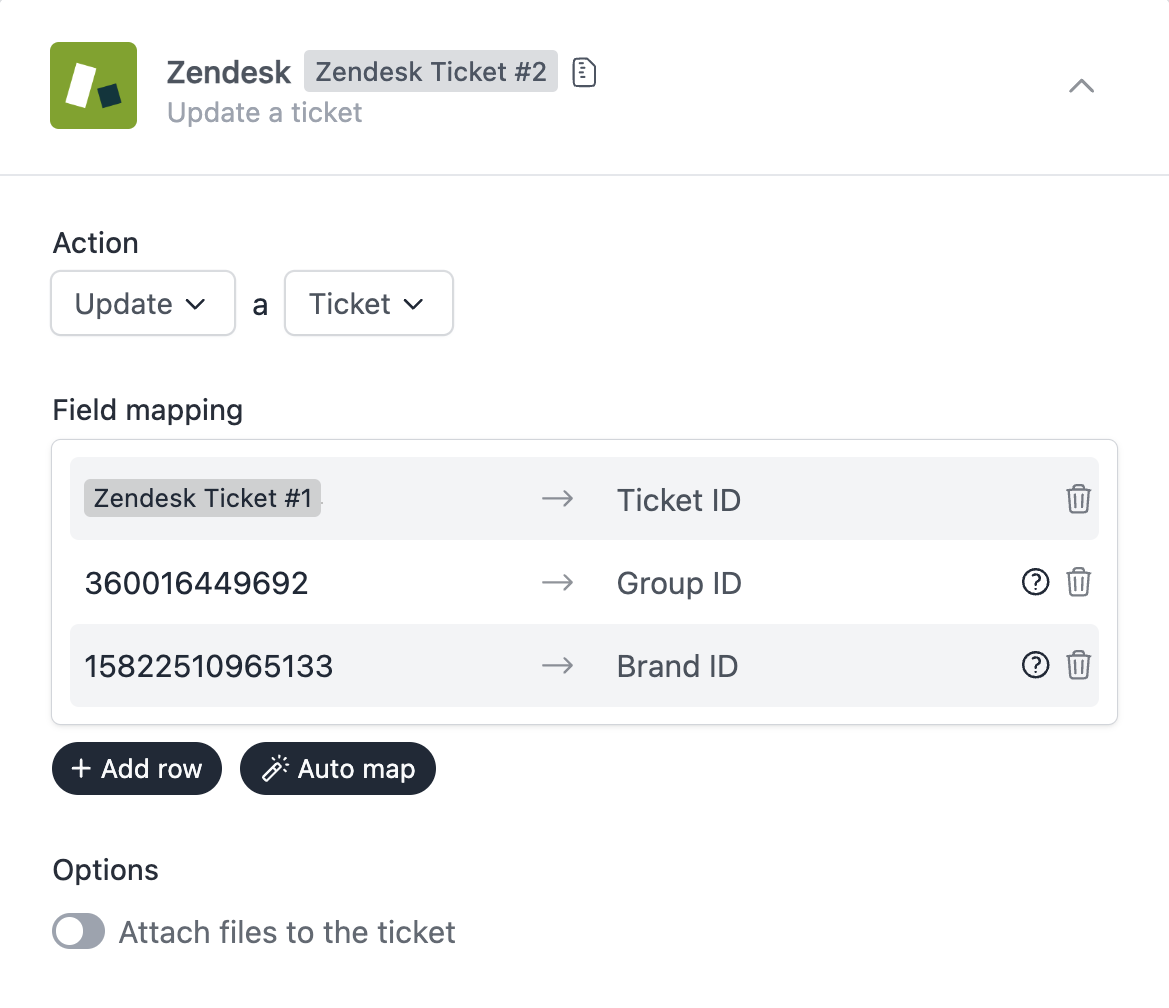
You would notice that the Zendesk field list does not include an option to set other fields properties - such as group, brand, or ticket ID. You can achieve this by adding an additional workflow action.
Edit your existing workflow, and click on Add Action. The action should be Update a Ticket.
Under (form fields) select the result of our previous action, and map that to Ticket ID. Here you can also create mappings for other fields like Group, Brand, etc.
Attaching files
You can accept files through your form and have them attached to the created ticket in Zendesk. To achieve this add a File upload field to your form, and then edit the workflow action to enable the Attach files to the ticket option.
Conditional workflows
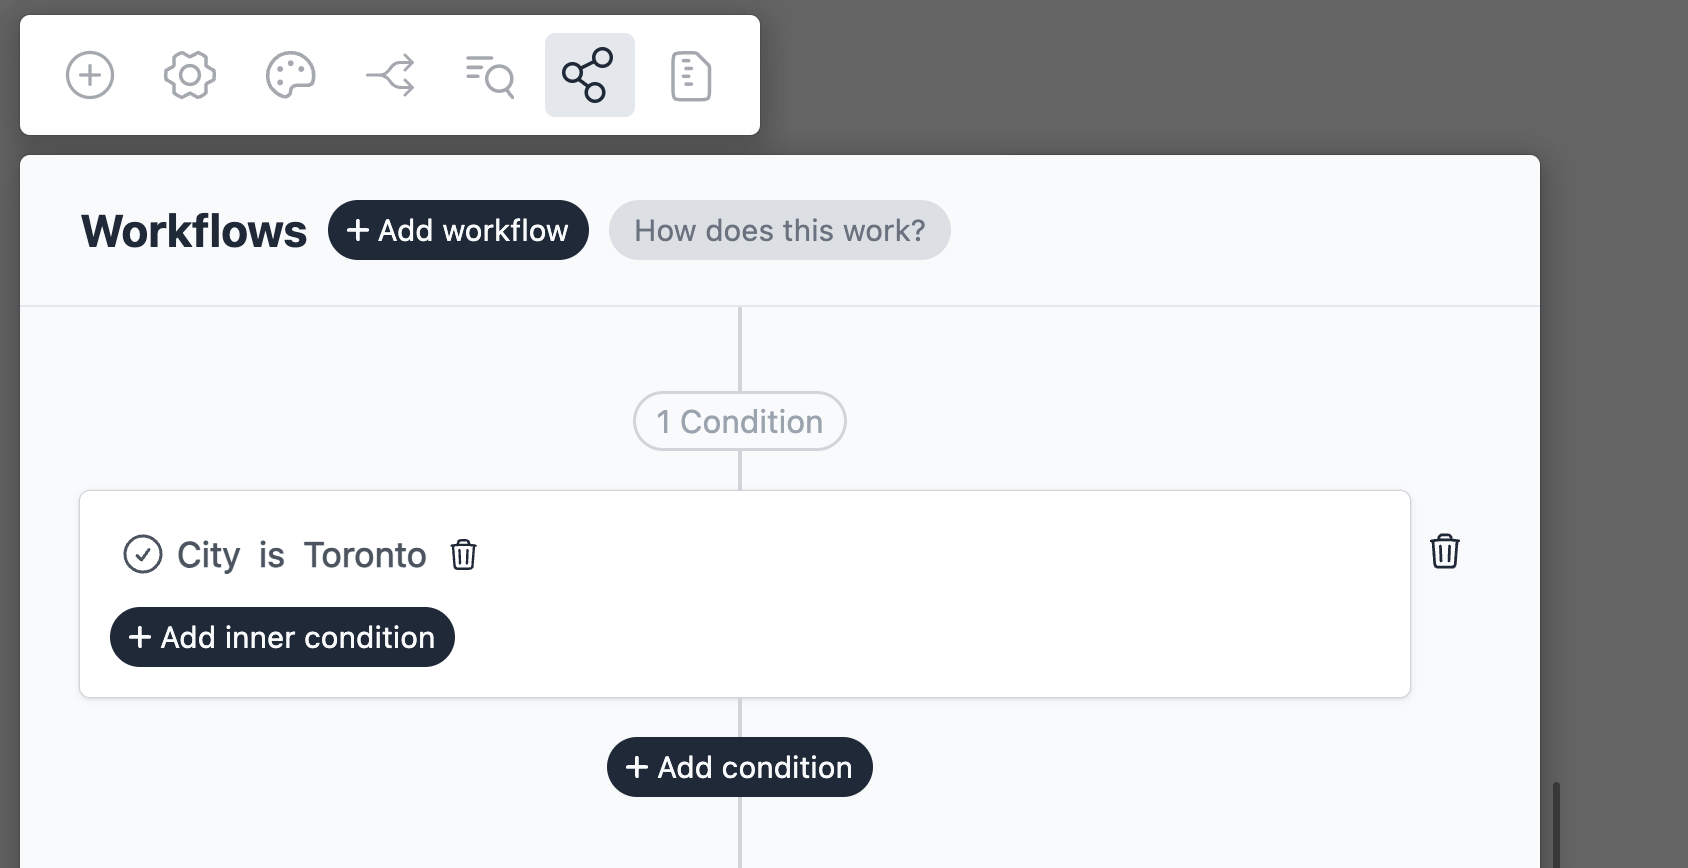
By default the Zendesk action(s) is triggered on each form submit. We can add conditions to our workflow to trigger the action(s) only when certain conditions are met. Edit your workflow and click on Add condition. Here you can add conditions, or even create condition groups.
Use ticket ID
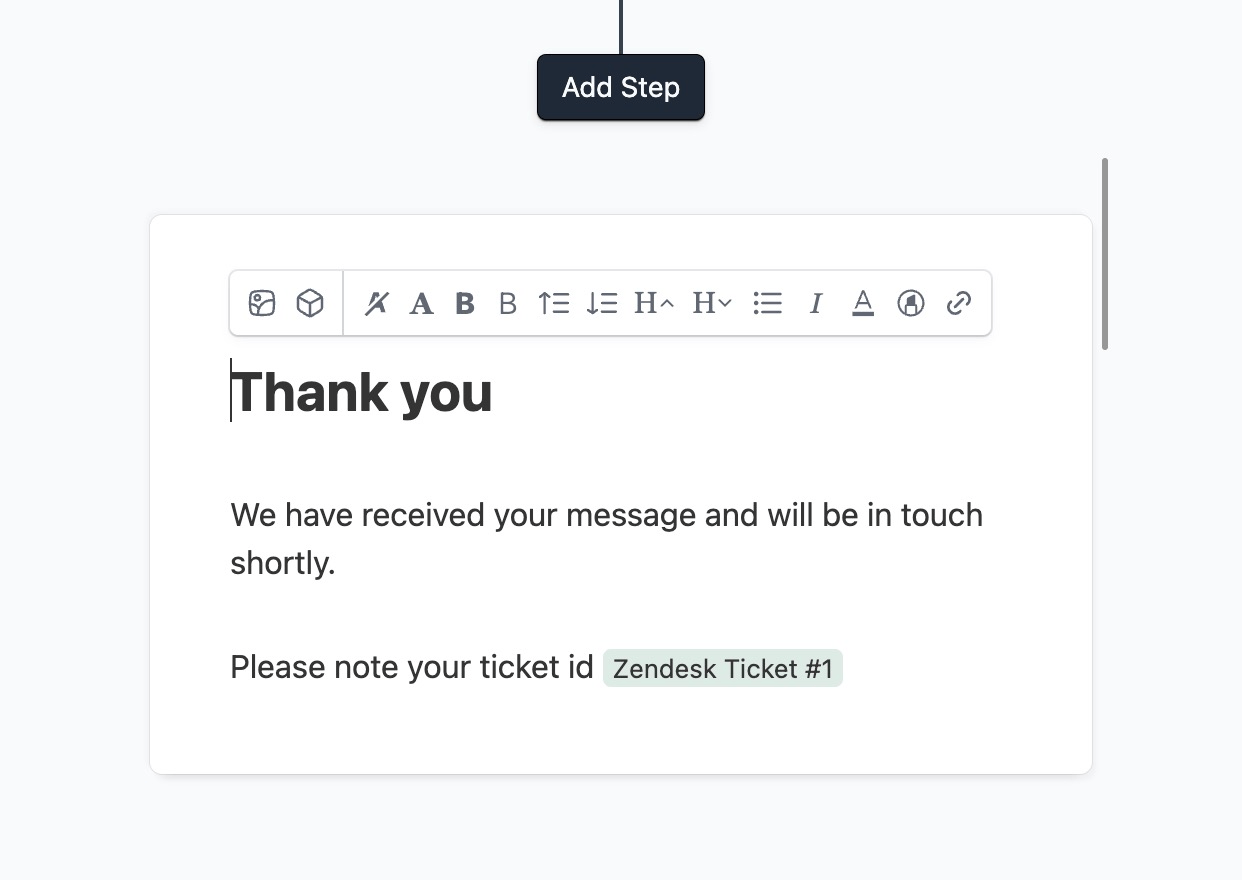
The ticket ID of the created ticket can be used in the success message or the redirect URL. Learn more about using workflow results.
Embed on the Help Center
You can embed this form on your Zendesk Help Center. Learn more about embedding forms on the Zendesk Help Center.
