Create a HubSpot Lead Capture Form
Introduction
In the previous tutorial we learnt how to create a simple contact form that turns new responses into HubSpot contacts.
In this tutorial we will create a lead capture quotation request form with additional features:
- It will be a multi-step form.
- It will use workflows to create a new deal in HubSpot.
- It will also create a HubSpot contact, or update an existing one.
- It will associate the new deal with the contact.
- Any file uploaded with the form will be attached to the deal in HubSpot.
- We will use conditional logic to calculate a deal value.
Create a new form
On your Formcrafts dashboard ↗ click on Add Form → Start from scratch. Enter a Form name and hit enter. This will create a new form.
You can also create a new form by clicking on Add Form → Use a Template and selecting a template. This would allow you to skip this step. We have a large collection of lead generation form templates ↗ that you can use.
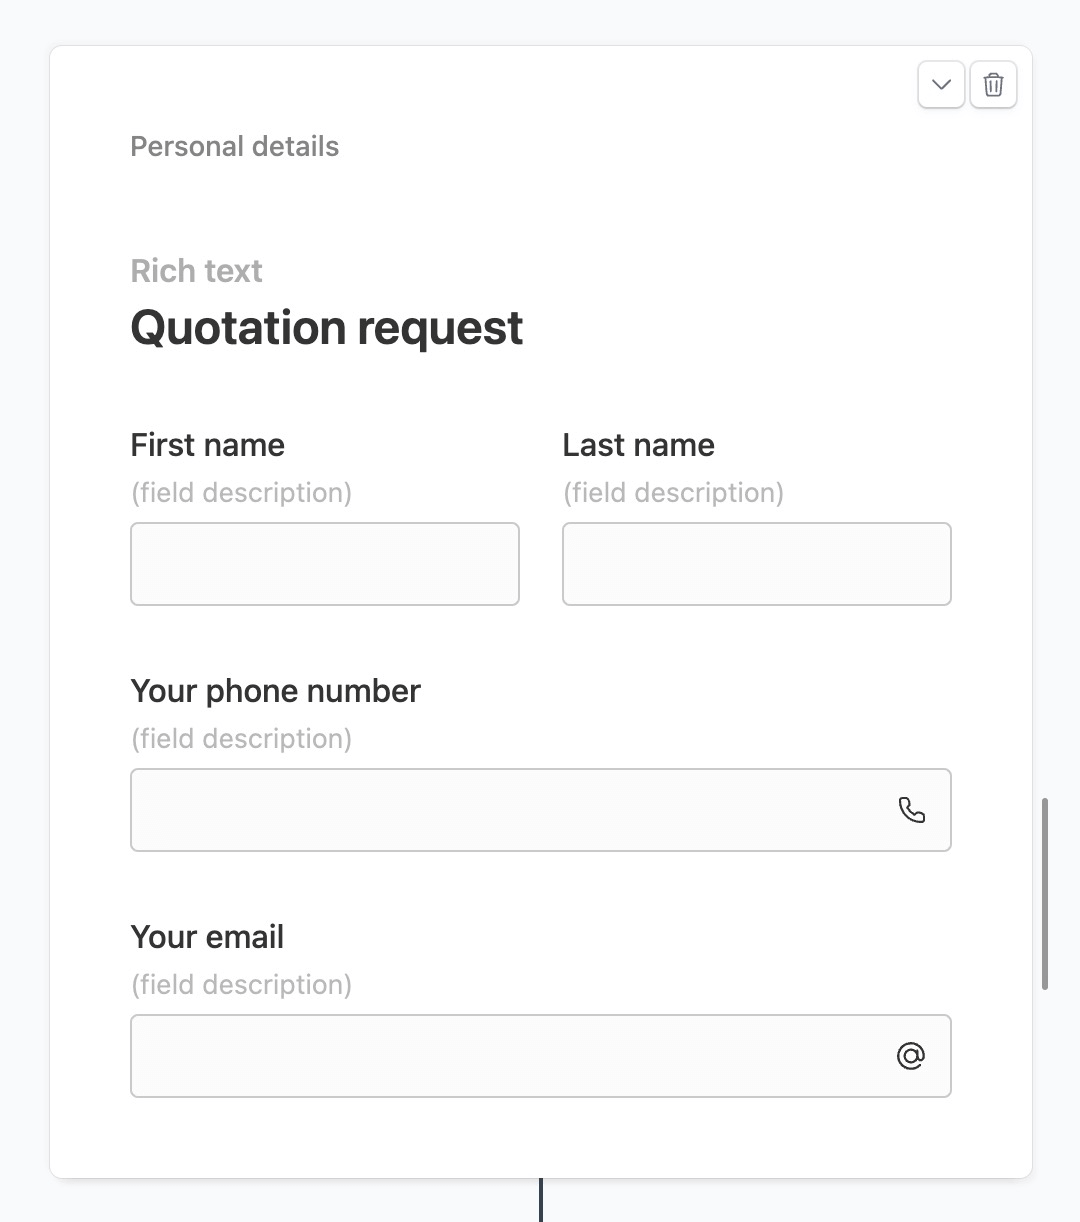
Now add some basic fields to your form using the Add field button on the top-left corner of the form editor:
- Quotation request (Rich text)
- First name (One line input)
- Last name (One line input)
- Your phone number (Phone)
- Your email (Email)
Now click on Add step, and then add a few more fields for the second step:
- Installation type (Multiple choice)
- Details (Comment)
- Building plan (File upload)
- Deal value (Hidden)
Our two-step form in the form editor should look like this:

Create the contact workflow
Click on the Workflows button on the top-left corner of the form editor, and then click on the Add workflow button.
Now edit the new workflow, and click on Add action. Under (select action) find HubSpot.
Click on Connect to HubSpot and proceed to authenticate your HubSpot account.
Set the Action to Create or update a Contact.
Use the Field mapping section to map form fields to their respective contact fields in HubSpot:
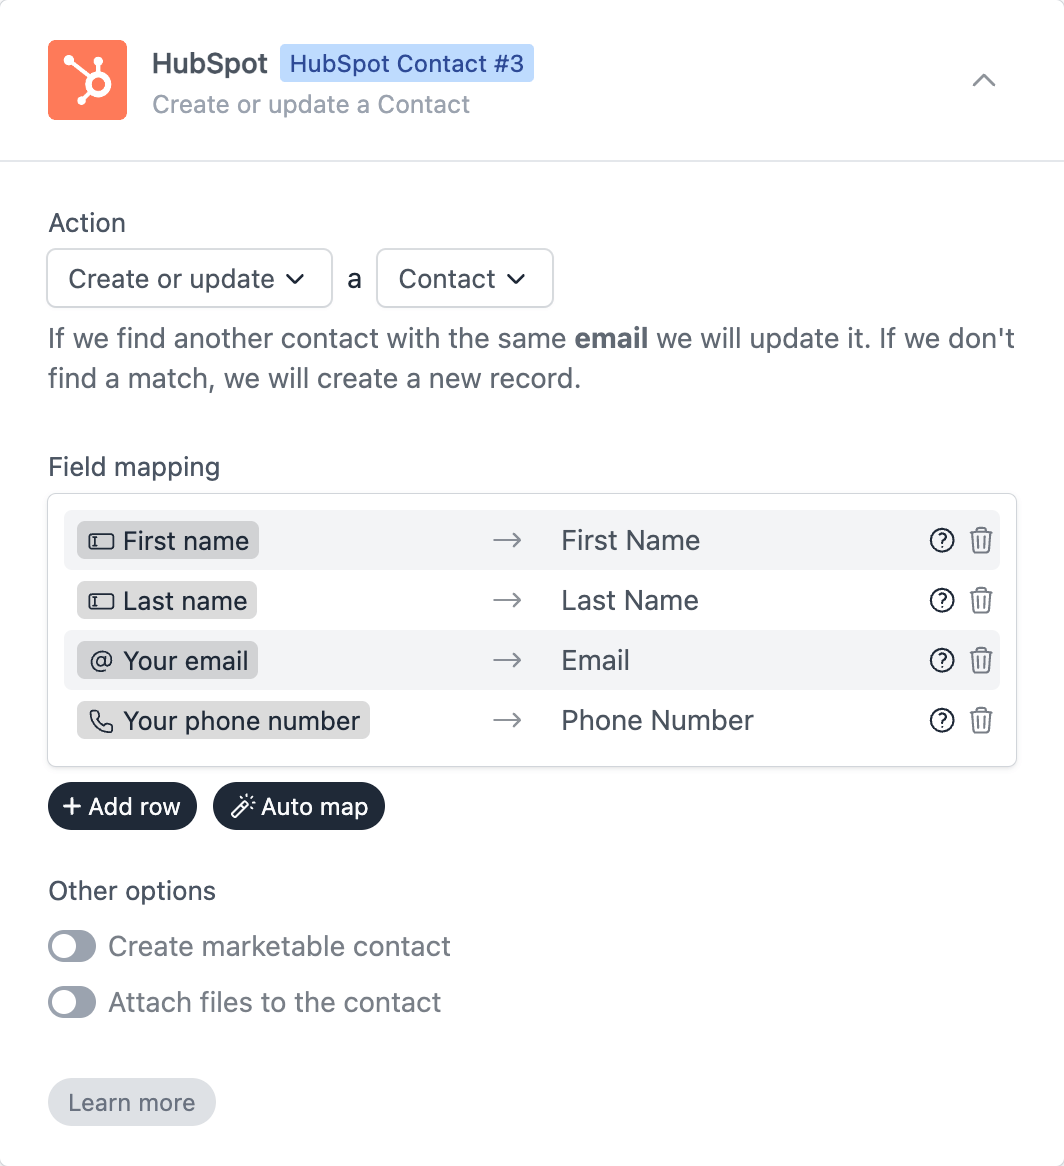
We have simply mapped the form fields to the contact fields in HubSpot, using the @ key to reference the form fields.
Create the deal workflow
In the same workflow click on Add action again, and select HubSpot. Set the action to Create a deal.
A workflow can have multiple actions, and they are executed in the order they are listed. This means that the contact creation action will be executed before the deal creation action, and the contact will be available to associate with the deal. You can re-order the actions by dragging them up or down.
The Field mapping section should look like this:
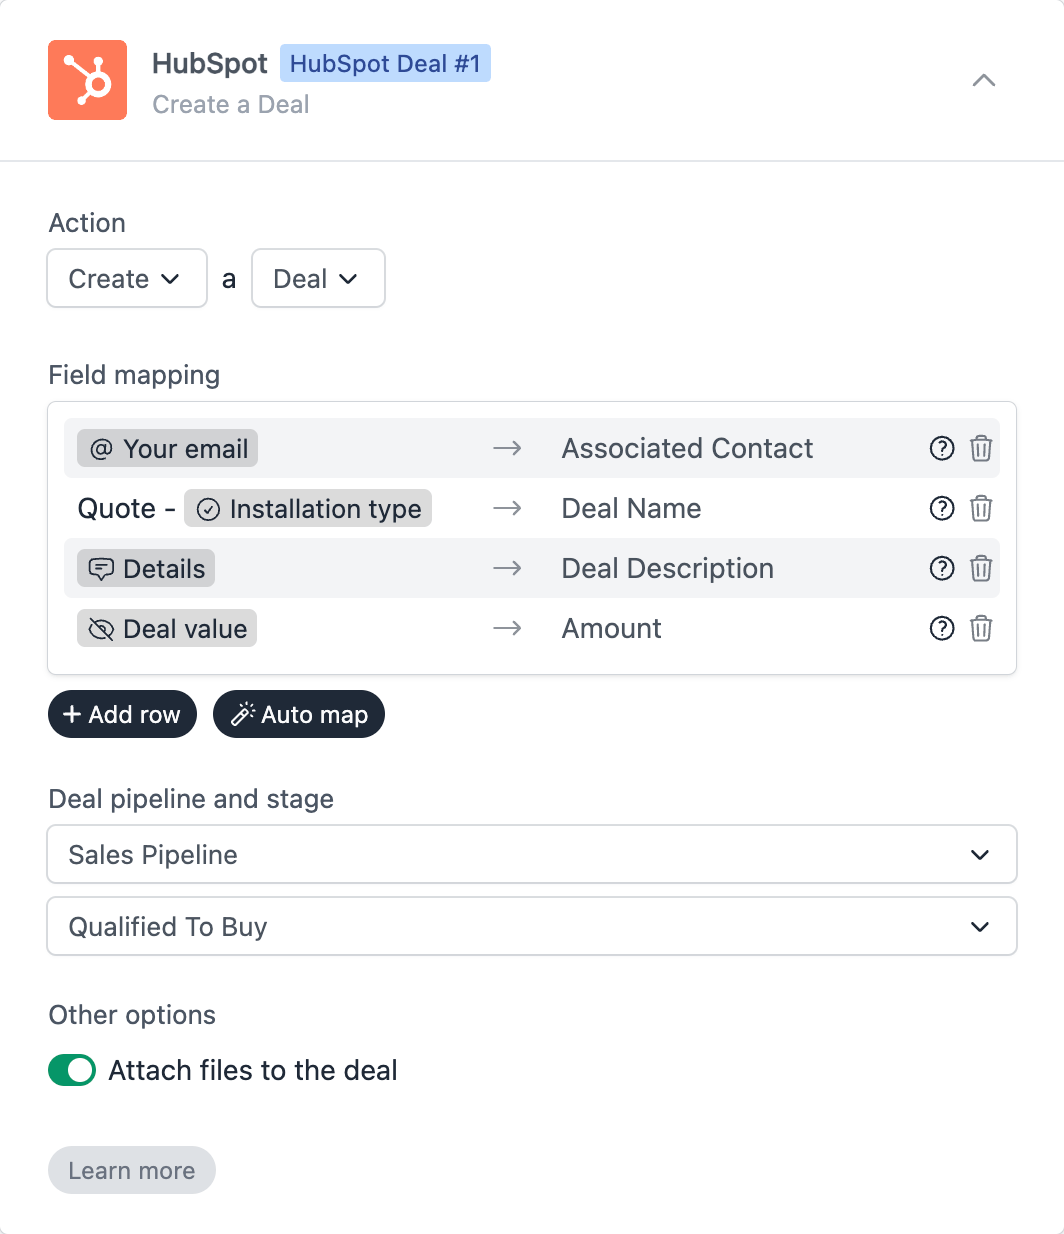
The form field Your email is mapped to the Associated Contact. This will associate the new deal with the contact created in the previous action.
We have mapped a combination of plain text and field reference (Quote - @Installation type) to Deal Name. This will create a deal with a name like “Quote - Personal”.
We have mapped Detail to Deal Description.
We have mapped Deal value to Amount.
We have also selected the appropriate Deal pipeline and stage, and checked the Attach files to the deal checkbox.
Use conditional logic
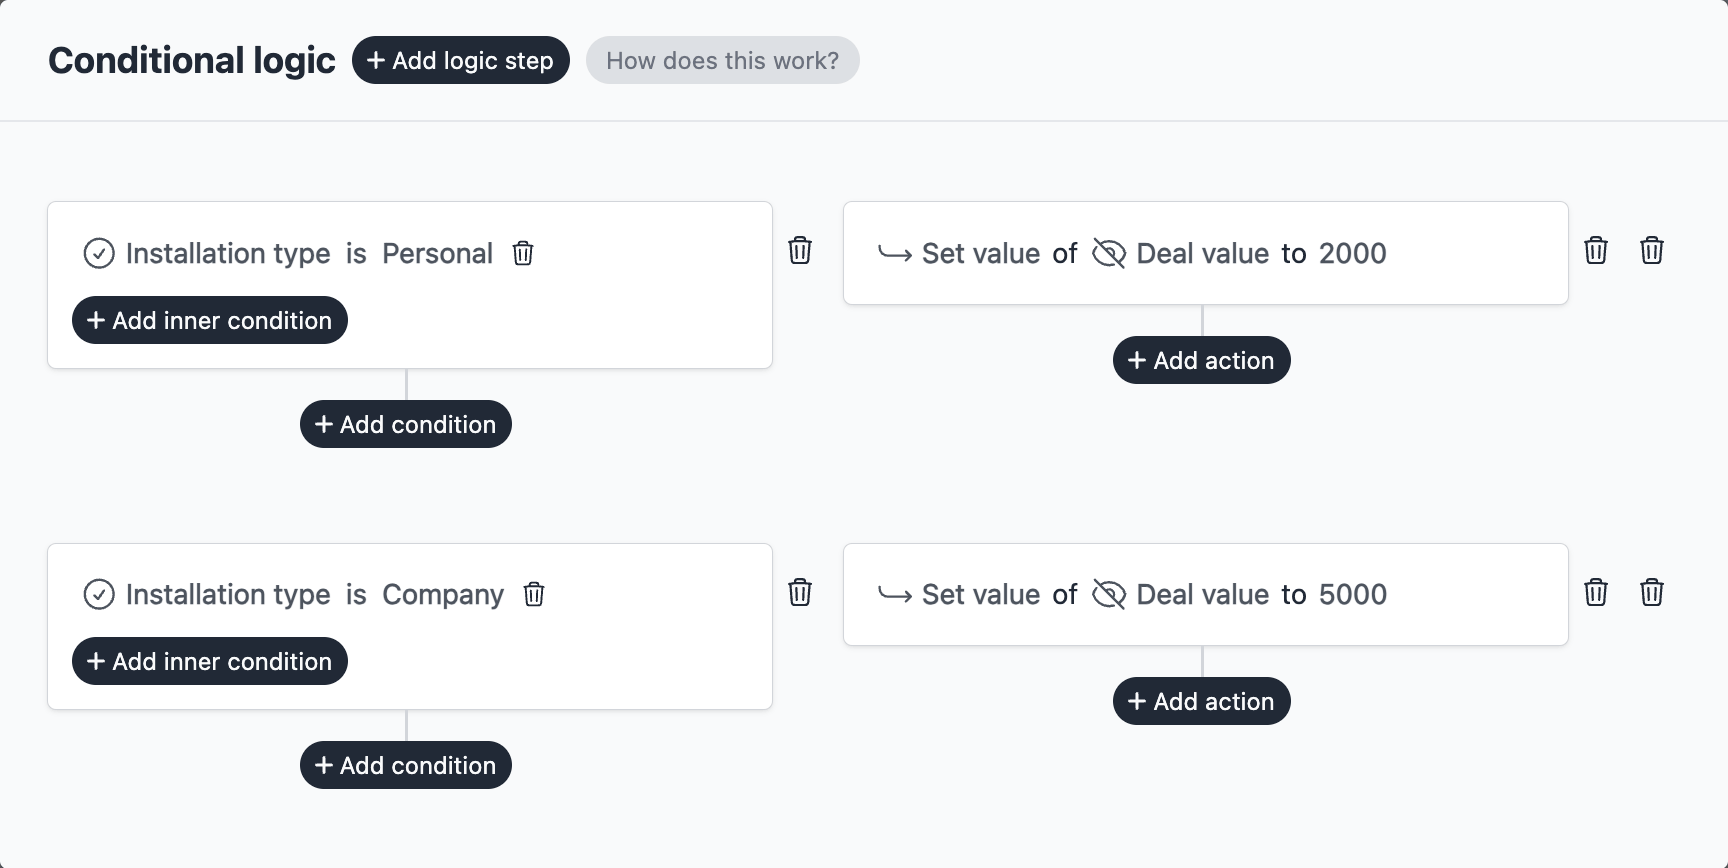
The deal value is empty in the form editor, but we can use conditional logic to calculate it. If Installation type is Personal we want the deal value to be 2000, and if it is Business we want the deal value to be 5000.
Click on the Conditional logic button on the top-left corner of the form editor, and add these logic steps:
Conditional logic in Formcrafts can also be used to show or hide fields, show or hide entire steps, disable the form, or change options in a field. Learn more about conditional logic.
Save and test
Click on the Preview button on the top-right corner of the form editor, and submit the form to test the workflow.
Formcrafts keeps a record of all successful and failed workflows which you can view using the Logs button on the top-left corner of the form editor.
Learn more about Workflow logs.
Notes
Company / ticket objects
This tutorial covers creating a deal and a contact, but the HubSpot workflow can also be used to create a company or a ticket. You can add these actions to the same workflow, and map the form fields to the company or ticket fields.
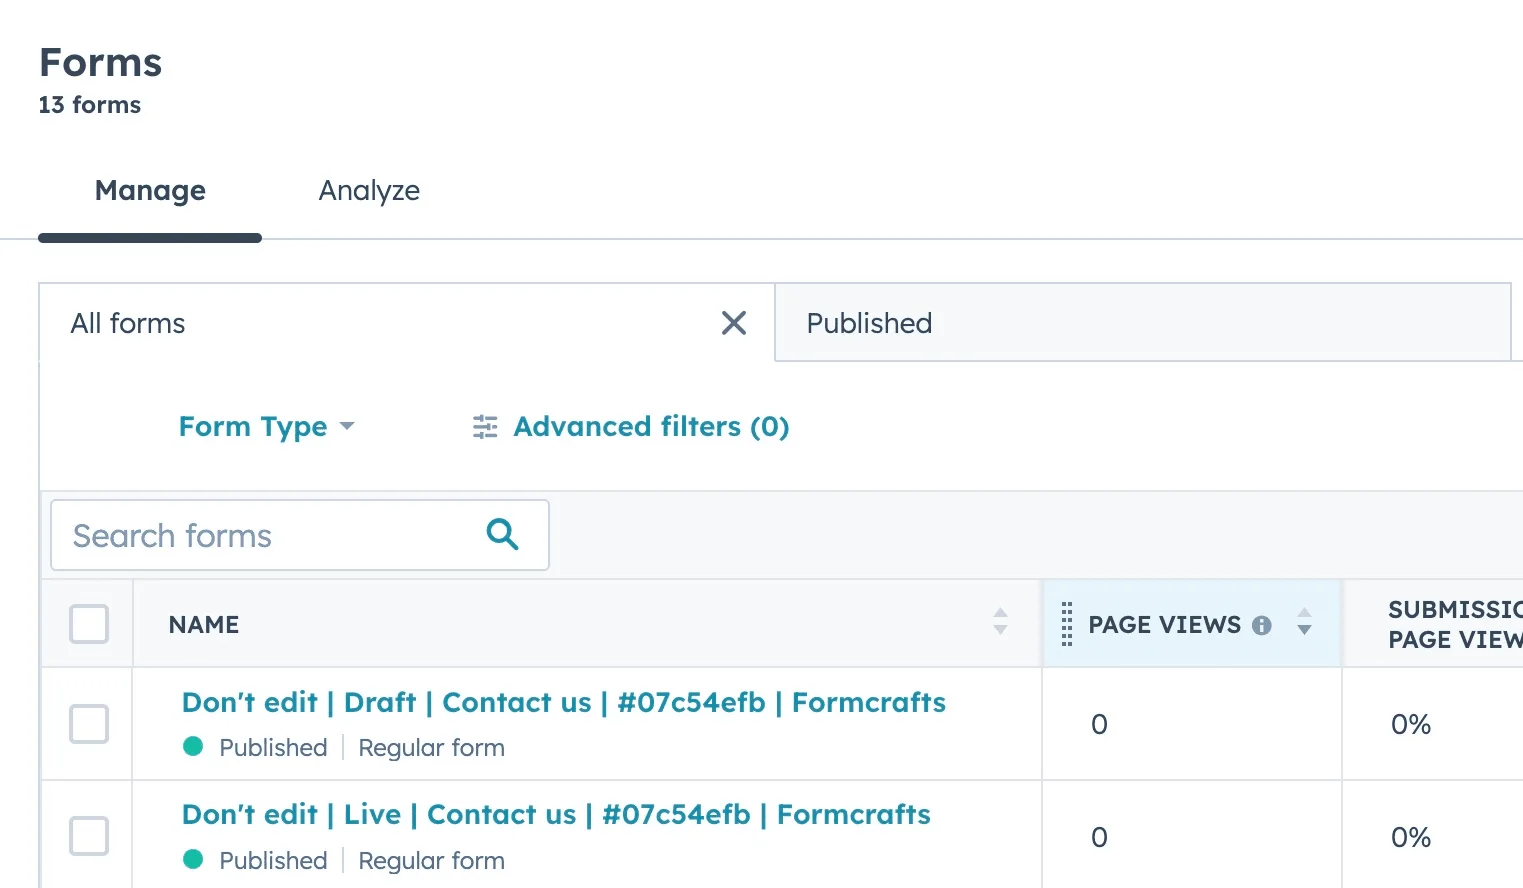
Read-only forms
When you create a form and use a HubSpot contact workflow, we create two read-only forms in your HubSpot account, which you can view in HubSpot under Marketing → Lead Capture → Forms.
One of these forms is a copy of your Formcrafts’ draft form, while the other one is a copy of the live form.
The forms in HubSpot should not be edited, since it can break your workflow.
The advantage of us creating read-only forms in HubSpot is that it allows you to use HubSpot automations ↗ on these read-only forms.
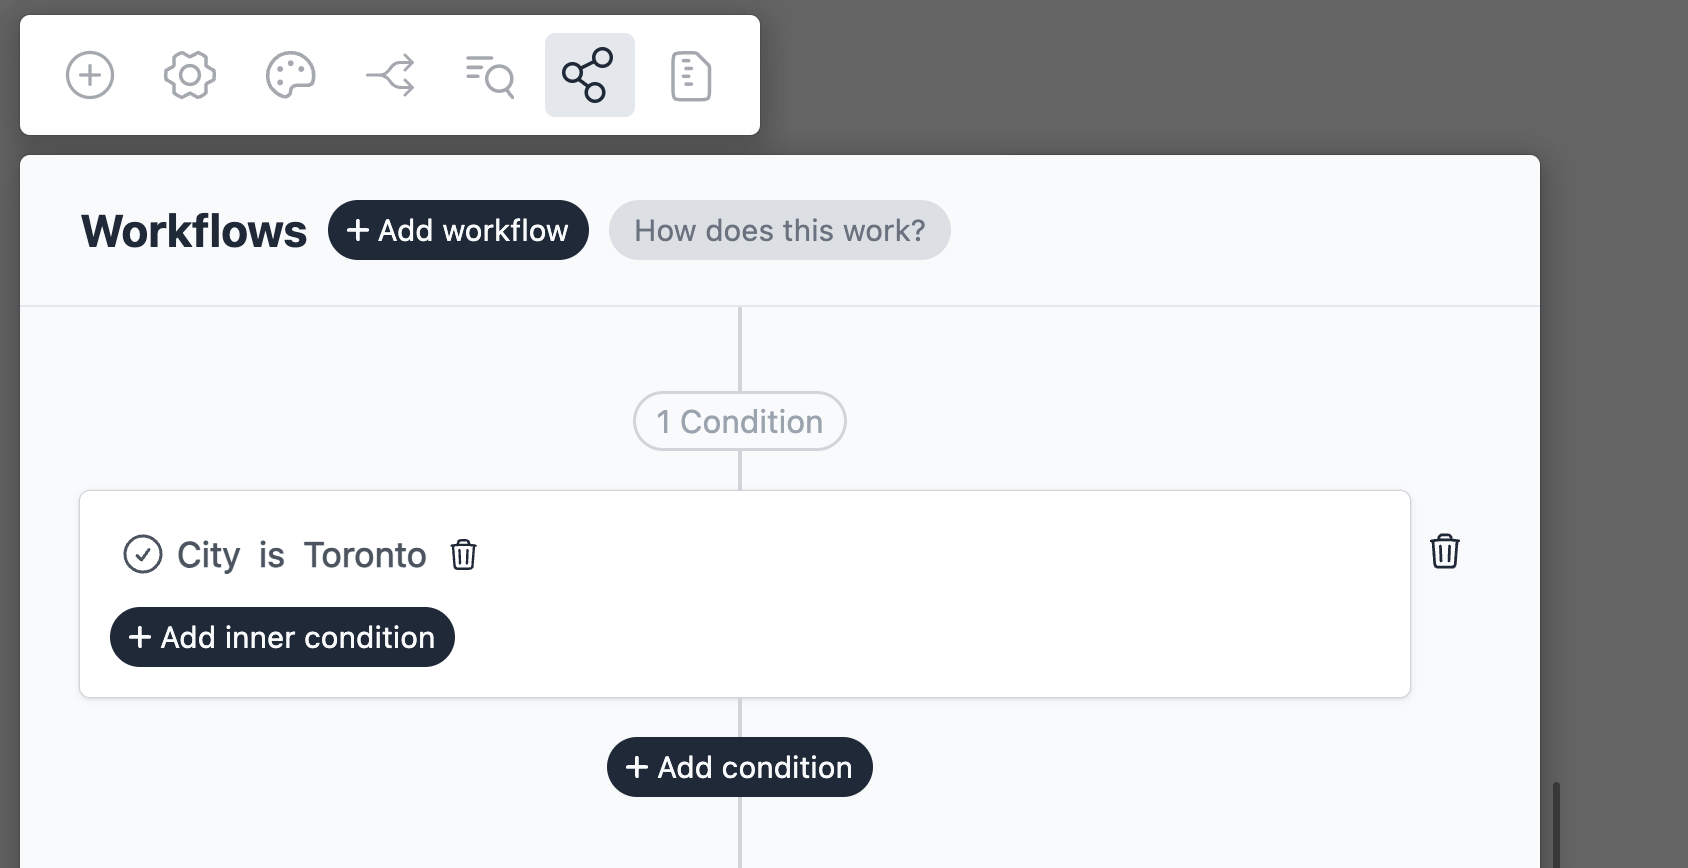
Conditional workflows
By default the HubSpot action(s) is triggered on each form submit. We can add conditions to our workflow to trigger the action(s) only when certain conditions are met. Edit your workflow and click on Add condition. Here you can add conditions, or even create condition groups.
Embed on a HubSpot page
You can embed this form on your HubSpot website or landing page. Learn more about embedding forms on a HubSpot page.