Prefill Forms
Introduction
Form prefill is a powerful feature that allows you to automatically populate form fields with data, enhancing user experience and streamlining data collection. This guide will walk you through everything you need to know about form prefill, from basic concepts to advanced implementations.
There are two types of prefill:
- Static prefill: Prefill data on form load, using URL parameters or hidden fields. This happens when the form is displayed to the user.
- Dynamic prefill: Prefill data based on user input, using dynamic lookups. This happens after the form is displayed to the user.
Here is an example of dynamic prefill using a dropdown field:
The user selects a contact record from a dropdown list. The form then fetches the contact’s email and phone number from Salesforce and pre-fills the form with this data.
Static prefill
Static prefill is the simplest way to prefill your form - it populates form fields before the user interacts with the form. This is useful for:
- Setting default values from the URL
- Personalizing forms based on known user data
- Carrying over information from previous steps in a multi-step process
There are two ways to prefill your form statically: using URL parameters, or using our embed library. Let’s look at each of these methods in detail.
URL parameters
You can pre-populate form fields using URL parameters. If you have a name field in your form, denoted by field1, you can prefill it by appending the URL with ?field1=John. The URL will look like this:
app.formcrafts.com/my-form?field1=JohnThis works with any number of fields. For multiple fields use this format:
app.formcrafts.com/my-form?field1=John&field2=Smith&field3=New+YorkNotice the format used here. The URL is first followed by a question mark ?, and then pairs of field names and values. The field name is followed by an equal sign =, and then the value. If the value has spaces, replace them with a plus sign. Each pair is separated by an ampersand &.
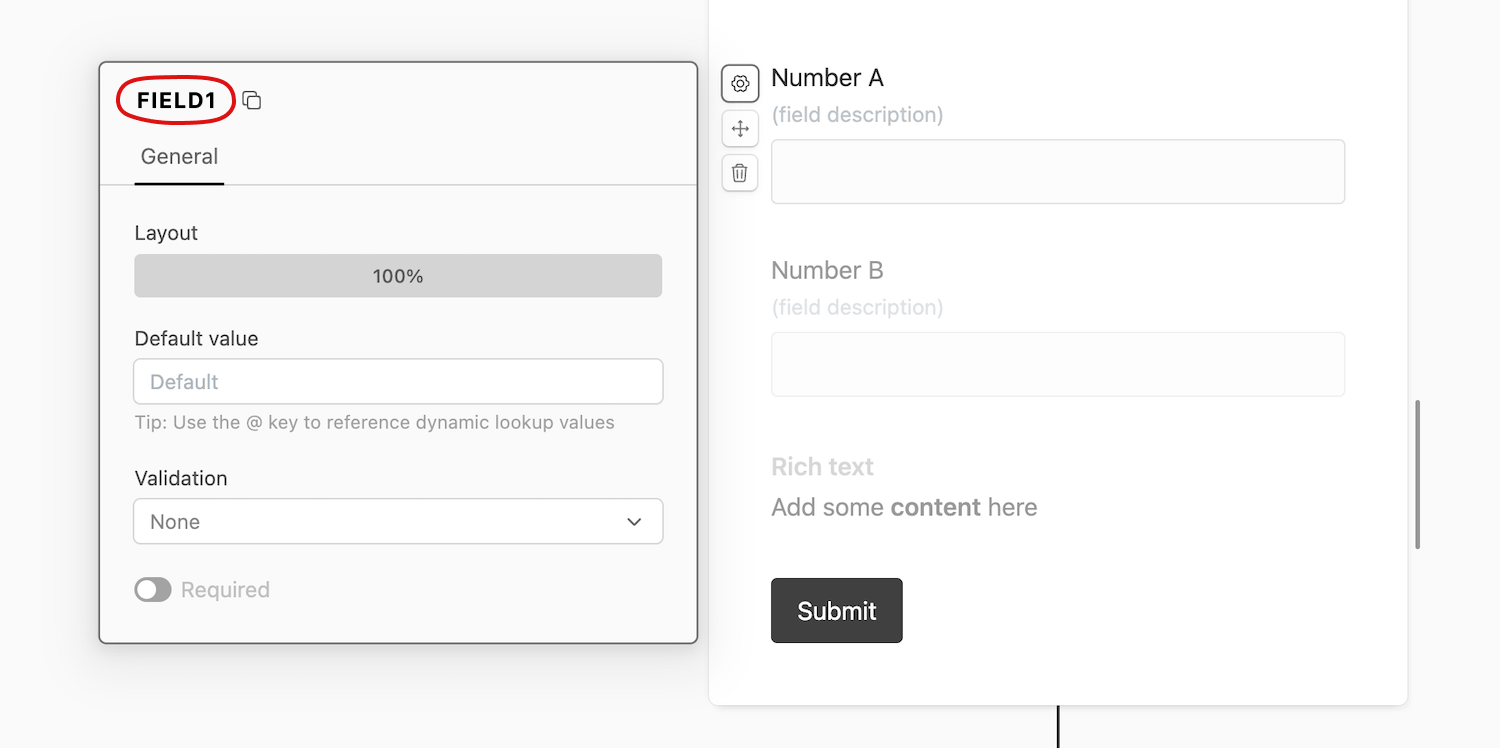
To make this work you need the field ID. You can find the ID of a field on the top-left corner of the field settings dialog in the form editor — which is accessed using the cog icon.

In order to prefill choice fields (like multiple choice, or dropdown), which may contain more than one option, you can use the following format:
app.formcrafts.com/my-form?field4[]=option1&field4[]=option2Note that these examples use the dedicated form links. However, this method will also work when your form is embedded on a page using the embed code. You would simply use URL parameter(s) on the parent page to prefill the form, example:
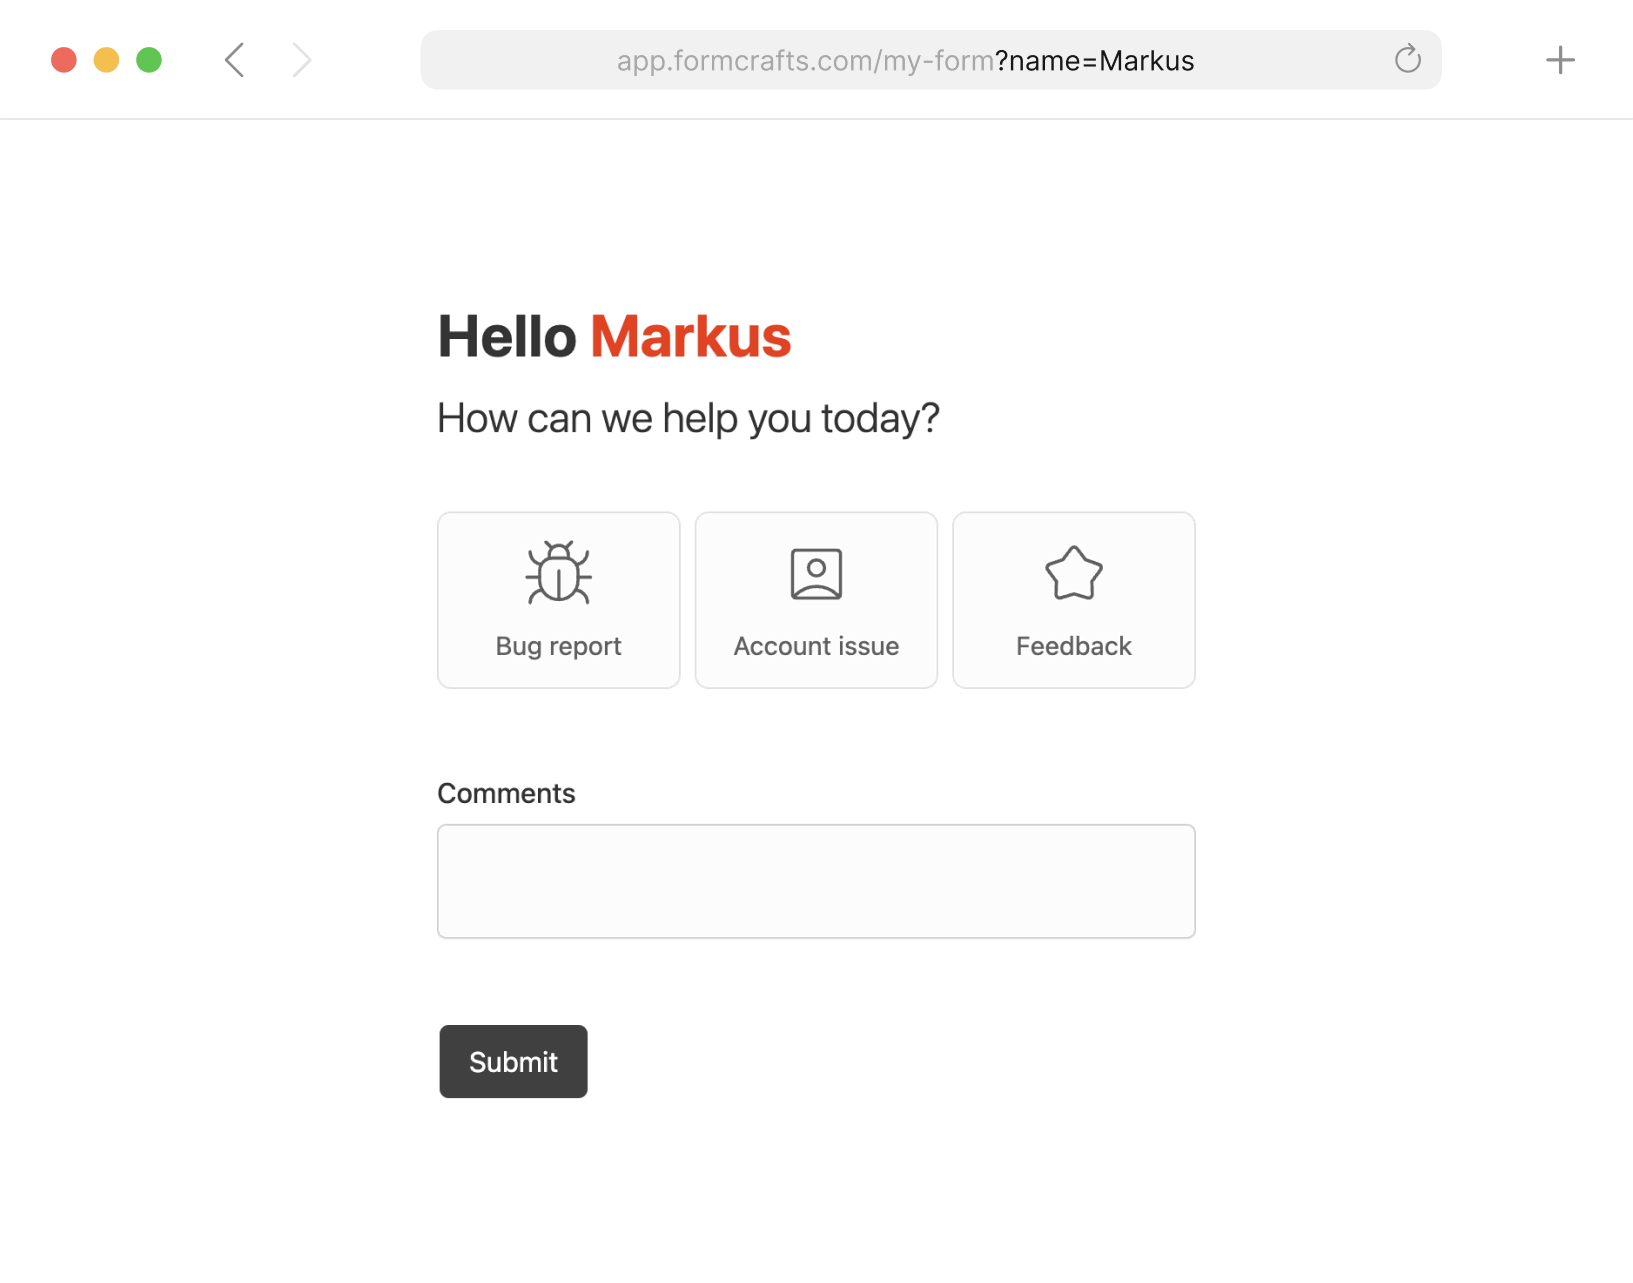
your-website.com/your-page?field1=John&field2=SmithYou don’t have to use the field ID. Pre-fill also works with the field label. If your hidden field is labelled name you can use ?name=Markus to prefill the field.
Here is an example of prefilling name and using that to personalize the form:

Embed library
If you are using Formcrafts’ embed library you can prefill your form using the values argument. This method is useful when the data is not readily available in the URL, but is available programmatically. You can learn more about Formcrafts’ embed library here.
Here is a simple example that renders the form, while pre-filling it with some information:
const myInlineForm = await createInlineForm({
	form: "form_key", // Your form key
	target: document.getElementById("element_id"), // Target element
	seamless: true, // Removes form border, shadow, and padding
	width: 500, // Max width of the form
	redirectWithin: true, // Keep redirect within form frame
	values: {
		field1: "Jack Smith",
		field2: ["Chocolate", "Vanilla"]
	} // Prefill values
});
Dynamic prefill
Dynamic prefill allows you to prefill your form after it is displayed to the user. This can either be in response to user input (via Lookup rules) or based on other actions.
Let’s explore how to use dynamic prefill using lookup rules, and then using the embed library:
Lookup rules
Lookup rules are a powerful way to prefill your form with data fetched from an external source. Formcrafts offers some built in lookup integrations (like Salesforce). Else, you can use a remote URL to fetch data.
Some examples on what you can achieve with dynamic lookups:
A currency conversion form that uses live exchange rates from an REST API to convert between currencies.
A feedback form that analyzes the sentiment of an open-ended field, and shows a follow-up question based on the sentiment.
A lead capture form that fetches the user’s first and last name from a CRM, based on their email address.
We recommend reading the dynamic lookup documentation to learn more about this feature.
Embed library
The embed library can pre-fill data either on load, or later on. Here is an example of loading a form using the embed library:
const myInlineForm = await createInlineForm({
	form: "form_key", // Your form key
	target: document.getElementById("element_id"), // Target element
	seamless: true, // Removes form border, shadow, and padding
	width: 500, // Max width of the form
});
Once the form is loaded you have access to the values method. This method allows you to prefill the form with data. Here is an example:
myInlineForm.values({
	field1: "Jack Smith",
});
Advanced scenarios
Linked forms
Our customers often create a two-form flow that goes something like this:
The first form collects basic information about the user, like their name and email.
The second form is pre-filled with this information, and asks for more detailed information.
Once the user submits the first form they are redirected to the second form. The second form is pre-filled with the data from the first form. This is what we call linked forms, and pre-fill is a key part of this feature.
Learn how to implement linked forms.
Read-only data
There are cases where you want to include some data in the form, but you don’t want the user to view or edit it. Some examples:
- A survey form with read-only agent ID.
- A linked form (like above) where the user should not be able to edit the pre-filled data.
- Another form that contains source data (like a quote) that should not be edited.
You can achieve this by adding a hidden field to your form. Pre-filling data into a hidden field works the same way as pre-filling a visible field. The only difference is that the user will not be able to view or edit the data.
Notes and special cases
Multi-step forms
When working with a multi-step form only a section of fields are visible at a time. If you prefill a field that is not visible, it will be pre-filled but not displayed to the user. When the user navigates to the next step, the pre-filled data will be visible. This, pre-fill is not limited to visible fields.
Precedence
Prefill data takes precedence over the data saved via auto-save form progress feature. For example, if the user visits a form at this url:
app.formcrafts.com/my-form?field1=JohnThe value of field1 will be John, even if the user has auto-saved data with a different value.
