Redirecting After Form Submission
Introduction
Form redirect takes your visitors to another web page once they have submitted a form. Redirects can be used to:
- Thank users for submitting the form
- Forward them to further resources
- Take them to a linked form
- Give them access to a resource
There are two ways to configure form redirect:
Default redirect
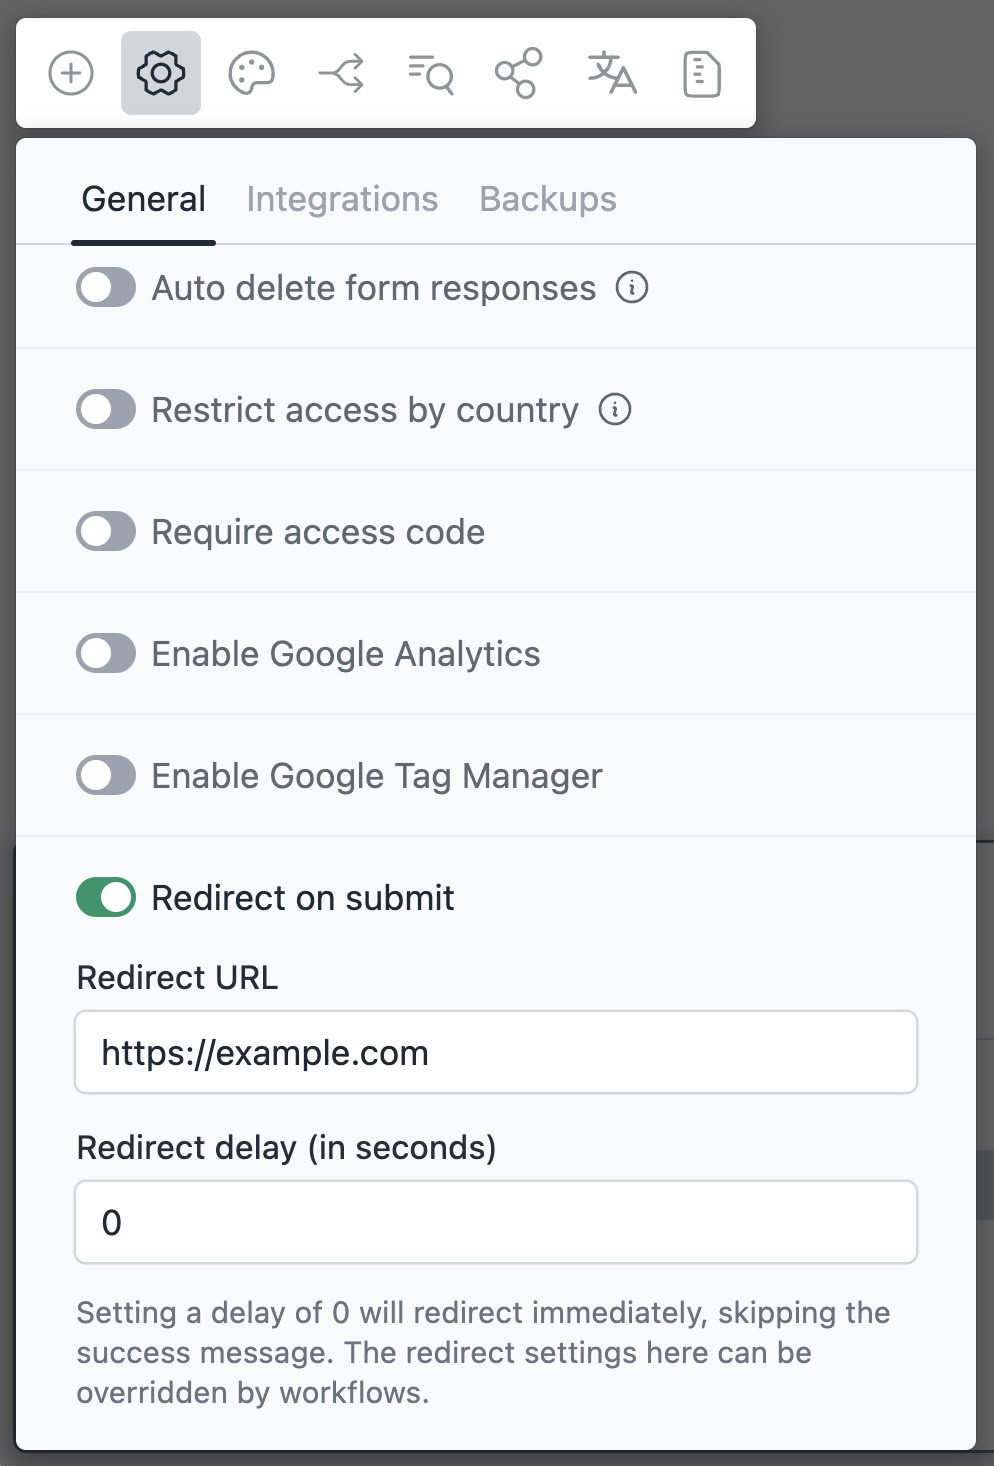
This option can be accessed on the form editor page, under Settings → General → Redirect on submit. Here you can enter the redirect URL and an optional delay in seconds.
Default redirect can be overridden by a workflow redirect.

Workflow redirect
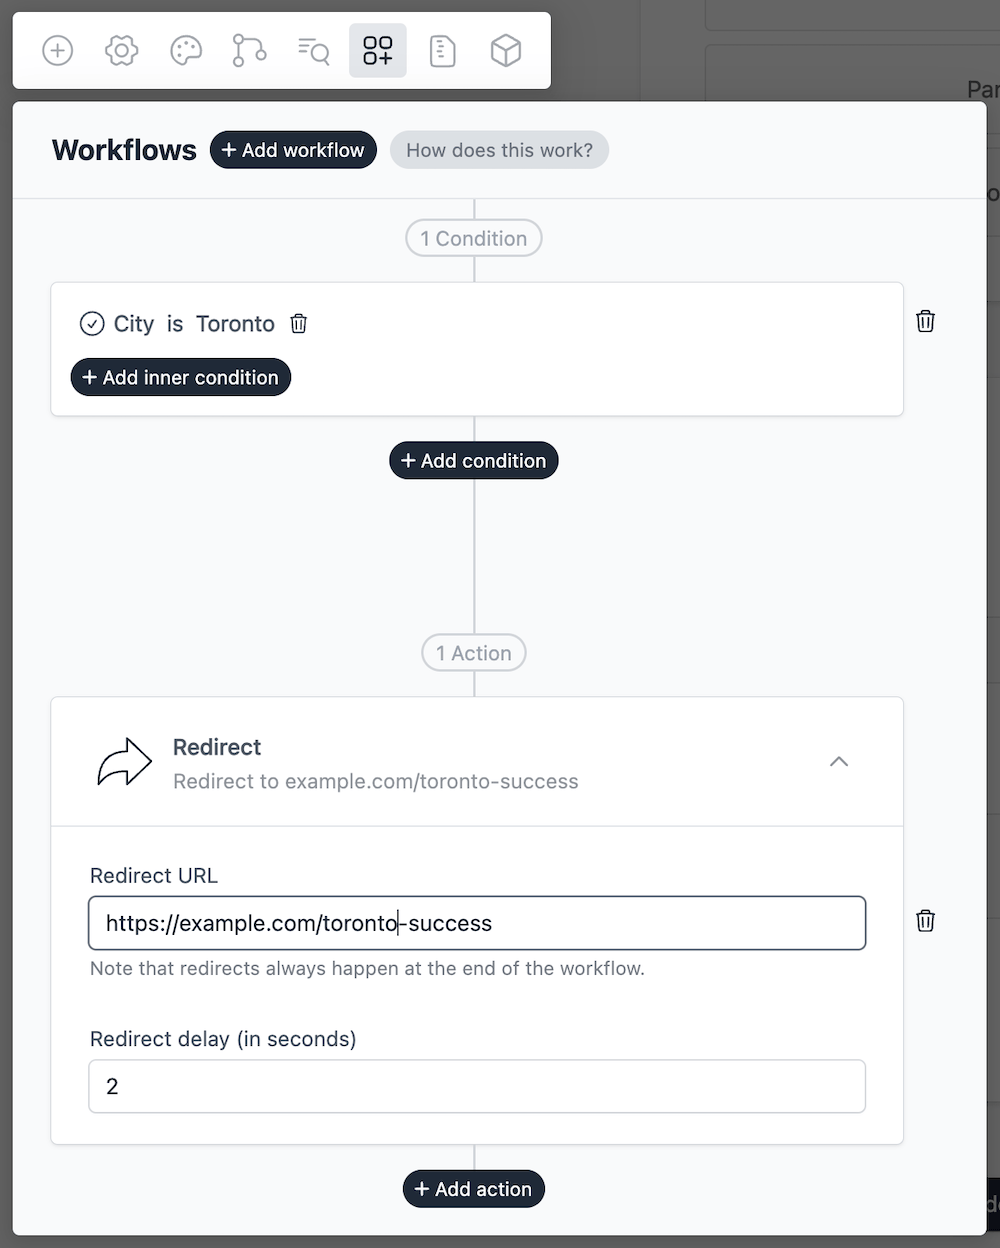
You can add workflows on the form editor page via Workflows → Add workflow.
Using form redirect via workflows allows you to configure conditional form redirects. You can redirect users to different steps based on their input.
For example, we want to redirect the user to example.com/toronto-success if the user selects Toronto in the city field.

You can create multiple workflows to redirect users to different steps based on their input.
If the conditions are not met, the form will use the default redirect URL.
Other notes
Understanding delay
The delay is the time in seconds before the redirect occurs. If you set the delay to 0, the redirect will happen immediately. Setting a delay number allows users to view the success message before being redirected. It is important to consider the length of the message when setting the delay.
When the delay is set to 0, no success message will be displayed.
Redirect for embedded forms
If you are using an embedded form, the redirect will happen on the parent page. For example, if you have embedded a form on example.com/form, the redirect will happen on example.com.
However, before you copy the embed code from the Share page you can enable the Redirect within iframe option. This will redirect the user to the specified URL within the iframe.
