How to Setup a Custom Email Sender Address
Default sender address
All email notifications from forms are sent using [email protected] as the sender address. However, you can change the sender address to a custom email address from your own domain, like [email protected].
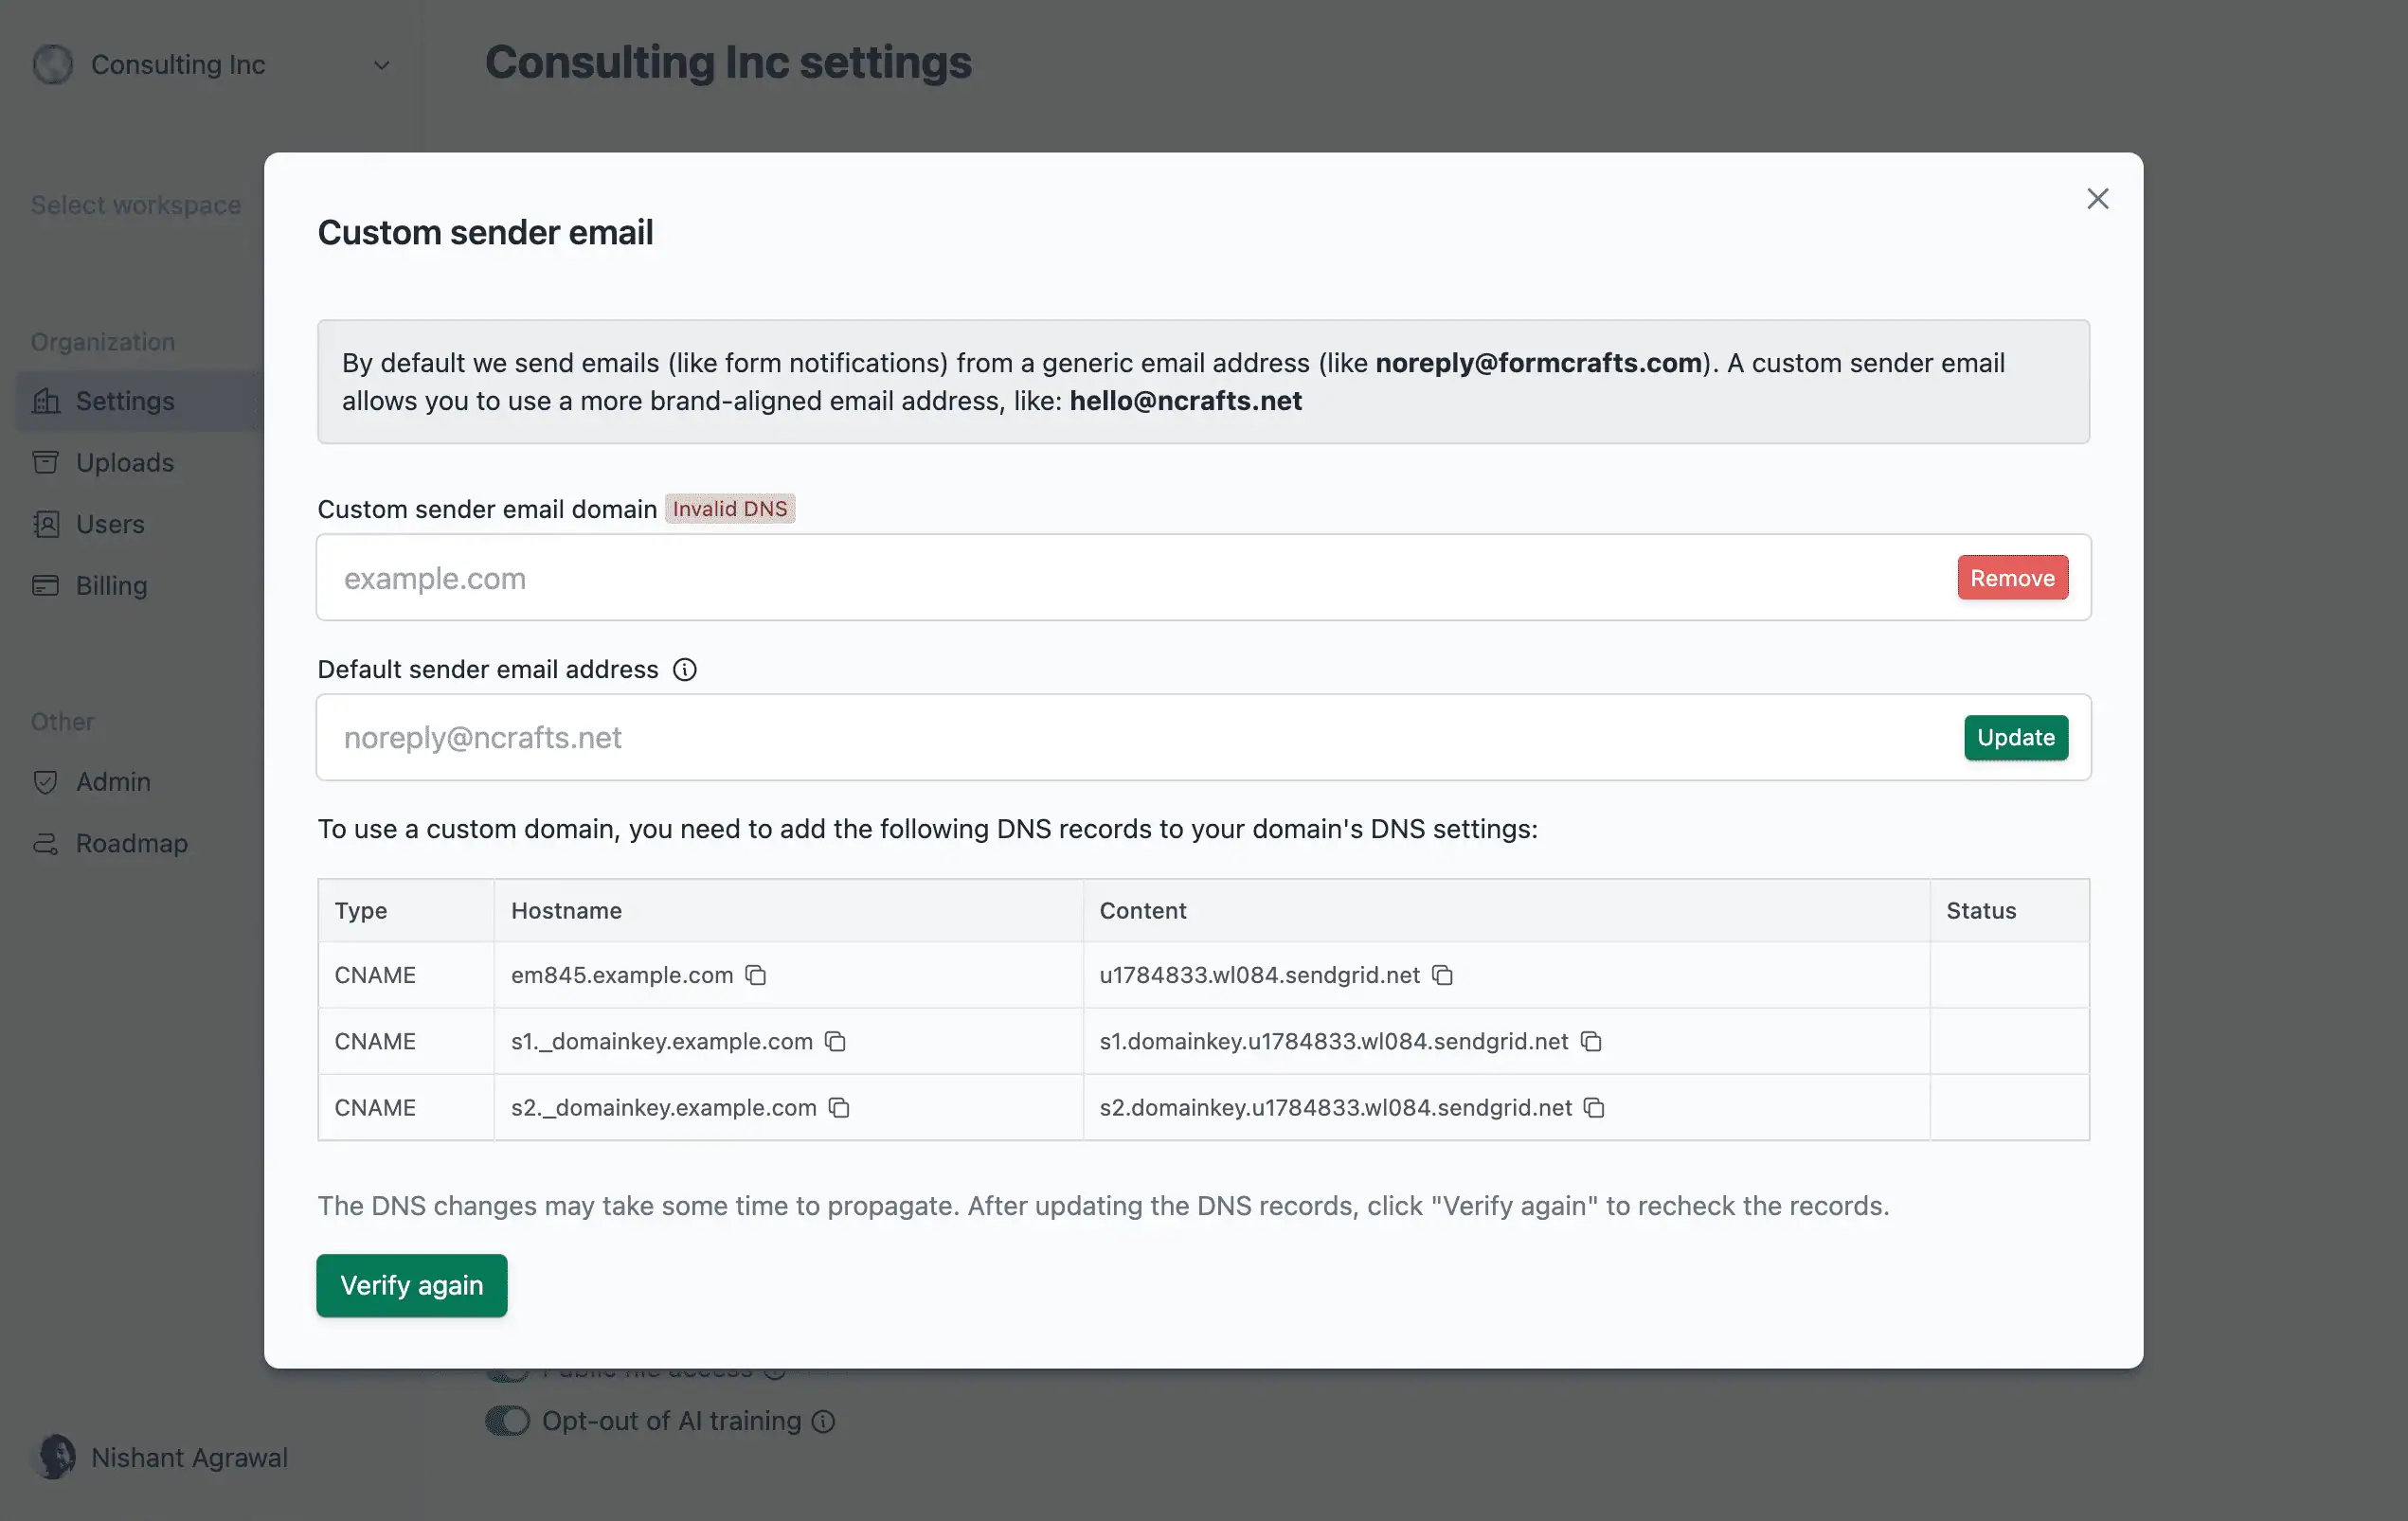
Custom email domain setup
You can set a custom email domain for your organization using these steps:
Visit Organization → Settings and click on Configure next to Custom email domain.
Enter the desired domain name and click on Next.
(Optional) Enter an email under Default sender email address. This email will be used as the sender address for all email notifications in the organization. Individual forms can override this email address.
Follow the instructions to add CNAME records to your domain’s DNS settings. You can modify the DNS settings from your domain registrar’s control panel, which could be Namecheap, Cloudflare, Porkbun, etc.
Once the CNAME records are added, click on Verify again. Note that it may take up to 6 hours after adding the records for the changes to take effect.
Once the email domain is verified, you will be able to add a custom sender email address on your email workflows.
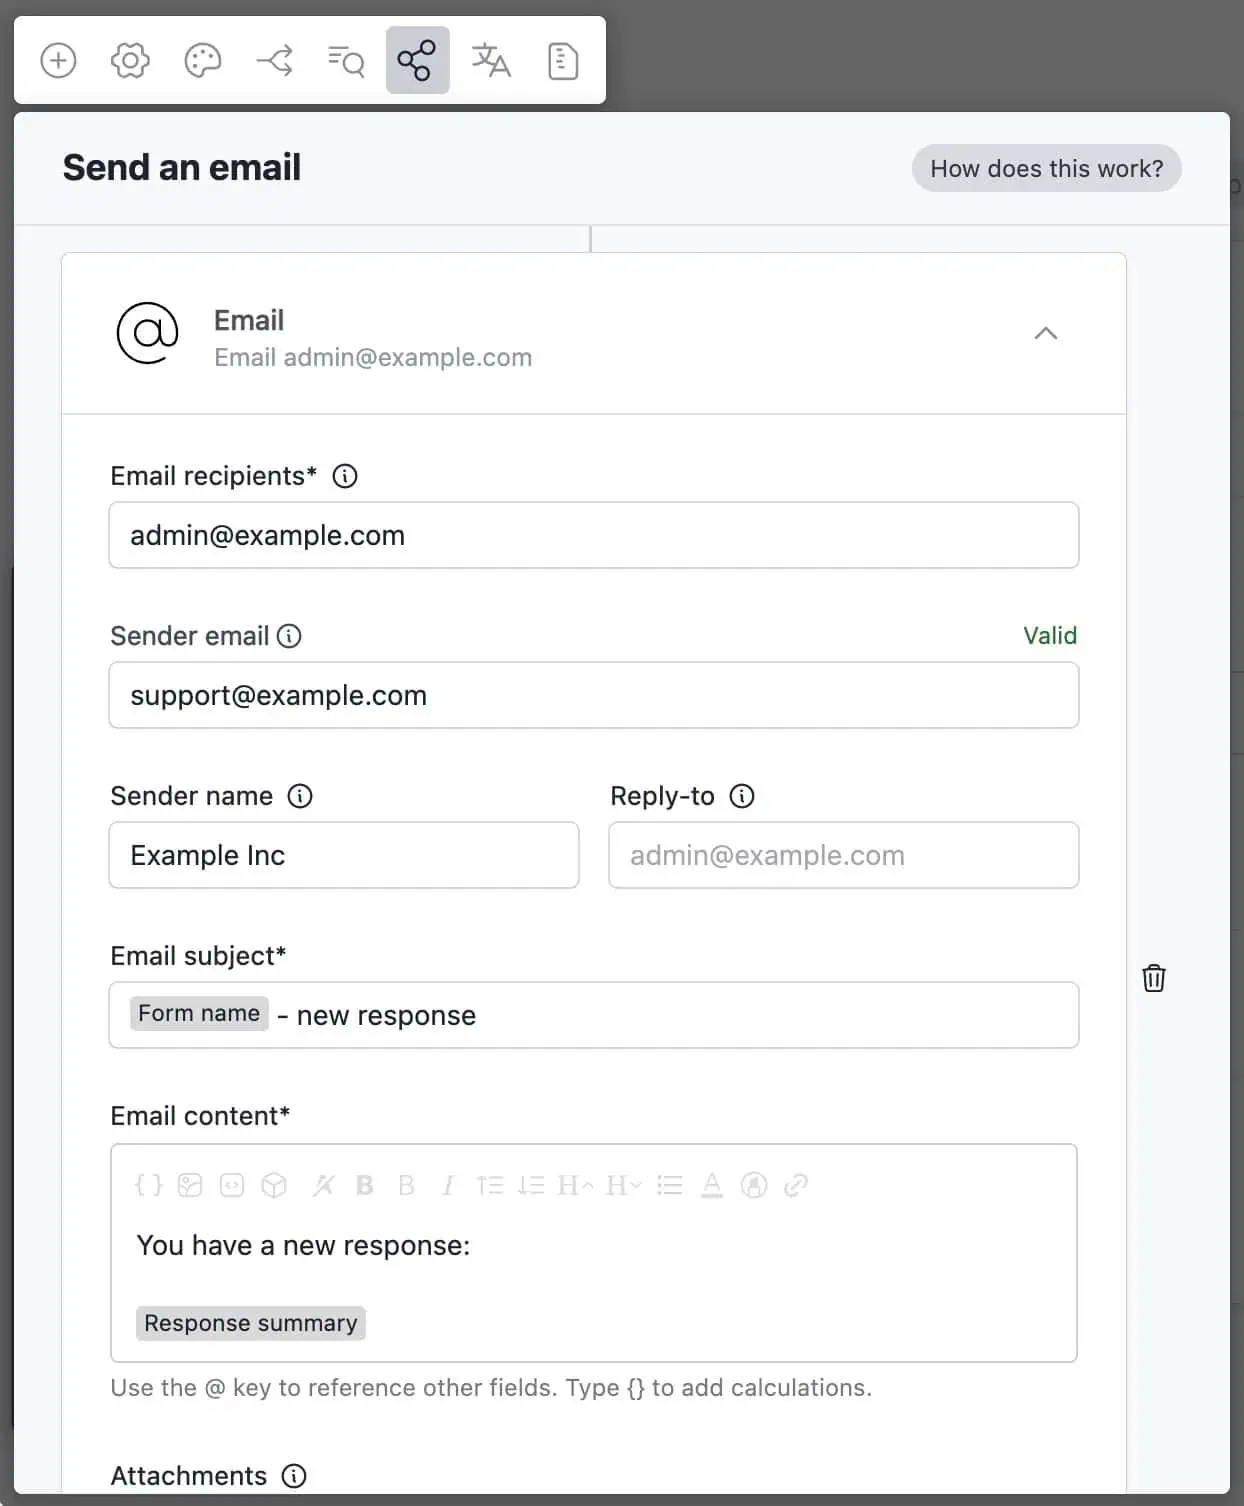
Change sender email on a form
If you want to override the default sender email address for a specific form, you can do so as follows:
Edit the form and click on Workflows
Edit the workflow for which you want to change the sender email address.
Edit the email action and change the Sender email to the desired email address. The domain of this email address must match the custom email domain configured for your organization.
Publish the changes.
The new sender email address will now be used for all email notifications sent from this form.