How to Generate PDFs for Salesforce Forms
FormCrafts allows you to create or update records on form submissions. You can also generate a PDF based on this response data, and attach that PDF to the record. PDFs can also be sent as file attachments on form notification emails.
This feature is designed to make record-keeping and documentation easier, more efficient, and more accessible, both inside and outside Salesforce. Here's how it works and how you can leverage this new feature in your operations.
The Power of PDFs in Salesforce
Before we walk you through the process, let's delve into why this new feature is a game-changer for Salesforce users. The ability to generate PDFs for Salesforce forms brings several benefits:
- Efficient Record-Keeping: PDFs allow for straightforward, tangible record-keeping, making it easier to organize and track submissions.
- Enhanced Documentation: PDFs provide a reliable snapshot of the information submitted at the time, ensuring an immutable, accurate record that can be beneficial for future audits or reviews.
- Improved Accessibility: PDFs can be accessed without needing to log into Salesforce, making it easier to share information with stakeholders who might not have Salesforce access.
- Streamlined Communications: By attaching PDFs to email notifications, you can share important information instantly and efficiently.
Now, let's move onto the step-by-step guide on how you can generate PDFs for your Salesforce forms using our form builder.
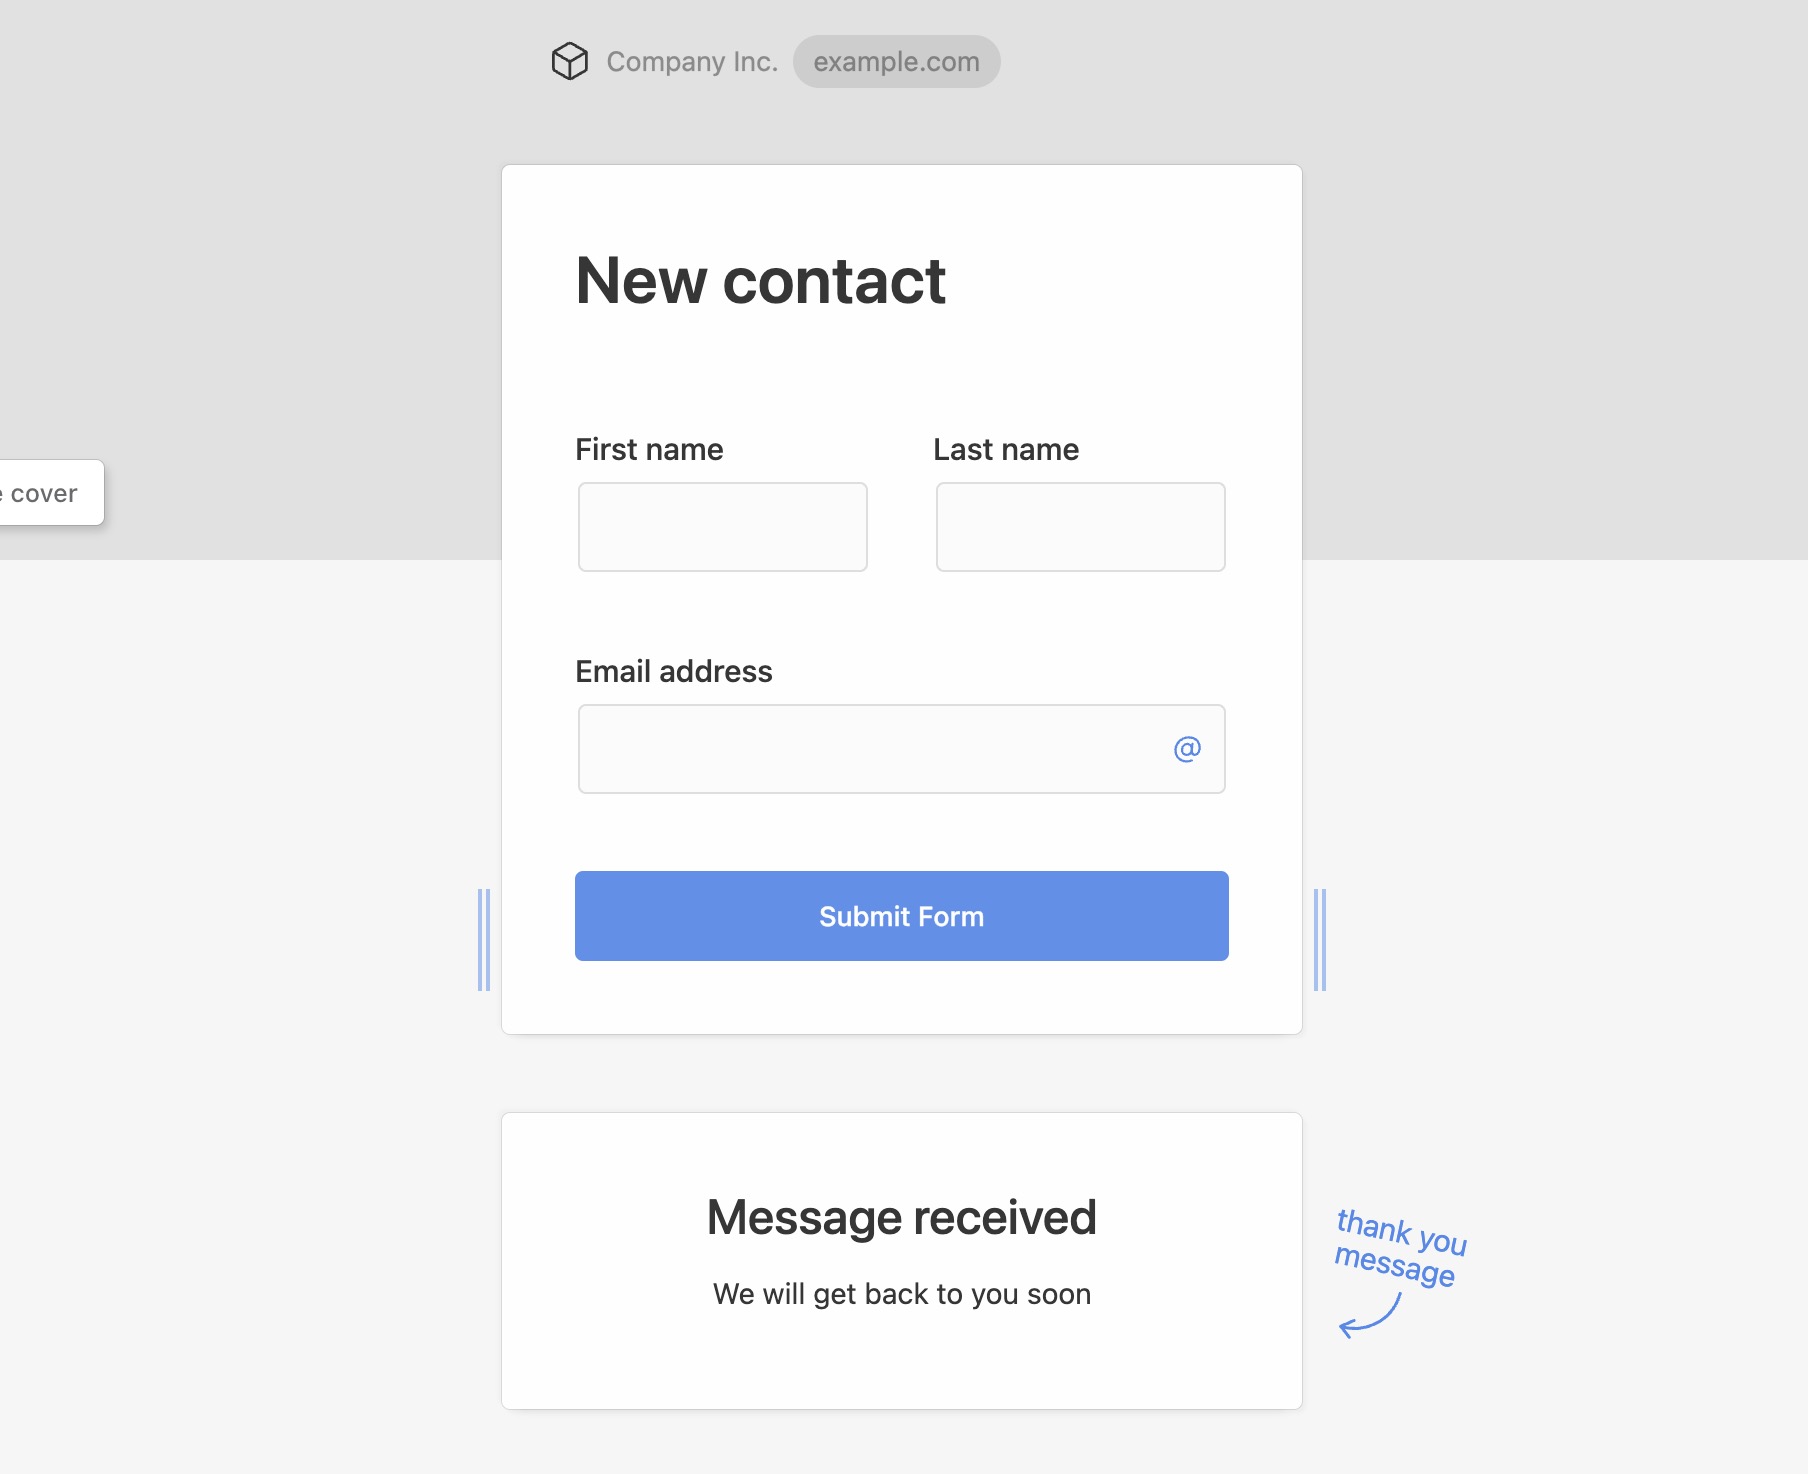
1. Create a new form
Create a free FormCrafts account using this link. In your FormCrafts dashboard click on New Form -> Blank Form. Enter the name of your form and hit Enter. Once the form has been created you will be redirected to the form edit screen. Here add some fields to your form via the Add Field button on the top-right corner.
2. Connect to Salesforce
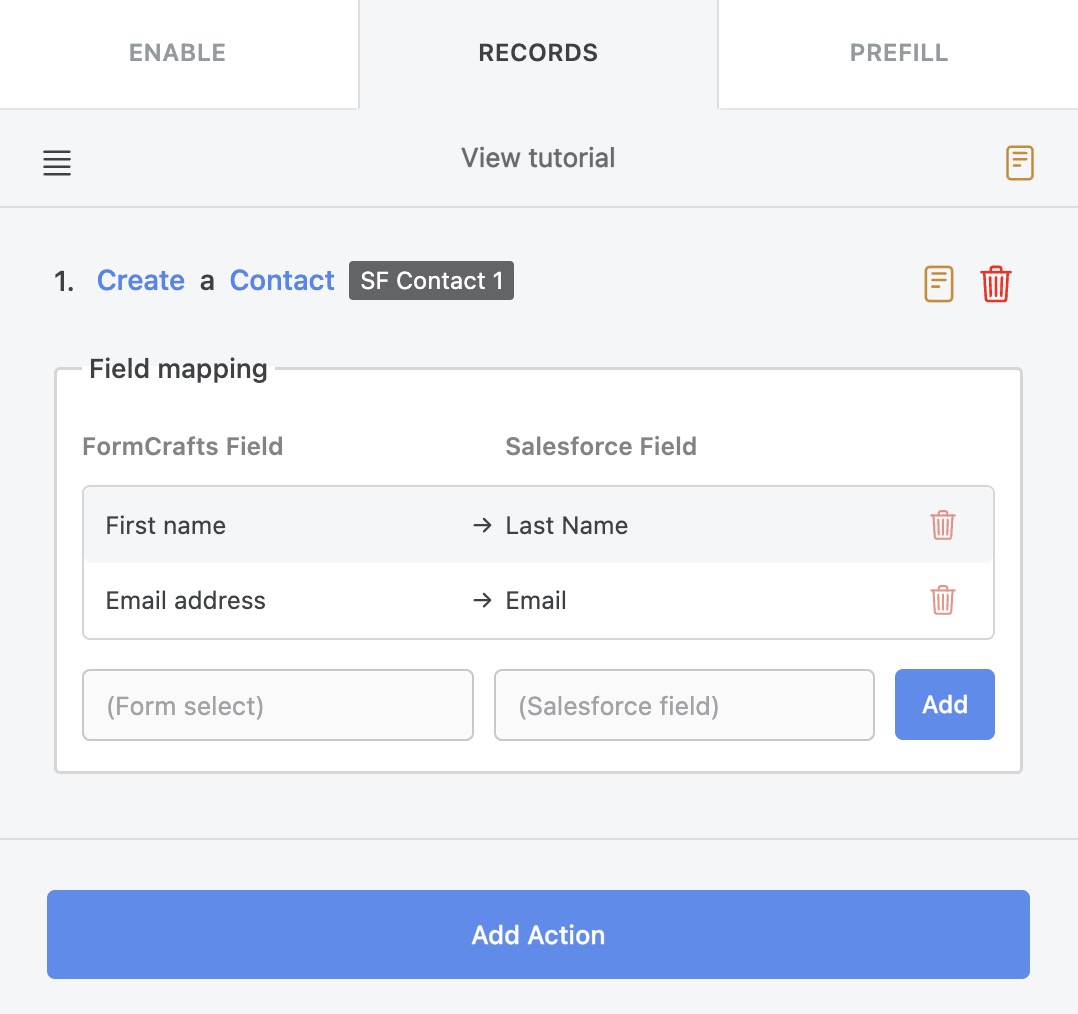
Our next step is to connect to our Salesforce organization, and then configure FormCrafts' Salesforce integration to create a new form lead on each response. Click on the Salesforce icon on the top-left corner of the screen and connect your organization.
Once you have connected our organization click on the Records tab. Here click on Add Action. Our action would be Create a Contact. In the next step we have to map our form fields to their Salesforce counterpart, as below:
3. Attach PDFs to records
The above steps have allowed us to create a form in FormCrafts, and enable Salesforce on the form so a new contact record is created on each form submission. The next step is to attach a PDF to the record on each submission as well.
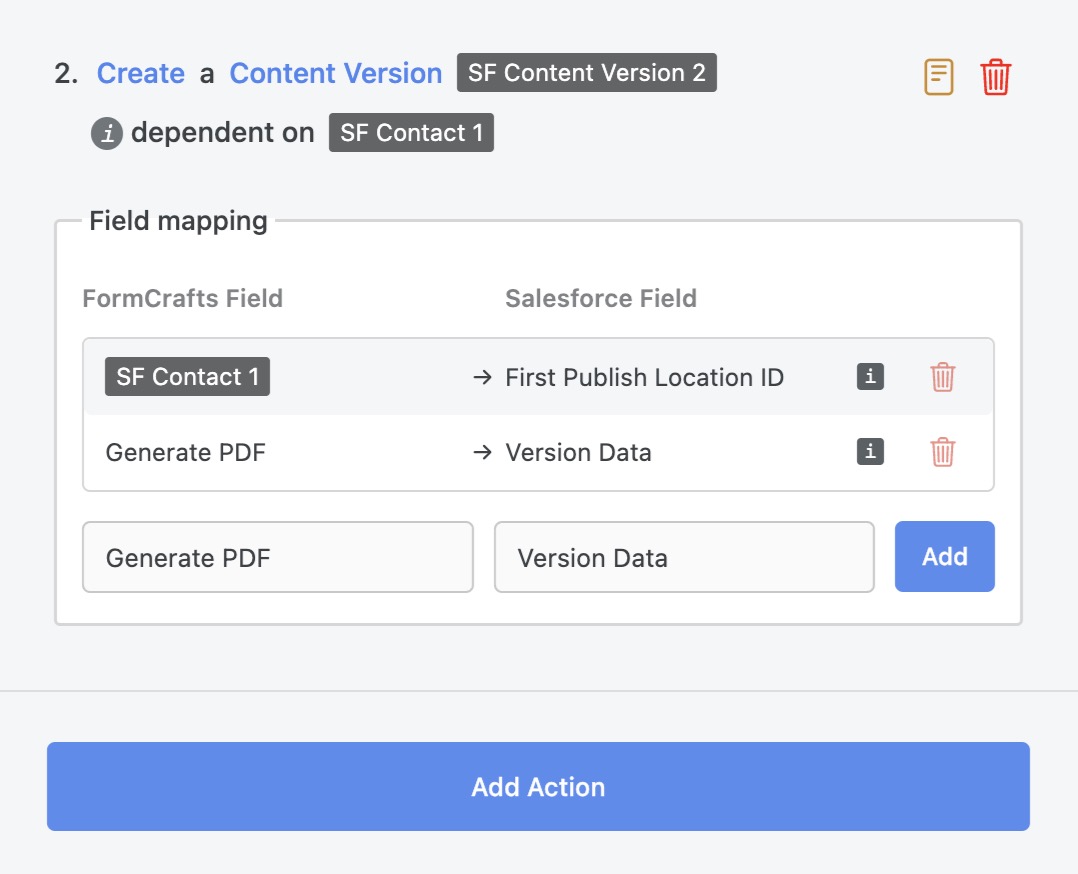
We will now add another Action - Create a Content Version.
Under field mapping we will first map our Contact action to First Publish Location ID and a special variable called Generate PDF to version data. Our field mapping for this action should look like this:
That's it. This will generate a PDF for each response and attach it to the record.
4. Attach PDFs to emails
Generated PDFs can also be attached to emails. To do so click on Settings (top-left corner of the screen) -> Emails -> General Email Settings and check the option Attach generated pdfs to emails.