How to Create a Stripe Subscription Form
In this tutorial, we will learn how to use a drag-and-drop form builder to create a hosted form to accept recurring payments via Stripe.
Our Stripe subscription payments form can be shared with a direct link, which can be customized:
example.formcrafts.com/subscribe
We can also embed the form on any website inline or as a popup form.
1. Create products and prices in Stripe
Your Stripe dashboard allows you to create products and prices. Products define what you sell and Prices track how much and how often to charge. FormCrafts uses the Prices defined in Stripe to sign up your customers, instead of asking you to re-configure them in the form builder. If you have already configured products and prices in your Stripe dashboard you can go to Step 2.
To create new products and prices, head over to your Stripe dashboard and go to Products, and add products and prices for them. Say you want to subscribe people to monthly tea and coffee delivery. Your two products would be Coffee and Tea. For each product, you can create Prices, say a price item Sencha for Tea, with a monthly price of $20.
You can learn more about Stripe products and prices here.
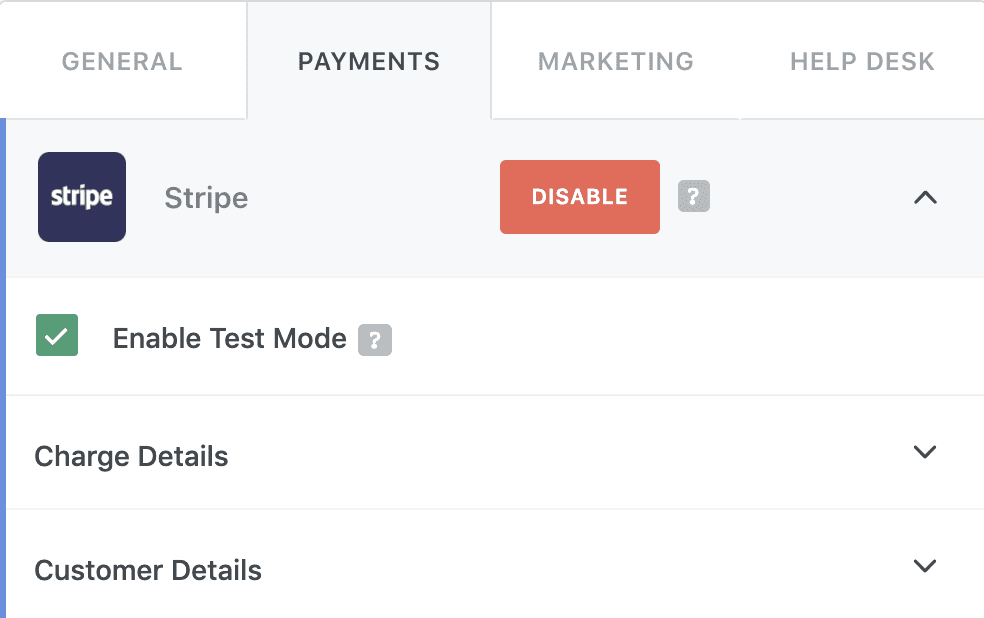
Note: Stripe has a live mode and a test mode. If you have created products and prices in Stripe's test mode, you need to enable Stripe test mode on your form, via Add-Ons -> Payments -> Stripe -> Enable Test Mode. When you are ready to go live with your form, uncheck Enable Test Mode and swap out the test mode price IDs with live mode price IDs. We will learn more about price IDs below.
2. Create a new form and enable Stripe
Now, on to our subscription form. Create a free account on FormCrafts, if you don't have one. On your dashboard click on New form -> Blank form.
Before we add fields to our subscription form, we will enable the Stripe addon via Addons -> Payments -> Stripe.
Check Enable Test Mode for now. Note that products and prices created in test mode in Stripe are only available in test mode, and vice versa for live mode.
3. Add fields to the subscription form
We will now add some fields to our Stripe form.
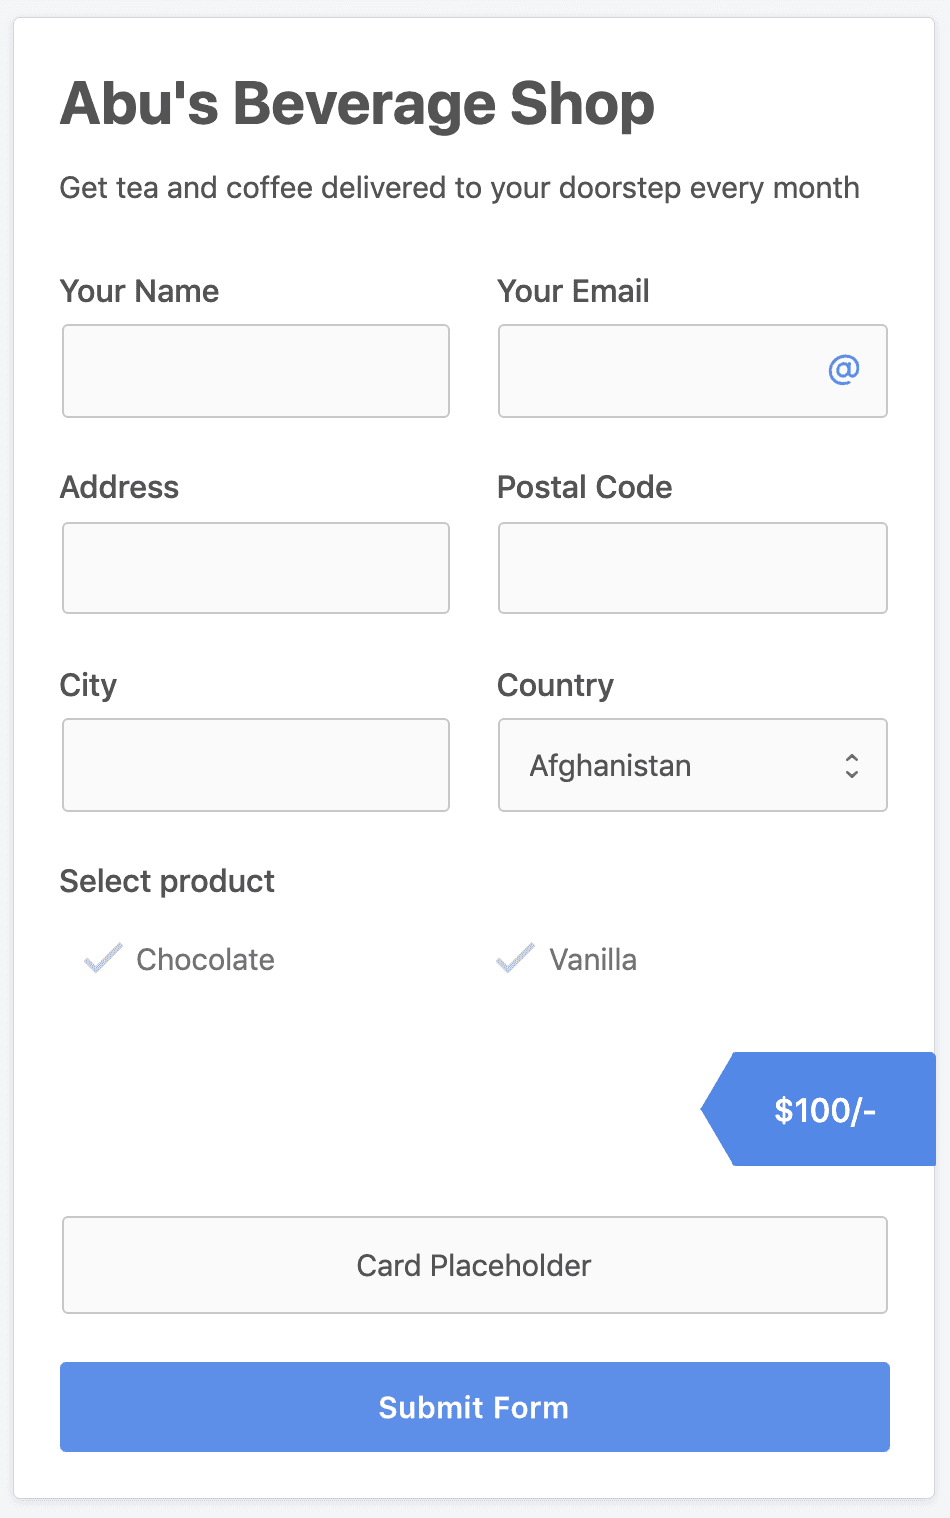
Go to Add Fields, and add a couple of one-line-text fields and label them: Your Name, Address, Postal Code, and City. Also, add an email field, a checkbox field, and a submit field.
Lastly, add a Stripe field via Add Fields -> Payments -> Stripe.
3. Configure a fixed subscription plan
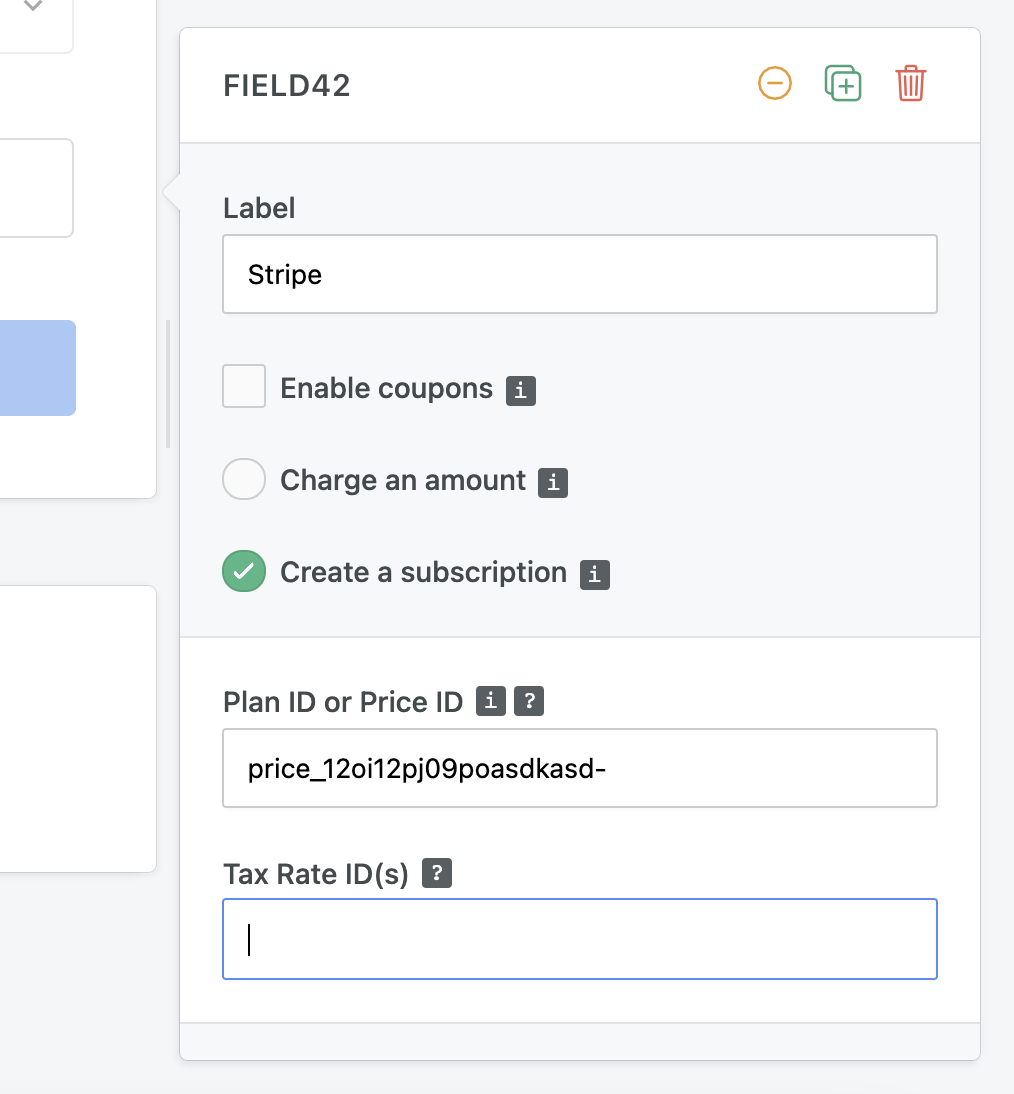
Let's say the goal of our form was to always subscribe users to the monthly Sencha tea plan. In this case we don't have to ask the user for their input. To configure your Stripe subscription form for a fixed plan, edit the Stripe field and enter the price ID of that plan under Plan ID or Price ID.
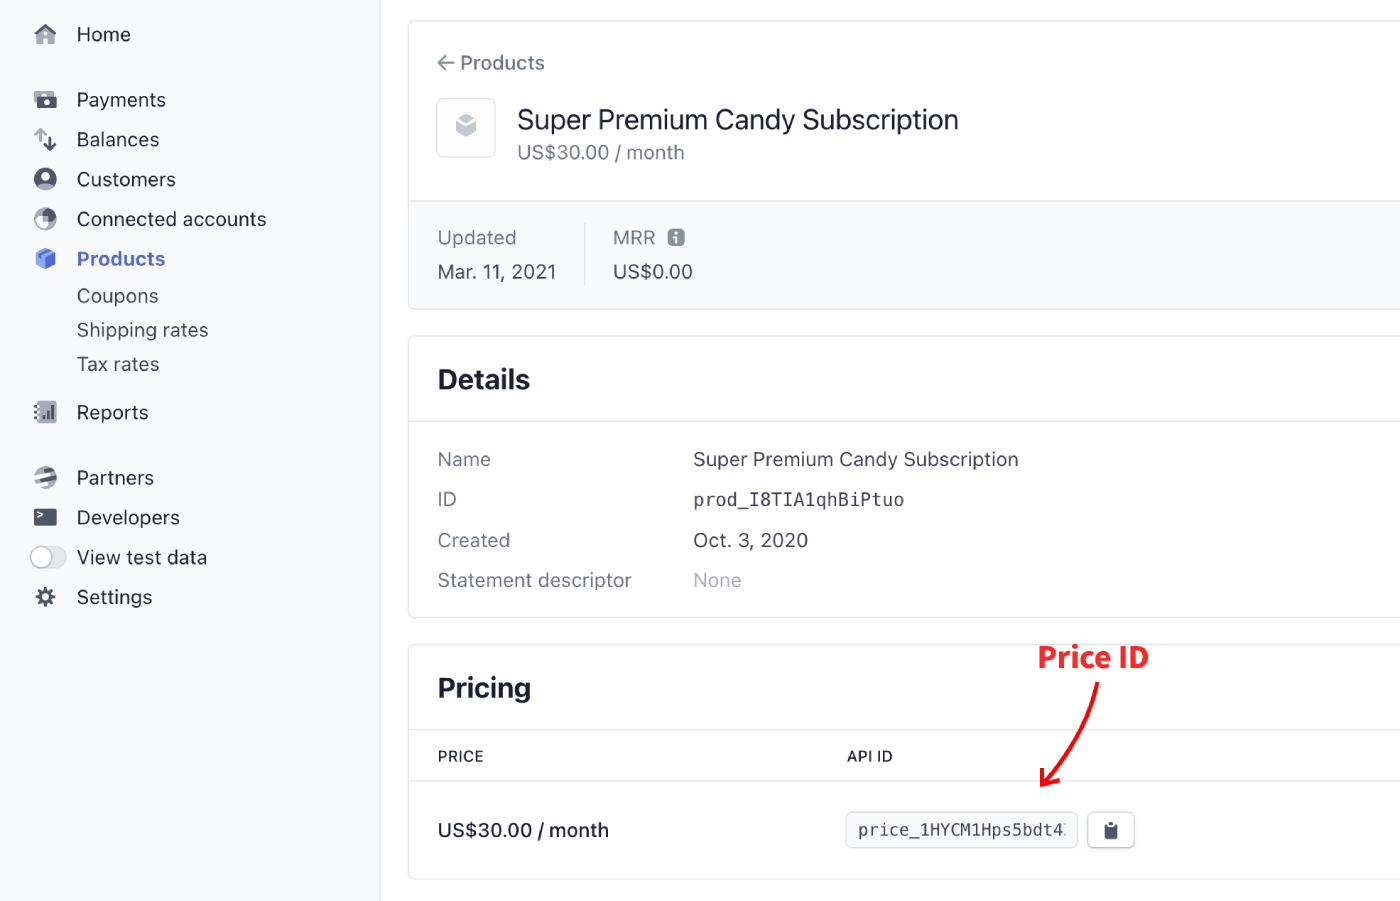
To find the Price ID click on Products on your Stripe dashboard. Select a product from the list, and look under Pricing.
4. Allow subscription plan selection
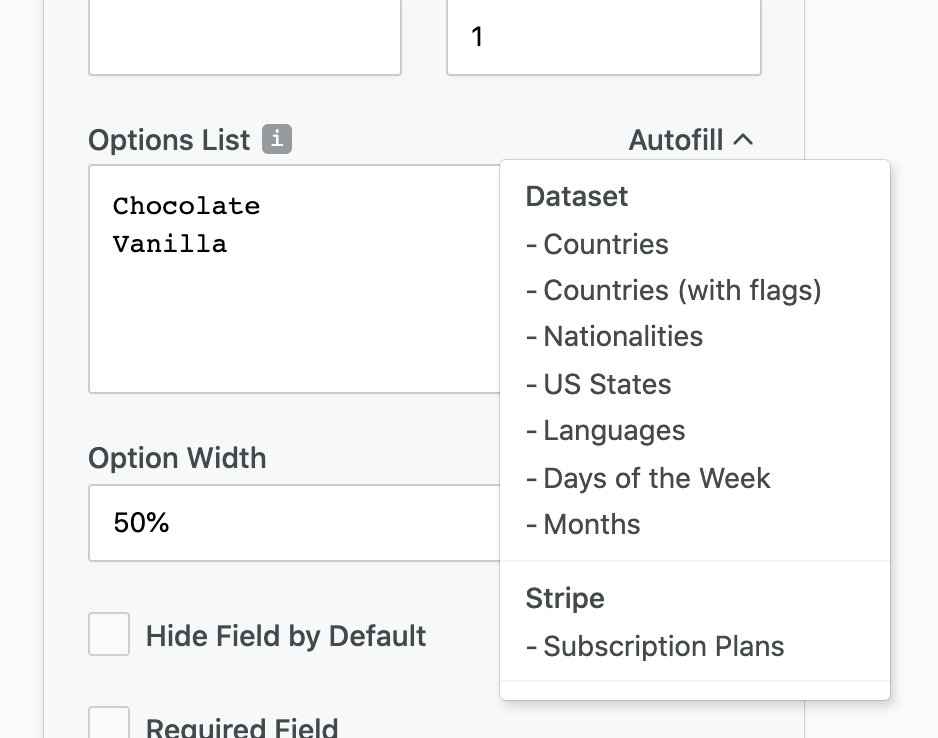
What if we want to ask the user what type of subscription plan they want to subscribe to? To do so we will add a checkbox field that allows users to select from different plans. To add a checkbox field go to Add Field -> Basic -> Checkbox.
The options in a checkbox field use this format:
Value==Text
The value for each option would be the Plan ID or Price ID and the text would be how we want to describe the plan to the customer. For example:
price_12oi12pj09poasdkasd==Sencha tea subscription ($20 a month)
We can find Price IDs for each price using the method described in the above step, or we can skip manually entering the options via Autofill -> Stripe -> Subscription Plans.
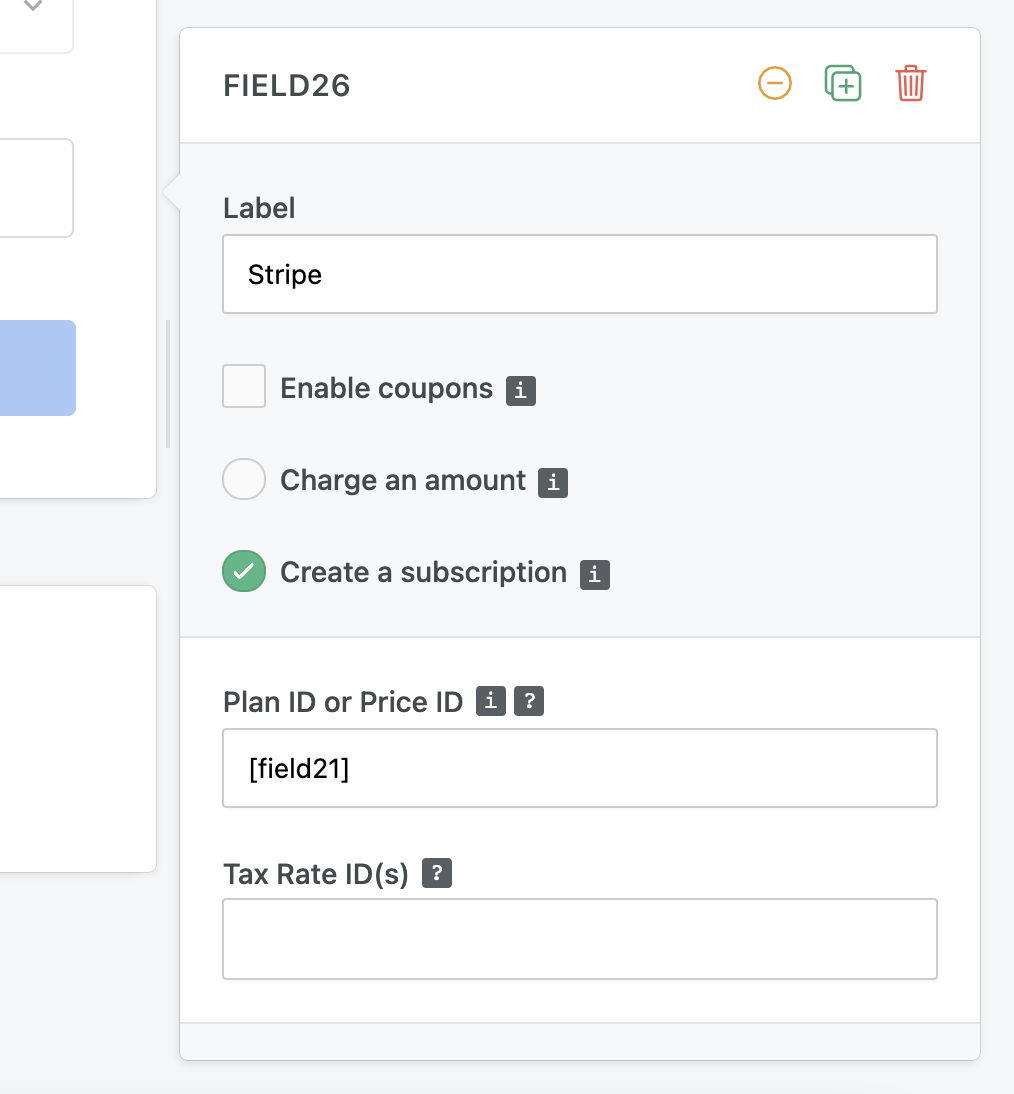
Our checkbox field is now configured to ask for the plan. Next, we need to link this checkbox field with the Stripe field. Note the field ID of our checkbox field - say it is field21. Now edit the Stripe field and enter this field ID in square brackets under Plan ID or Price ID.
5. Configure customer info
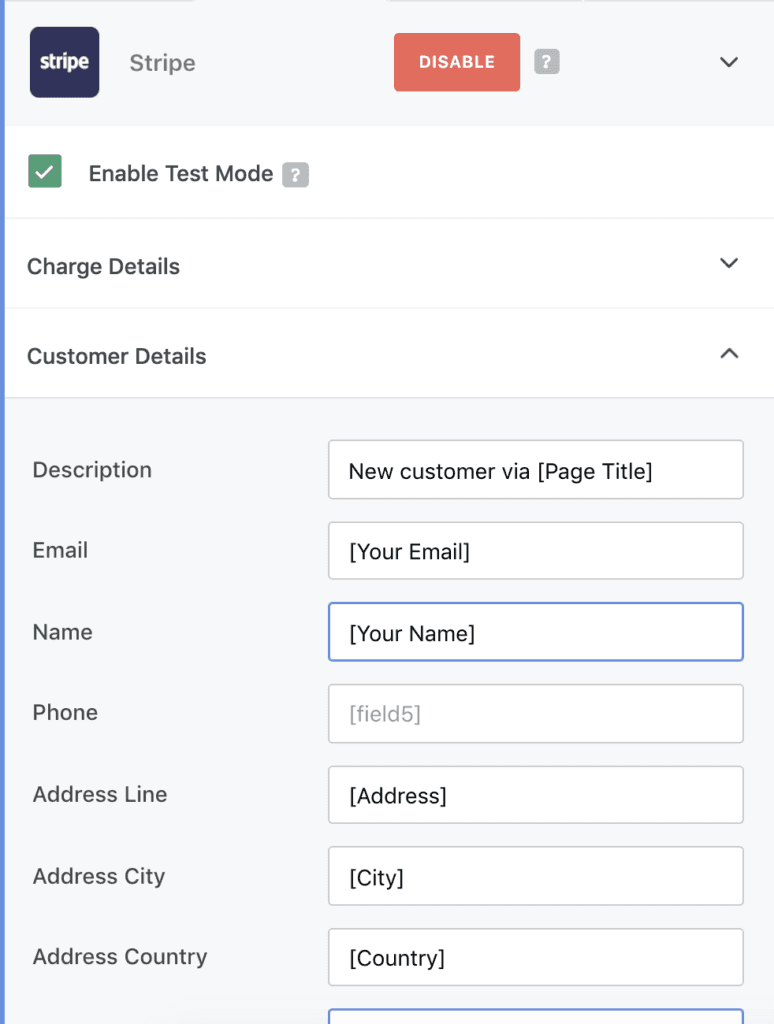
Remember the personal information fields we added initially? Those are saved in FormCrafts but we also want them to be saved in Stripe against that customer.
Go to Addons -> Payments -> Stripe, and click on Customer Details. Here we can map our form fields to their Stripe counterpart, using field labels.
6. Test the form
Our form is ready. Click on Preview (top-right corner). Since the Stripe addon is in test mode we can simulate a payment using a test card number: 4242 4242 4242 4242
You can learn more about card testing here.
Once you are ready to go live, head back to the form edit page, go to Addons -> Payments -> Stripe and uncheck Enable Test Mode. Also, replace the test mode Price IDs with live mode Price IDs.
7. Other Stripe subscription form features
Stripe form coupons
FormCrafts has support for coupons. Just like products and prices, you need to configure the coupons in your Stripe dashboard. To allow accepting coupons on the form, simply edit the Stripe field and check the option Enable Coupons.
Stripe tax rates
FormCrafts allows you to apply tax rates on your subscription plans. You can apply a fixed tax rate, or a variable tax rate based on some parameters. Learn more about using tax rates on your Stripe subscription form.
Stripe form templates
There is so much more you can do with Stripe subscription forms created in FormCrafts: signup customers for multiple subscription plans, offer add-ons, etc ... View our template gallery for inspiration.