Web-to-lead is a tool offered by Salesforce that generates an HTML form which can capture visitor information, and store that in Salesforce as a new lead. Once the lead is in, Salesforce can then score, qualify, and route it to the correct reps.
It is available as a part of Service Cloud, or Sales Cloud. It is a time-tested lead capture tool, and is fairly easy to setup.
In this detailed guide we will cover all aspects of web-to-lead forms (along with some enhancements):
- Setup and customization
- Understanding the HTML code
- Web-to-lead in action
- Debugging the form
- Adding form styling
- Adding form validation
- Lead assignment
- Common questions
- Pros and cons
Setup and customization
If you are using Salesforce lightning, go to the Setup page, and enter Web-to-lead in the Quick Find box. You will be able to see the Web-to-lead menu item under Marketing.
If you are using Salesforce classic Web-to-lead is available under Setup → Customize → Leads.
Once you are on the web-to-lead setup page click on Create Web-to-lead Form.
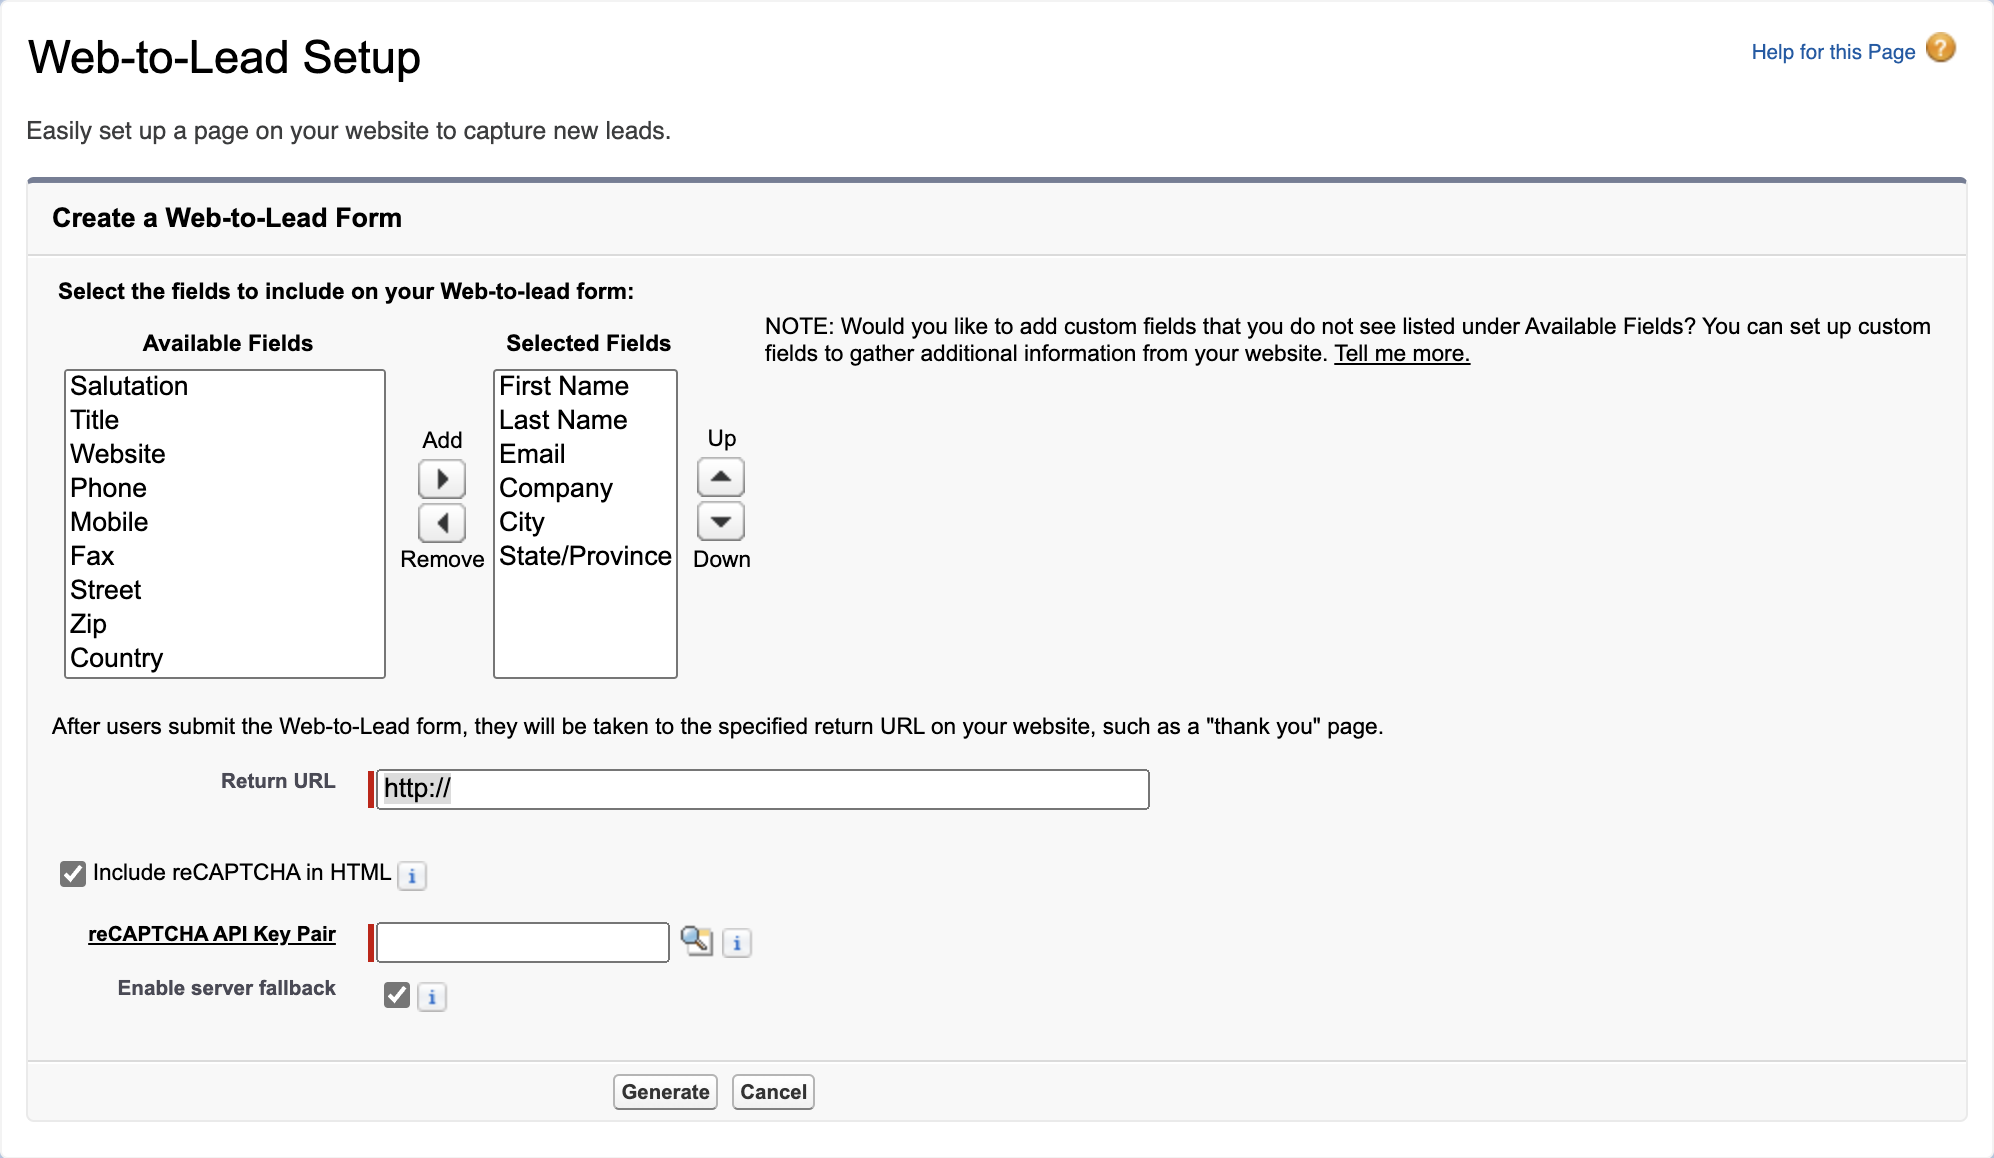
On this page you can add the fields you’d like on your form, selecting from the Available Fields section. Salesforce has selected the following fields by default:
- First Name
- Last Name
- Company
- City
- State/Province
You can also choose to enable reCAPTCHA on this page. We highly recommend using reCAPTCHA. Without Captcha or spam protection, these forms will get flooded with spam. See the common questions section below to learn how to configure reCaptcha.
You can also define a Return URL on this page to take visitors to a confirmation page after submission.
Your Return URL page should contain a Thank you message so the visitors know that their inquiry was successfully submitted.
Now click on Generate. You will be taken to the next step where you can get the HTML code.
Note that we can’t hide certain fields, or make them dependent on other fields. This feature, called conditional logic, requires a third-party platform.
Understanding the HTML code
HTML is the language that powers the web. Browsers will read and display the HTML code generated by Salesforce as a form for visitors. Note that Salesforce simply generates HTML for you to use - it doesn’t remember your form.
This is an important aspect of Web-to-lead forms. The implication is that there is no list of active forms you can view. The other implication is that you can also create custom forms, and have them work like web-to-lead forms - you are tied to using the web-to-lead form generator.
This generated HTML code has two parts. The first part is the header, and can be ignored in most cases. If you are using a CMS like WordPress this aspect is already taken care of.
Any piece of text between <!-- and --> is ignored by the browser. These are called HTML comments.
The form itself is enclosed within <form and </form>
The second part defines your form and the different fields that you selected on the previous page. The HTML code specifies where the form sends the data - in this case it’s Salesforce.

Web-to-lead in action
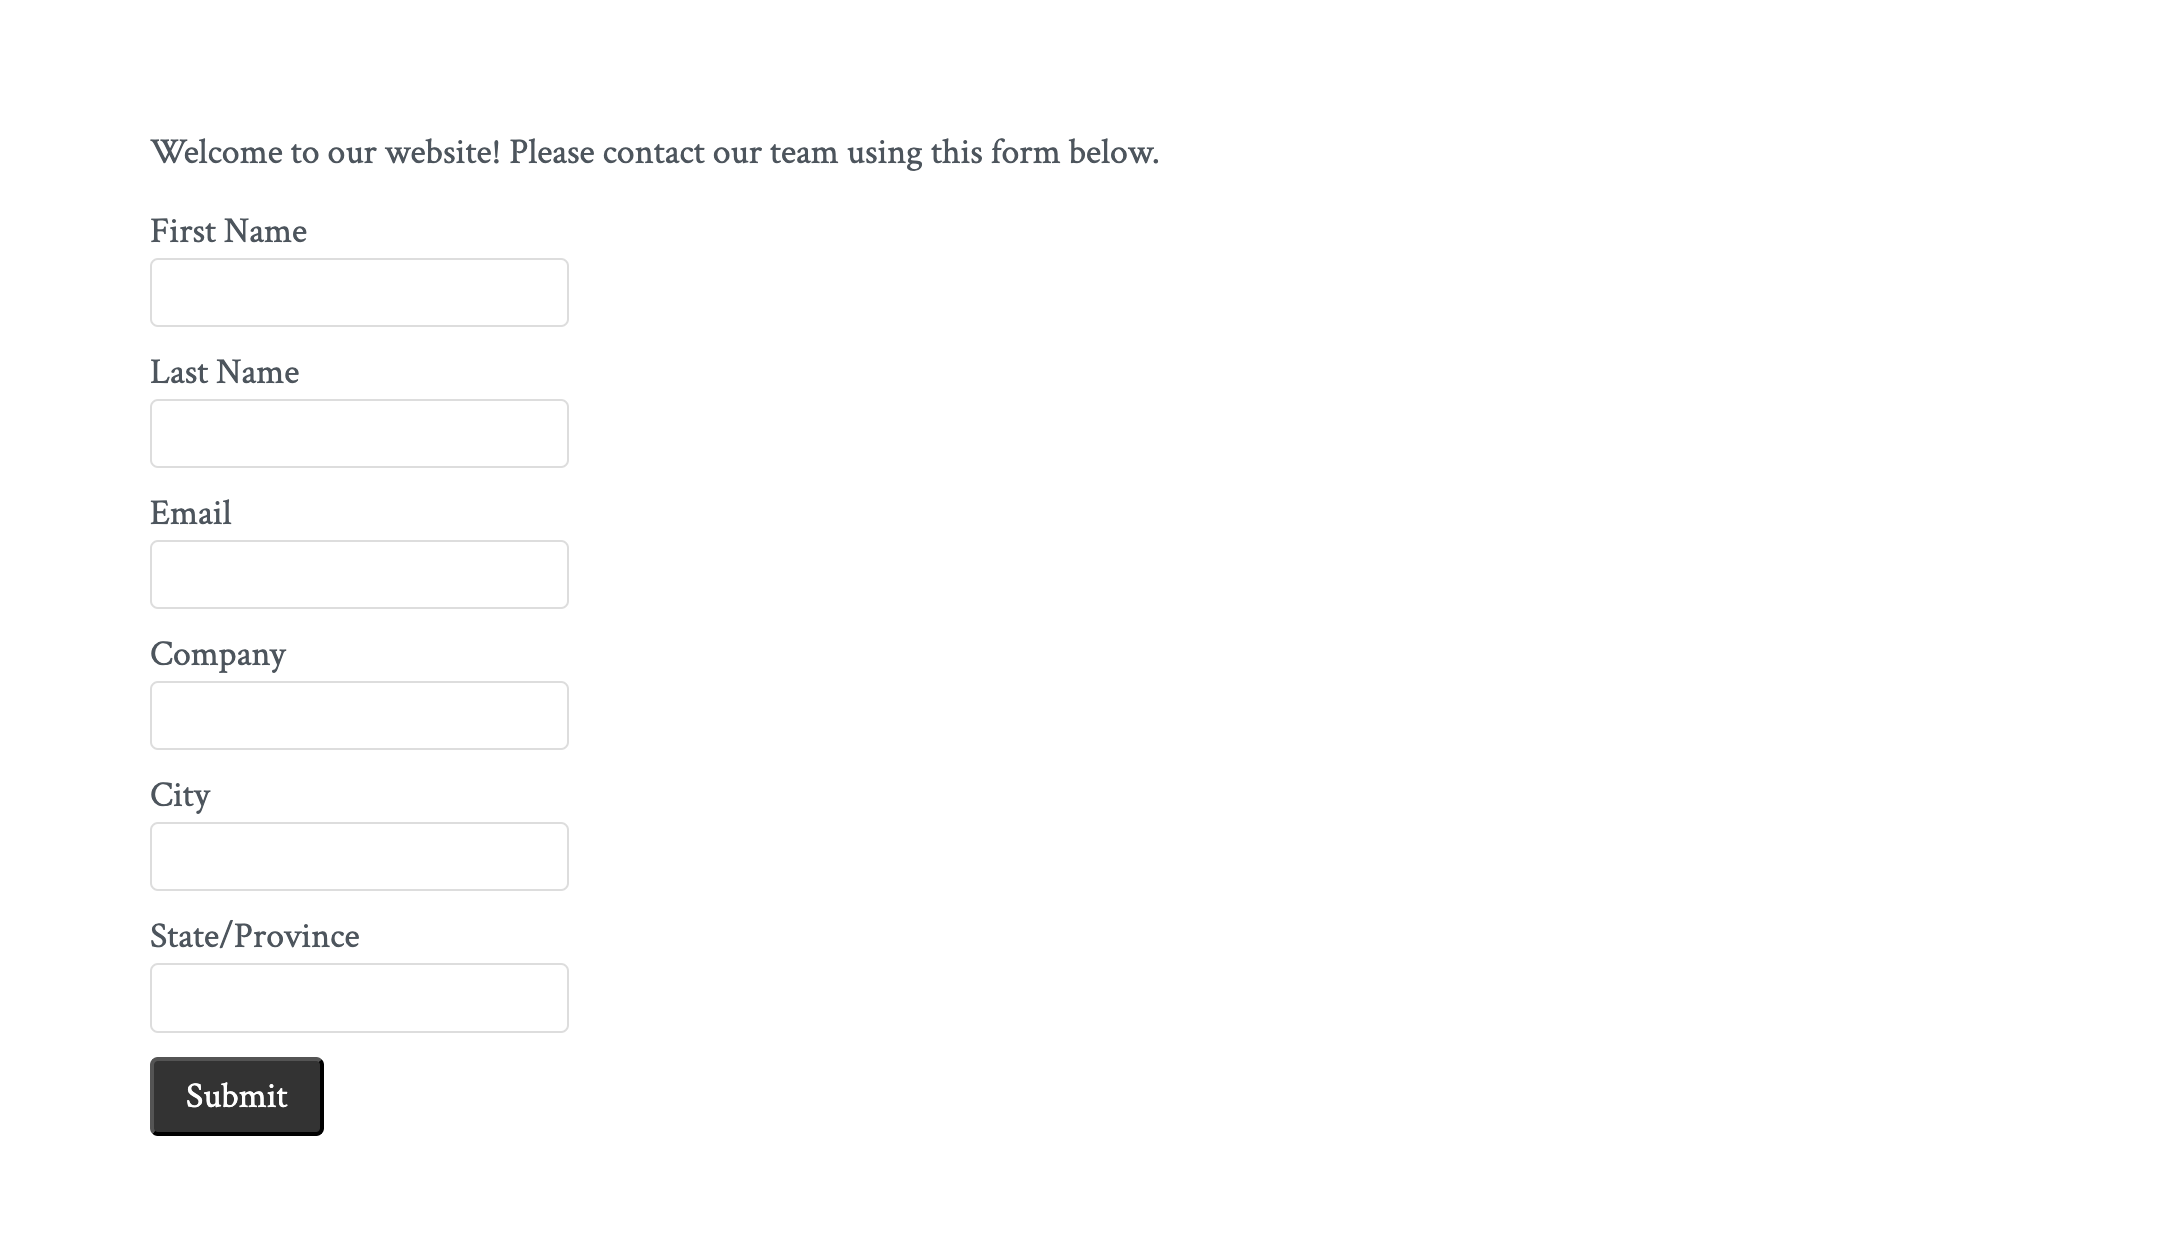
Once you embed the form on your website, it would look and work something like this:
The form is processed with minimal delay, and the visitor is then redirected to the return URL. The submit button does not show a loading state. There is also no provision to show an error message, or success message on the form.
You must be wondering - what happens if someone doesn’t enter all the details, or enters incorrect information. What if the lead with that email already exists, and I have duplicate prevention rules in place?
Let’s enable debugging on our form.
Debugging the form
Your form’s HTML code contains lines like these:
<!--  <input type="hidden" name="debug" value=1>  -->
<!--  <input type="hidden" name="debugEmail" value="<<add emailId here>>">  -->
These lines are surrounded by comment tags, meaning they are not active. Remove the <!-- and the --> from around the lines. Enabling this will switch the form to debug mode.
Replace <<add emailId here>> with the email where you’d like to receive emails about failed lead creation events (if it doesn’t already include the email).
Now if you submit the form and it triggers a rule that should block lead creation you will receive an email from Salesforce with the subject, “Salesforce Could Not Create This Lead,” and some details.
Before going live, remove the two lines from the HTML code or re-add the comment tags.
Adding form styling
Out-of-box the form doesn’t look great. Web-to-lead generates the HTML needed to make the form function, but it doesn’t include any CSS. CSS is a language that allows you to style HTML components. Let us fix that.
Look for <form in your HTML code, and replace it with <form class="lead-form__styled". Now add these lines, right before <form:
<style>
.lead-form__styled label {display: block;margin-top: 10px;}
.lead-form__styled input[type="text"] {border: 1px solid #ddd;border-radius: 4px;padding: 6px 10px;}
.lead-form__styled input[type="submit"] {background: #333;color: white;border-radius: 4px;padding: 5px 16px;margin-top: 12px;font: inherit;}
</style>
Here is your newly styled and well-designed web-to-lead form:
It might not be much, but at least the form doesn’t look suspicious anymore. I know you have a lot of questions.
Adding form validation
Our web-to-lead form does not include any validation, which means that visitors can submit the form without include any value for the fields, like name or company. Worse still, they can submit the form with an invalid email address, like jack#example.com. We don’t want that.
Luckily, it’s easy to add client-side validation to the fields.
Each field in the form looks something like this:
<input id="first_name" maxlength="40" name="first_name" size="20" type="text" />If I wanted to make the First name field as required, I would simply add a required=“true” attribute, as such:
<input required="true" id="first_name" maxlength="40" name="first_name" size="20" type="text" />You can do this for other fields as well.
We now also want to ensure that the email field only accepts a valid email. Currently, our email field looks like:
<input required="true" id="email" maxlength="80" name="email" size="20" type="text" />Change the type="text" attribute to type="email". That’s it.
Save your form changes. Your form should now ensure that required fields are filled out, and the email field has a valid email in place.
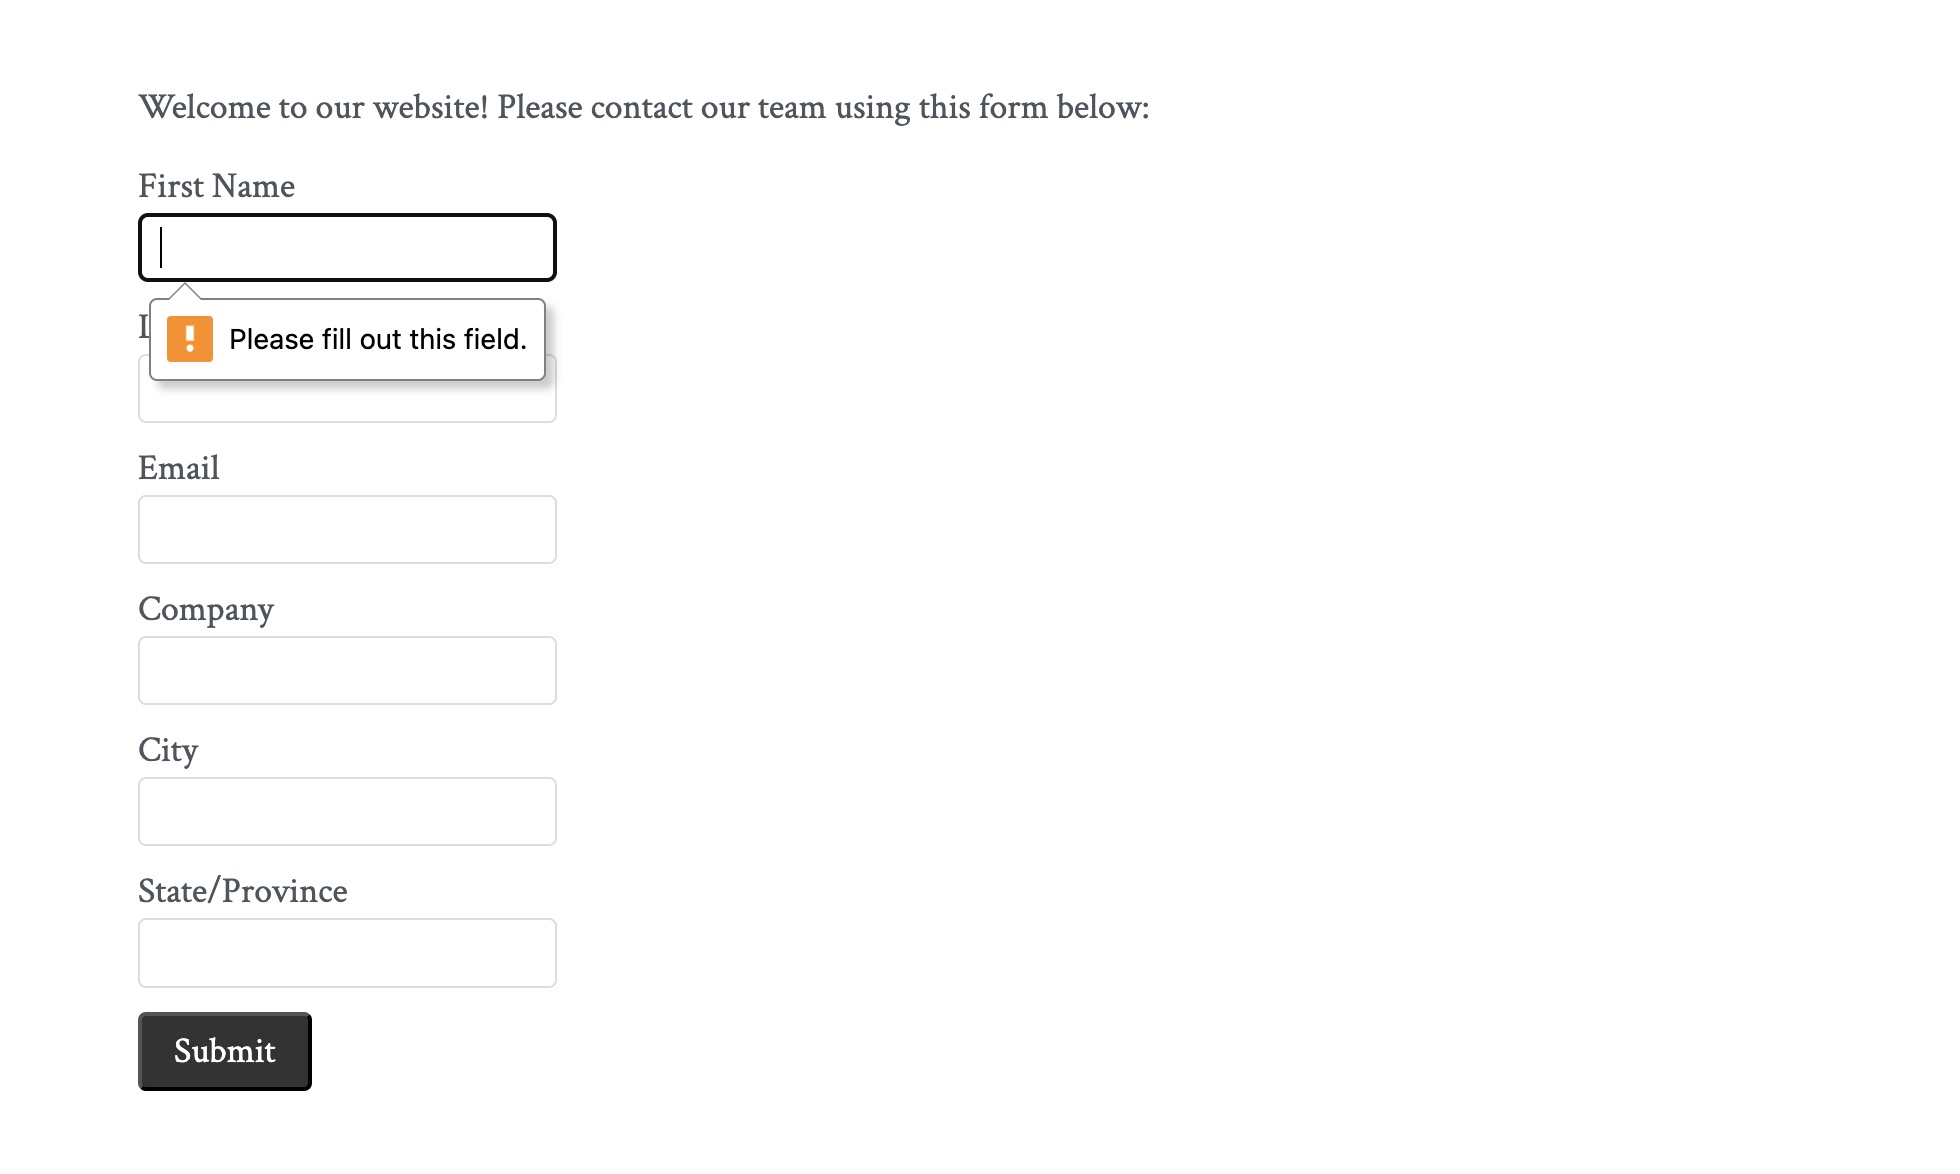
The styling and content of error messages isn’t something we can control. This is handled by the browser, and these error messages will automatically be translated as well.
We have added some styling and validation to the form, but there isn’t much else we can do. If you want greater control over the form we recommend using one of our templates. Here are some examples:

See that template in the middle? That is what we use internally to collect leads. View more Salesforce web-to-lead form templates ↗
Lead assignment
Which agent or user is assigned the leads coming in from the web-to-lead forms? Luckily, Salesforce offers a ton of options and settings to configure lead assignment.
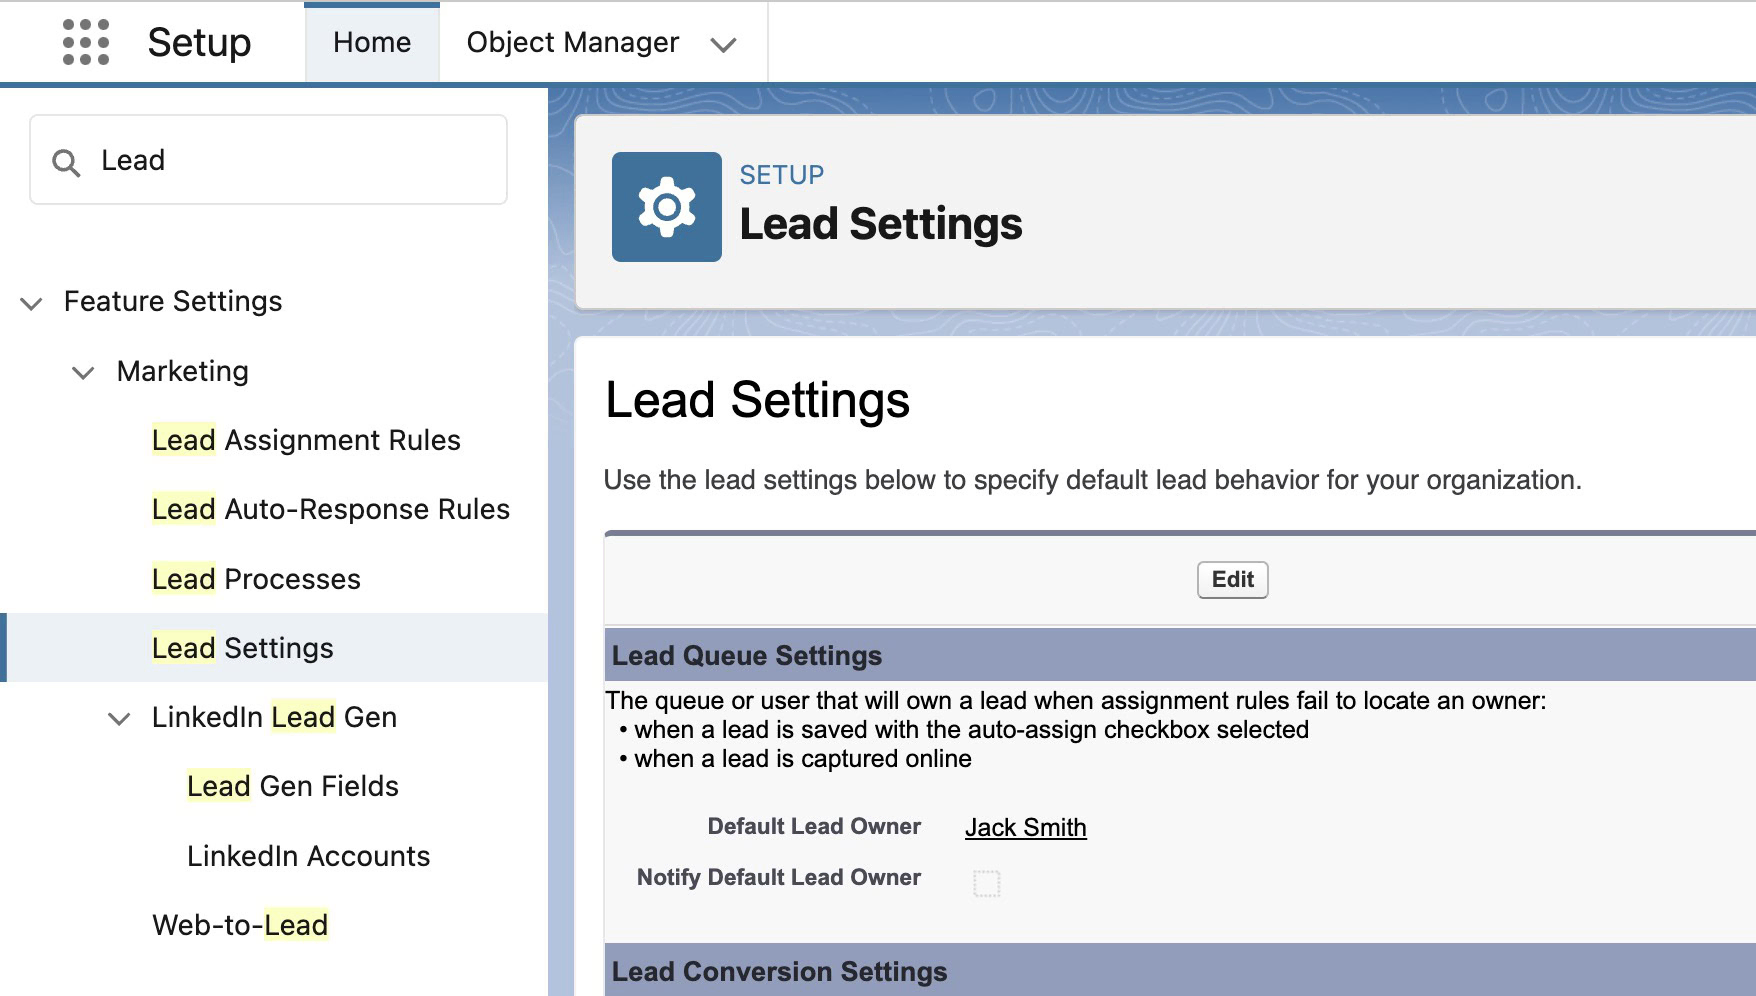
Type “Lead” in the Quick Find box and you will see several pages that allow you to handle the lead ownership and assignment behavior:
- Lead Assignment Rules: Assign leads to users or queues based on criteria you define. Web-to-case offers something similar, called case assignment.
- Lead Auto-Response Rules: Send autoresponder emails to new leads.
- Lead Processes: Configure lead processes (like stage, status, etc…)
- Lead Settings: Other settings relating to default lead behavior.
Note that you don’t have to re-generate your web-to-lead form after tinkering with these settings.
Common questions
Do I need reCaptcha? If yes, how do I configure it?
You absolutely do.
Firstly, enable the form to always use reCaptcha:
- From Setup, enter Web-to-Lead in the Quick Find box, then select Web-to-Lead.
- Hit the Edit button next to Web-to-Lead Settings.
- Check Require reCAPTCHA Verification and save your changes.
To add reCAPTCHA to your Web-to-Lead form:
- Go to the Google reCAPTCHA website ↗ and sign up. Note that Web-to-Lead only supports reCAPTCHA v2. So, v3 won’t work.
- Click “Get reCAPTCHA” to register your domain and obtain a public and private key pair.
- Now, go back to the Setup and customization step, and use the reCAPTCHA API Key Pair option to set and use the key pair.
How can I configure lead source attribution for my leads?
When configuring the form fields you would notice that lead source is one of the available fields. This allows you to add a lead source picklist to your form. However, we don’t want our users to select their source. If you want to ensure that all leads created using your form are marked with the web source, add this HTML to your form:
<input id="lead_source" name="lead_source" type="hidden" value="web" />This is a hidden field that sets the value of lead_source to web.
Where do I paste the HTML code?
The answer depends on where and how your website works. If you are using WordPress you would add an HTML Block element to your page and insert the HTML code in that block. For other CMSs you would try to find something similar - some call it an HTML block, some would call it code.
Does web-to-lead have a public-facing API?
Last we checked, it does not. The official documentation on web-to-lead is rather sparse, and it doesn’t have much functionality outside of what we discussed. It is meant to be a simple tool.
Can I use web-to-lead to update leads?
No. Web-to-lead can only create new leads.
Can I view my created web-to-lead forms in Salesforce?
Web-to-lead generates an HTML code snippet. It is not a form editor - it does not remember or save the generated forms. There is no way to view the web-to-lead forms in Salesforce.
How is web-to-lead different from web-to-case?
Web-to-lead and web-to-case are form generators provided by Salesforce. They give you an HTML form which you can embed on your website to capture data. The difference is that web-to-lead is meant to capture leads, whereas web-to-case is meant to capture cases. Learn more about web-to-case.
Are there any limits to the form?
Web-to-lead can only accept up to 500 leads per day. Any responses after that will be processed after some delays. Before processing, the extra responses will end up in a queue, along with pending web-to-case responses. If you expect 500 leads in a day, you really should not be using web-to-lead.
Pros and cons
Web-to-lead has several advantages:
- It is built into the Salesforce platform. Not having to learn a new tool has several advantages.
- It is simple and easy to setup - specially for those with limited technical skills.
- It creates new leads in real-time.
- It is time-tested. While I wouldn’t call it robust, web-to-lead has been around for a long time.
Web-to-lead also has several major drawbacks, as listed here:
- No validation: If the visitors enters incorrect information, or skips certain required fields the form cannot show error messages. It will simply fail to create a lead, and send an email to the admin. This will cost you real leads.
- No JS or CSS: The public-facing web is largely built using an interplay of JavaScript, HTML, and CSS. HTML gives structure, CSS gives style, and JavaScript brings things to life. Web-to-lead generates an HTML code (without any accompanying JS or CSS). While it still works, the functionality is rudimentary, and styling non-existent.
- Requires reCaptcha: With reCaptcha your form will receive a lot of spam. Setting up reCaptcha requires additional admin work, thus taking away from the simplicity of the intent behind web-to-lead.
- Not intuitive: While the setup is easy, it isn’t nearly as simple as a drag-and-drop form editor would have been.
- No files: Web-to-lead isn’t designed to handle file uploads.
- No analytics or tracking: There is no way to track the referring URL, or record UTM parameters in the form.
Summary
Web-to-lead is meant to be a simple tool to collect leads from a website. It has some glaring limitations, and is becoming less relevant as the web becomes more dynamic. It works fine as a temporary measure while you get a real lead generation form in place.
Using web-to-lead in the long-run is not recommend owing to the lack of validation and customization.
Have a look at Formcrafts. It’s a purpose-built Salesforce forms ↗ solution with a host of advanced features, and a drag-and-drop interface.